
In this tutorial, we are going to discuss how to install GNOME 40 In Ubuntu 21.04, which will help you to experience something new. As the new version of GNOME is released, you might be considering to use its new and awesome features on Ubuntu 21.04. Unfortunately, since the new version of GNOME is missing with new Ubuntu release, the users will really miss the same. If you have not yet upgraded your Ubuntu to 21.04, read our previous article.
Well, coming back to our topic, GNOME 40 is reportedly ported over as a PPA, so it’s available for testing preview, and we will discuss here how to install GNOME 40 In Ubuntu 21.04.
Note: Since the GNOME 40 is not officially released with Ubuntu 21.04, you may end up experiencing some issues as well. If you are just testing it, we suggest you to install it on a virtual machine.
How to install Gnome 40 in Ubuntu 21.04
In order to use the new Gnome on your machine get through the steps mentioned below:
Add the Repository at first
sudo add-apt-repository ppa:shemgp/gnome-40
sudo apt update
Install mutter
sudo apt install mutter gnome-shell gnome-session fonts-cantarell
Verify Gnome and reboot your system
gnome-shell --version
reboot
Use your system in Xorg
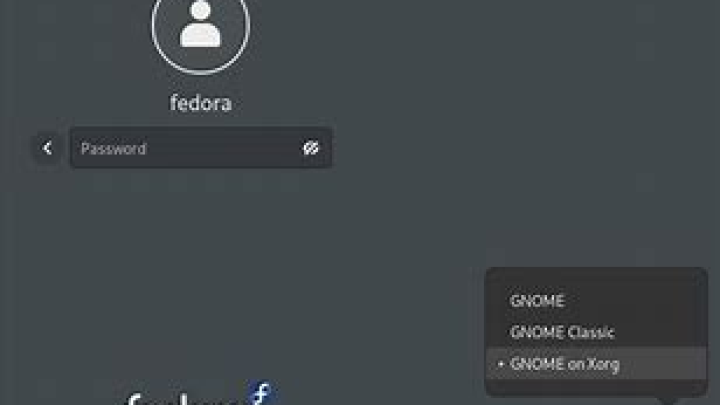
Since the new version of Ubuntu 21.04 is using Wayland, it’s expected that your system will start to suffer glitches, so we suggest you to boot your system into Xorg. To do so, logout your system with normal user, and click on the username.
Click on the gear icon in the bottom left of screen and choose GNOME on XORG.
That’s it. So you have successfully learned how to install GNOME 40 in Ubuntu 21.04 easily. If you are suffering issues, you can report us through comment section below or through clicking Suggest US page.

Nishant Verma is a senior web developer who love to share his knowledge about Linux, SysAdmin, and more other web handlers. Currently, he loves to write as content contributor for ServoNode.


