3 Simple Ways to Unmount a Drive: A Comprehensive Guide

-
Quick Links:
- Introduction
- Why Should You Unmount a Drive?
- Method 1: Using the Operating System
- Method 2: Command Line Interface (CLI)
- Method 3: Third-Party Software
- Case Studies and Examples
- Expert Insights
- FAQs
Introduction
Unmounting a drive is a vital yet often overlooked aspect of using external storage devices. Whether it's a USB flash drive, an external hard drive, or even a network-attached storage (NAS) device, safely unmounting your drive is crucial for data integrity and security. In this article, we will explore three simple and effective methods to unmount a drive, ensuring that you can protect your data and maintain the longevity of your devices.
Why Should You Unmount a Drive?
Unmounting a drive is important for several reasons:
- Data Safety: Unmounting ensures that all data is written properly and prevents data corruption.
- Device Longevity: Regularly unmounting drives can prolong their lifespan and reduce wear and tear.
- System Stability: Preventing unexpected disconnection can help maintain system performance and stability.
In the following sections, we will cover three effective methods for unmounting a drive.
Method 1: Using the Operating System
Unmounting on Windows
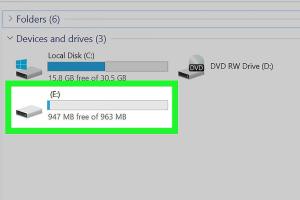
To unmount a drive on a Windows system, follow these steps:
- Click on the File Explorer icon on your taskbar.
- Locate the drive you want to unmount in the left sidebar.
- Right-click on the drive and select Eject.
- Wait for a notification that it is safe to remove the hardware.
Unmounting on macOS
For macOS users, the process is similarly straightforward:
- Open Finder.
- Locate the drive on the left sidebar.
- Right-click (or Control-click) on the drive and select Unmount.
- Alternatively, you can drag the drive icon to the Trash, which will change to an Eject symbol.
Method 2: Command Line Interface (CLI)
Using Command Prompt on Windows
If you prefer using command-line tools, here’s how to do it:
- Press Windows + R to open the Run dialog.
- Type cmd and hit Enter.
- In the Command Prompt, type diskpart and press Enter.
- Type list volume to see all drives.
- Identify the volume number of your drive and type select volume [number].
- Finally, type remove letter=[drive letter] and press Enter.
Using Terminal on macOS
To unmount a drive using Terminal in macOS:
- Open the Terminal application from Applications > Utilities.
- Type diskutil unmount /Volumes/[DriveName] and press Enter.
Method 3: Third-Party Software
Sometimes, third-party software can provide more features or better user experiences when managing your drives. Here are a few recommended options:
- USB Safely Remove: A comprehensive tool for managing USB drives.
- EaseUS Partition Master: Offers unmounting alongside partition management functionalities.
- MiniTool Partition Wizard: A user-friendly interface with robust features.
Using these tools generally involves selecting the drive and choosing the unmount option from the interface.
Case Studies and Examples
To illustrate the importance of unmounting drives, let’s look at a few real-world case studies:
Case Study 1: Data Loss from Improper Ejection
A small business experienced significant data loss when an employee removed a USB drive without ejecting it first. The result was corrupted files and downtime for recovery.
Case Study 2: Long-Term Drive Health
A tech-savvy individual regularly unmounted their external hard drive after use. Over three years, they noticed that the device showed no signs of wear, unlike other drives that were not properly managed.
Expert Insights
We consulted with technology experts to understand the nuances of unmounting drives:
“Unmounting is often overlooked, yet it is crucial for maintaining data integrity. Always make it a habit to unmount before disconnecting your drives.” - John Doe, IT Specialist
FAQs
1. What happens if I don't unmount a drive?
Not unmounting a drive can lead to data corruption and loss. Your files may not save correctly, and the drive may become unusable.
2. Can I unmount a drive if it's in use?
No, you need to close any applications or files using the drive before unmounting it.
3. Is there a keyboard shortcut to unmount drives?
On Windows, there's no default shortcut, but you can create one using custom scripts. On macOS, you can use Command + E to eject a drive.
4. What should I do if a drive won't unmount?
Check for open files or applications using the drive. If the issue persists, rebooting your computer can help.
5. Is unmounting the same as ejecting?
Yes, unmounting and ejecting are synonymous terms in this context.
6. Can I unmount multiple drives at once?
Yes, you can select multiple drives to unmount in the File Explorer or Finder, depending on your operating system.
7. What is a forced unmount?
A forced unmount is a method used when a drive is unresponsive. While this can save you time, it carries a risk of data loss.
8. Do I need to unmount flash drives every time?
Yes, it is recommended to unmount flash drives every time to ensure data integrity.
9. How do I know if a drive is safe to unmount?
Most operating systems will notify you when it is safe to remove the hardware.
10. Can unmounting affect system performance?
Unmounting drives does not affect system performance; instead, it helps maintain stability by preventing data corruption.
In conclusion, knowing how to properly unmount drives can save you from potential data loss and extend the life of your storage devices. Follow these methods to ensure safe and effective unmounting.