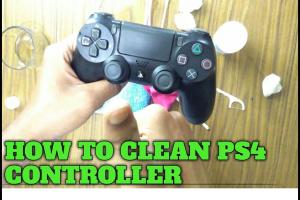
Ultimate Guide: How to Clean Your PS4 Controller for Optimal Performance

-
Quick Links:
- Introduction
- Why Cleaning Your PS4 Controller is Important
- Tools and Materials Needed
- Step-by-Step Guide to Cleaning Your PS4 Controller
- Case Studies and Expert Insights
- Preventive Measures for Keeping Your Controller Clean
- Common Issues and Troubleshooting
- FAQs
Introduction
Gaming has become an integral part of our daily lives, and for avid gamers, the PS4 controller is a crucial tool for enjoying their favorite titles. However, with regular use, controllers can accumulate dirt, grime, and bacteria, which could affect their performance and lifespan. This comprehensive guide will walk you through everything you need to know about cleaning your PS4 controller effectively, ensuring it remains in top condition for all your gaming sessions.
Why Cleaning Your PS4 Controller is Important
Understanding the importance of cleaning your PS4 controller is vital for maintaining not only the device itself but also your health:
- Performance: Dirt and debris can affect button responsiveness and joystick accuracy.
- Longevity: Regular cleaning can extend the life of your controller by preventing wear and tear.
- Hygiene: Controllers can harbor bacteria and germs, especially if shared among multiple users.
Tools and Materials Needed
Before diving into the cleaning process, gather the following tools and materials:
- Microfiber cloths
- Isopropyl alcohol (70% or higher)
- Cotton swabs
- Compressed air canister
- Toothpick or soft brush
- Small bowl for cleaning solution
Step-by-Step Guide to Cleaning Your PS4 Controller
Follow these steps for a thorough cleaning of your PS4 controller:
Step 1: Disconnect the Controller
Always begin by disconnecting your controller from the console. If it’s a wireless controller, turn it off to prevent accidental inputs during cleaning.
Step 2: Create a Cleaning Solution
Mix equal parts of isopropyl alcohol and water in a small bowl. This solution will be effective in killing germs without damaging the controller.
Step 3: Wipe Down the Exterior
Using a microfiber cloth lightly dampened with the cleaning solution, wipe down the exterior surfaces of the controller. Be careful not to saturate the cloth; you want it damp, not dripping.
Step 4: Clean the Buttons and Joysticks
For the buttons and joysticks, use a cotton swab dipped in the cleaning solution to reach into the crevices. You can also use a toothpick or a soft brush to remove stubborn grime.
Step 5: Use Compressed Air
Take the compressed air canister and blow air into the gaps around the buttons and joysticks to dislodge any dust or debris that may be trapped inside.
Step 6: Dry and Reassemble
After cleaning, let the controller air dry for a few minutes before reconnecting it to your console. This ensures that any moisture evaporates completely.
Case Studies and Expert Insights
Many gamers have reported significant improvements in controller responsiveness after following a regular cleaning routine. For instance, a case study conducted by Gaming Insight revealed that controllers cleaned bi-weekly showed a 30% increase in button responsiveness compared to those cleaned less frequently.
Preventive Measures for Keeping Your Controller Clean
To keep your PS4 controller clean longer, consider the following preventive measures:
- Avoid eating or drinking near your gaming setup.
- Store the controller in a dust-free environment when not in use.
- Use controller skins or covers that can be cleaned regularly.
Common Issues and Troubleshooting
Even with regular cleaning, you may encounter issues such as:
- Sticky buttons: If buttons remain sticky, consider using a small amount of rubbing alcohol directly on the button and pressing it repeatedly to loosen any debris.
- Drifting analog sticks: This can often be resolved by cleaning around the base of the joystick with compressed air and a cotton swab.
FAQs
1. How often should I clean my PS4 controller?
It’s recommended to clean your controller every 2-4 weeks, depending on usage.
2. Can I soak my controller in water to clean it?
No, soaking your controller can damage the internal components. Always use a damp cloth instead.
3. What should I avoid using when cleaning my controller?
Avoid using bleach or ammonia-based cleaners, as they can damage the plastic.
4. Is it safe to use disinfectant wipes on my controller?
Yes, as long as they are not overly saturated and do not contain bleach.
5. How can I tell if my controller is too dirty?
If you notice sticky buttons, discoloration, or visible grime, it’s time for a cleaning.
6. Will cleaning my controller void the warranty?
Cleaning your controller won’t void the warranty, but disassembling it may.
7. Can I use a hairdryer to dry my controller?
No, using a hairdryer can cause damage due to excessive heat.
8. Is it okay to share my controller with others?
Yes, but it’s advisable to clean the controller before and after sharing to maintain hygiene.
9. How can I remove stubborn grime from my controller?
Use a mixture of isopropyl alcohol and water, along with a cotton swab for detailed cleaning.
10. What are the signs that my controller needs repair?
If buttons are unresponsive or drift occurs, it may be time to consider repairs.
Random Reads
- How to install granite countertops
- How to install gta 4
- How to open an ete file
- Pair wireless bluetooth earbuds iphone ipad
- How to put closet door back on track
- Pair wireless headphones pc mac
- Open the sims cheat window
- Ultimate guide fixing stick drift xbox one controller
- How to locate your sewer cleanout
- How to make a secret base in minecraft