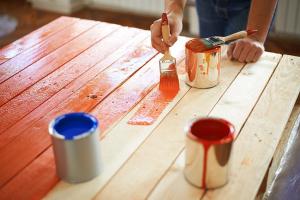
Mastering Wood Painting: The Ultimate Guide for Beginners and Experts

-
Quick Links:
- 1. Introduction
- 2. Materials Needed
- 3. Preparing the Wood Surface
- 4. Painting Techniques
- 5. Finishing Touches
- 6. Troubleshooting Common Issues
- 7. Case Studies
- 8. Expert Insights
- 9. FAQs
1. Introduction
Painting wood can breathe new life into your furniture, flooring, or crafts. Whether you're a DIY enthusiast or a professional, mastering the art of painting wood is essential. In this guide, we will explore everything you need to know about painting wood, from preparation to finishing touches, ensuring you achieve the best results possible.
2. Materials Needed
Before you start your painting project, ensure you have the following materials:
- Wood primer
- Paint (latex, oil-based, or chalk paint)
- Paintbrushes (various sizes)
- Rollers
- Sandpaper (various grits)
- Drop cloths or newspapers
- Painter's tape
- Wood filler (if needed)
- Protective gear (gloves, mask)
- Clean cloths
3. Preparing the Wood Surface
Proper preparation is crucial for a successful painting project. Follow these steps:
- Clean the Surface: Remove any dirt or grease using a damp cloth. For tougher stains, you may need a wood cleaner.
- Sand the Wood: Use sandpaper to smooth the surface. Start with a coarser grit (80-120) and gradually move to a finer grit (220).
- Fill Holes and Cracks: Apply wood filler to any imperfections and sand smooth once dry.
- Prime the Surface: Use a wood primer to ensure better paint adhesion and coverage.
4. Painting Techniques
Once your wood is prepared, it's time to paint. Here are some techniques to consider:
4.1 Brush Painting
This method allows for precision and control, especially in detailed areas. Use a quality brush and apply paint in smooth strokes.
4.2 Roller Painting
For larger surfaces, rollers can save time and provide a smooth finish. Use a short nap roller for the best results.
4.3 Spray Painting
For an even coat and faster application, consider using a spray gun. Ensure you practice on scrap wood first.
5. Finishing Touches
After the paint has dried, consider the following finishing touches to enhance durability:
- Apply a clear topcoat for added protection.
- Sand lightly between coats for a smoother finish.
- Consider using a wax finish for a soft sheen.
6. Troubleshooting Common Issues
Even the best painters encounter issues. Here’s how to troubleshoot common problems:
- Peeling Paint: Ensure the surface was properly cleaned and primed.
- Brush Marks: Use a high-quality brush and apply thinner coats.
- Uneven Color: Ensure even application and consider a second coat.
7. Case Studies
Here are two real-world examples of successful wood painting projects:
Case Study 1: Revamping an Old Chair
An amateur DIYer transformed a worn-out chair using chalk paint and a matte finish. The project took three days, including drying time, and resulted in a modern look.
Case Study 2: A Custom Wooden Table
A professional woodworker refinished a dining table using a combination of oil-based paint and polyurethane. The project showcased the importance of preparation and resulted in a durable and attractive finish.
8. Expert Insights
We spoke with professional painters to gather their top tips:
"Always invest in quality brushes; they make a world of difference in the final finish." - Jane Doe, Professional Painter
"Don't rush the drying process; patience leads to a better finish." - John Smith, Wood Finishing Expert
9. FAQs
What type of paint is best for wood?
Water-based latex paint is popular for its ease of use and quick drying time, while oil-based paint offers durability.
Do I need to sand wood before painting?
Yes, sanding helps create a smooth surface and improves paint adhesion.
How many coats of paint should I apply?
Typically, two coats are recommended for even coverage and durability.
Can I paint over stained wood?
Yes, but ensure you use a primer to seal the stain and enhance adhesion.
How do I clean brushes after painting?
Use warm soapy water for latex paint and mineral spirits for oil-based paints.
Is it necessary to use a primer?
Yes, primer helps with adhesion and can prevent wood stains from bleeding through.
What is the best finish for painted wood?
A clear topcoat, such as polyurethane, can enhance the durability of painted wood.
How long does paint take to dry on wood?
Drying times vary by paint type, but generally allow 1-2 hours for touch dry and 24 hours for a full cure.
Can I paint wood furniture without sanding?
While possible, it's not recommended as sanding improves paint adhesion and finish quality.
What should I do if I get paint drips?
Let the paint dry, then sand the drips smooth and repaint the area.
Random Reads
- How to maintain your water softening system
- How to mail a link from an ipad
- How to hang records on wall
- How to hang roman shades
- How to mount an sd card
- How to mount tv
- How to mount an iso image
- Quickly zoom out on mac
- How to send message unknown number whatsapp
- Mastering out of office replies in outlook