Ultimate Guide to Mailbox Installation: Tips, Tricks, and Step-by-Step Guide

-
Quick Links:
- Introduction
- Types of Mailboxes
- Mailbox Installation Process
- Mailbox Regulations
- Common Mistakes in Mailbox Installation
- Mailbox Maintenance Tips
- Case Studies
- Expert Insights
- FAQs
Introduction
Installing a mailbox might seem like a simple task, but it requires careful planning and execution to ensure it meets local regulations and serves its purpose effectively. This guide will cover everything you need to know about mailbox installation, from selecting the right type to understanding installation procedures, regulations, and maintenance tips.
Types of Mailboxes
There are several types of mailboxes to consider when planning your installation. Each type has its benefits and considerations:
- Wall-Mounted Mailboxes: These are attached to the wall of your home and are often used in urban settings.
- Post-Mounted Mailboxes: This is the most common type found in residential areas, mounted on a post at the end of a driveway.
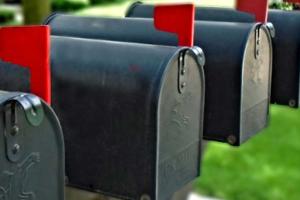
- Cluster Mailboxes: Used in communities where mail is delivered to a central location.
- Lockable Mailboxes: Ideal for added security, especially in neighborhoods with high theft rates.
Mailbox Installation Process
The installation of a mailbox involves several steps:
Step 1: Choose a Location
Identify a suitable location that complies with local regulations. The mailbox should be easily accessible for postal workers.
Step 2: Gather Tools and Materials
You will need:
- Mailbox
- Post (if applicable)
- Concrete mix
- Level
- Shovel
- Measuring tape
Step 3: Prepare the Site
Clear the area where the mailbox will be installed, ensuring there are no obstacles.
Step 4: Install the Post (if necessary)
Dig a hole about 2 feet deep and place the post in it. Use concrete to secure it in place and allow it to cure as per package instructions.
Step 5: Attach the Mailbox
Once the post is secure, attach the mailbox according to the manufacturer’s instructions. Ensure it is level and stable.
Mailbox Regulations
Compliance with USPS guidelines is essential. Here are key points to consider:
- Mailboxes should be positioned 41-45 inches above the road surface.
- The mailbox needs to be set back 6 to 8 inches from the curb.
- Ensure that your mailbox is accessible without the postal worker leaving their vehicle.
For more detailed regulations, check the USPS Mailbox Guidelines.
Common Mistakes in Mailbox Installation
Here are some common pitfalls to avoid:
- Ignoring local regulations can lead to fines or having to reinstall the mailbox.
- Placing the mailbox too far from the curb can hinder mail delivery.
- Using inadequate materials that will not withstand the elements.
Mailbox Maintenance Tips
Regular maintenance can prolong the life of your mailbox:
- Check for rust and repaint as needed.
- Clear snow and ice around the mailbox during winter.
- Ensure the mailbox door functions properly to keep mail secure.
Case Studies
Let's look at some examples of successful mailbox installations:
Case Study 1: A Community Project
A neighborhood association in Springfield organized a project to replace old, rusted mailboxes with new, community-approved units. They followed regulations closely and involved local contractors.
Case Study 2: DIY Installation Success
A homeowner documented their DIY mailbox installation on a popular blog, showcasing the importance of selecting the right materials and adhering to USPS guidelines. Their post went viral, helping many others.
Expert Insights
We spoke with several home improvement experts about mailbox installation:
John Smith, Home Improvement Specialist: "The key to a successful mailbox installation is not just about aesthetics but functionality. Always consult local regulations first!"
FAQs
1. What is the ideal height for a mailbox?
The ideal height is between 41-45 inches from the ground.
2. Can I install a mailbox on my property?
Yes, but ensure it complies with local and USPS regulations.
3. What materials are best for mailbox installation?
Opt for weather-resistant materials such as aluminum or galvanized steel for durability.
4. How often should I maintain my mailbox?
Regular checks every six months are advisable, especially after severe weather.
5. Are there specific mailbox designs allowed by USPS?
Yes, USPS has guidelines for aesthetic and functional designs, which should be followed.
6. How do I secure my mailbox against theft?
Consider getting a lockable mailbox or installing it in a well-lit, visible area.
7. Can I paint my mailbox any color?
While you can paint it, ensure that the color adheres to local guidelines and is visible.
8. What should I do if my mailbox is damaged?
Assess the damage, and if it's repairable, fix it; otherwise, consider replacing it.
9. How can I decorate my mailbox?
Use paint, decals, or creative mailbox covers, but ensure they meet local regulations.
10. How long does mailbox installation take?
Typically, a mailbox can be installed in a few hours, depending on the type and preparation needed.
Random Reads
- Mastering pdf attachments
- Mastering pc power supply issues
- How to use tv as computer monitor
- How to use the wii controller
- How to remove chrome plating
- How to remove chewing gum from dryer drum
- Unlocking rss find feeds
- How to replace a thermostat
- How to replace a microwave lightbulb
- How to unshare excel workbook