Create Animated GIFs with GIMP: A Comprehensive Guide

-
Quick Links:
- Introduction
- What is GIMP?
- Why Use GIMP for GIF Creation?
- Pre-requisites for Creating Animated GIFs
- Step-by-Step Guide to Create an Animated GIF
- Common Issues When Creating GIFs
- Best Practices for GIF Creation
- Case Studies
- Expert Insights
- FAQs
Introduction
Animated GIFs are a fun and engaging way to express creativity and convey messages in a visually dynamic format. From memes to tutorials, GIFs have become an essential part of online communication. In this comprehensive guide, we will explore how to create animated GIF images using GIMP, a powerful open-source image editing software.
What is GIMP?
GNU Image Manipulation Program (GIMP) is a free and open-source raster graphics editor used for tasks such as photo retouching, image editing, and creating original artwork. GIMP is frequently compared to Adobe Photoshop, and while it may not have all the features of its commercial counterpart, it offers a robust toolset for creating animations and GIFs.
Why Use GIMP for GIF Creation?
- Cost-effective: GIMP is free to use, making it accessible for everyone.
- Flexible: It supports various file formats, allowing for versatile GIF creation.
- Powerful Tools: GIMP comes with advanced features that can cater to both beginners and experienced designers.
- Community Support: A large user base means ample tutorials, forums, and community support.
Pre-requisites for Creating Animated GIFs
Before diving into GIF creation, ensure you have the following:
- GIMP installed on your computer. You can download it from GIMP's official website.
- Basic knowledge of using GIMP’s interface and tools.
- A collection of images or frames you want to animate.
Step-by-Step Guide to Create an Animated GIF
Step 1: Open GIMP
Launch GIMP on your computer. Familiarize yourself with the workspace, including the toolbox and layers panel.
Step 2: Import Images
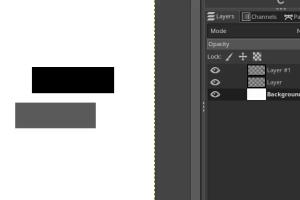
To import images, go to File > Open as Layers. Select all the images you want to include in your GIF. Each image will become a separate layer.
Step 3: Arrange Layers
In the Layers panel, arrange your images in the order they should appear in the animation. You can rename each layer for clarity.
Step 4: Set the Frame Delay
To control the speed of your GIF, you need to set a delay between frames. Right-click on each layer, select Layer Attributes, and add the delay in milliseconds (e.g., “100ms” for 0.1 seconds). This detail should be included in the layer name, like “Frame 1 (100ms)”.
Step 5: Export as GIF
Once satisfied with your GIF, go to File > Export As. Choose the GIF file format and ensure to check As Animation in the export options. Set the loop options to your preference (e.g., Forever).
Step 6: Preview and Adjust
Open the exported GIF in a web browser or GIF viewer to preview it. If adjustments are needed, go back to GIMP, modify the layers or delays, and re-export.
Common Issues When Creating GIFs
- File Size: Large GIFs can take too long to load. Optimize images before importing.
- Frame Rate: Too fast or too slow frame rates can make GIFs hard to follow. Adjust delays accordingly.
- Quality Loss: GIFs can lose quality due to color limitations. Consider using fewer colors for a cleaner look.
Best Practices for GIF Creation
- Keep your GIFs short and relevant to the message.
- Use contrasting colors to make your GIF visually appealing.
- Test across different devices to ensure compatibility and quality.
- Optimize file sizes without compromising too much on quality.
Case Studies
Explore the use of GIFs in marketing, social media engagement, and educational content. Companies like BuzzFeed and Giphy have successfully leveraged GIFs to enhance user engagement and communicate messages effectively.
Expert Insights
Industry experts suggest that GIFs can increase social media engagement by up to 25%. Incorporating GIFs into your content can make it more shareable and visually appealing.
FAQs
1. What file formats can I use for GIF creation in GIMP?
You can use various image formats, including JPEG, PNG, and TIFF.
2. Can I add text to my GIFs in GIMP?
Yes, you can add text layers to your GIF before exporting.
3. How do I control the looping of my GIF?
During the export process, you can choose to loop the GIF forever or a set number of times.
4. What is the maximum size for GIFs?
While there’s no strict maximum, keeping GIFs under 5MB is advisable for faster loading times.
5. Can I edit an existing GIF in GIMP?
Yes, you can import existing GIFs, edit the layers, and export them again.
6. How can I reduce the size of my GIF?
Reduce the number of colors, frames, or dimensions in your GIF to decrease the file size.
7. Are there any alternatives to GIMP for GIF creation?
Yes, other options include Adobe Photoshop, Ezgif, and online tools like Canva.
8. How do I share my GIFs online?
You can upload your GIFs to social media platforms, websites, or GIF hosting services like Giphy.
9. Can I create GIFs from videos in GIMP?
GIMP does not directly convert videos to GIFs, but you can use a video editor to extract frames and then import them into GIMP.
10. What are some common use cases for GIFs?
GIFs are commonly used in social media posts, marketing campaigns, tutorials, and as reaction images in messaging platforms.
Random Reads
- How to remove whited out
- How to remove wood stain
- Catch regigigas hoenn golems pokemon platinum
- Cancel stockx order
- How to make godzilla in little alchemy
- Connect ps4 controller wirelessly
- Connect kindle fire to tv
- How to measure area google maps
- How to measure amperage
- Install windows xp mode windows 7