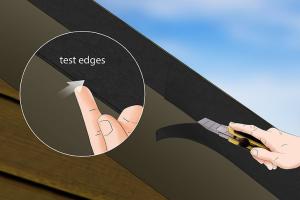
Mastering the Art of Applying Rolled Roofing: A Comprehensive Guide for Homeowners

-
Quick Links:
- Introduction
- What is Rolled Roofing?
- Benefits of Rolled Roofing
- Tools and Materials Needed
- Preparation Steps
- Step-by-Step Guide to Applying Rolled Roofing
- Common Mistakes to Avoid
- Maintenance Tips for Rolled Roofing
- Case Studies
- Expert Insights
- FAQs
Introduction
Rolled roofing is a popular choice among homeowners seeking an affordable and efficient roofing solution. Often used for flat or low-slope roofs, it offers a quick installation process and can be a fantastic DIY project for those willing to roll up their sleeves. In this comprehensive guide, we will explore everything you need to know about applying rolled roofing, from the initial preparation to the final inspection. Whether you're a seasoned DIYer or a first-time homeowner, this article will equip you with the knowledge and skills to successfully apply rolled roofing.
What is Rolled Roofing?
Rolled roofing, or roll roofing, is a type of roofing material that comes in large rolls. Typically made of asphalt, it is designed for easy installation on flat or low-sloped roofs. Unlike shingles, which are applied individually, rolled roofing is applied in large sections, making it a cost-effective and time-efficient choice for many homeowners.
Benefits of Rolled Roofing
- Affordability: Rolled roofing is generally less expensive than traditional roofing materials.
- Ease of Installation: The application process is straightforward, making it accessible for DIY enthusiasts.
- Durability: When properly installed, rolled roofing can last up to 10-15 years.
- Lightweight: The material is lightweight, which reduces the load on the structure.
- Versatility: Suitable for various applications, including garages, sheds, and low-sloped roofs.
Tools and Materials Needed
Before beginning the application process, gather the following tools and materials:
- Rolled roofing material
- Roofing cement
- Utility knife
- Measuring tape
- Caulking gun
- Roofing nails
- Hammer
- Safety goggles
- Work gloves
- Ladder
Preparation Steps
Preparation is key to a successful roofing project. Follow these steps:
- Inspect the Roof: Before applying rolled roofing, inspect your roof for any damage or structural issues.
- Clean the Surface: Ensure the roof surface is clean and free of debris, dirt, or old roofing material.
- Repair Any Damage: Fill in any holes or cracks with roofing cement to create a smooth surface.
- Measure and Cut: Measure the area to be covered and cut the rolled roofing material accordingly.
Step-by-Step Guide to Applying Rolled Roofing
Now, let's dive into the actual application process:
Step 1: Position the First Roll
Start at the lower edge of the roof. Roll out the first section of rolled roofing, making sure it overhangs the edge by about an inch.
Step 2: Secure the Roll
Apply roofing cement generously along the bottom edge and press the rolled roofing into place. Use roofing nails to secure the roll, placing them every 12 inches along the edge.
Step 3: Overlapping Rolls
When you reach the end of the first roll, position the next roll so that it overlaps the first by at least six inches. Repeat the process of applying cement and securing with nails.
Step 4: Seal the Seams
After all rolls are applied, use roofing cement to seal the seams between the rolls. This is crucial for preventing leaks.
Step 5: Final Inspection
After the roofing has been installed, conduct a thorough inspection to ensure there are no exposed nails or gaps. Address any areas that need additional sealing.
Common Mistakes to Avoid
- Failing to properly clean the surface before installation.
- Not overlapping the seams adequately, leading to leaks.
- Using insufficient adhesive or nails for securing the rolls.
- Neglecting to inspect the roof for structural issues beforehand.
Maintenance Tips for Rolled Roofing
To extend the life of your rolled roofing, consider the following maintenance tips:
- Perform regular inspections for any signs of wear or damage.
- Keep the roof clean from debris, leaves, and snow buildup.
- Check and repair any seams or flashing as needed.
Case Studies
Here are a couple of case studies illustrating effective applications of rolled roofing:
Case Study 1: Residential Garage
A homeowner in a suburban area applied rolled roofing to a detached garage. They followed the step-by-step guide and completed the project in one weekend, saving on labor costs.
Case Study 2: Community Shed
A local community center opted for rolled roofing for their storage shed. The project was completed by volunteers, and they reported a 15% savings compared to traditional roofing methods.
Expert Insights
We spoke with roofing expert John Smith, who emphasized the importance of proper installation techniques. "Rolled roofing can be a durable option if installed correctly. Always take the time to prepare the surface and use quality materials," he advised.
FAQs
- What is the lifespan of rolled roofing? Rolled roofing typically lasts between 10 to 15 years.
- Can I install rolled roofing over existing shingles? While it's possible, it's best to remove the existing layer for a proper seal.
- Is rolled roofing waterproof? Yes, when installed correctly, it is designed to be waterproof.
- What is the best weather for installation? Mild, dry weather is ideal for installing rolled roofing.
- How do I repair a leak in rolled roofing? Locate the leak and apply roofing cement or a patch to seal it.
- Can I paint rolled roofing? Yes, you can paint it to improve aesthetics and add a layer of protection.
- How much does rolled roofing cost? The price can vary, but it generally ranges from $1 to $3 per square foot.
- Is rolled roofing suitable for all climates? It's best suited for moderate climates; extreme conditions may reduce its lifespan.
- What tools will I need for installation? Common tools include a utility knife, roofing cement, and nails.
- Do I need a permit for roofing installation? Check local regulations; some areas require permits for roofing projects.
Random Reads