Mastering the Craft: Your Ultimate Guide to Building a Hip Roof

-
Quick Links:
- Introduction
- Understanding Hip Roofs
- Tools and Materials Needed
- Planning Your Project
- Step-by-Step Guide to Building a Hip Roof
- Common Pitfalls to Avoid
- Case Studies
- Expert Insights
- FAQs
- Conclusion
Introduction
Building a hip roof can be a rewarding yet challenging project for homeowners and contractors alike. A hip roof, characterized by slopes on all four sides, not only provides aesthetic appeal but also offers durability against harsh weather. This comprehensive guide will take you through the necessary steps, tools, and considerations to effectively build a hip roof.
Understanding Hip Roofs
Hip roofs are designed with slopes on all sides, culminating in a ridge at the top. This design is ideal for areas with heavy rainfall or snowfall, as the sloped surfaces allow for effective water drainage. Here are some key advantages:
- Enhanced structural stability
- Improved wind resistance
- Aesthetic versatility
Tools and Materials Needed
Before starting your project, gather the necessary tools and materials:
- Tools:
- Measuring tape
- Level
- Hammer
- Saw (circular or hand saw)
- Safety gear (gloves, goggles, hard hat)
- Materials:
- Roofing plywood
- Shingles or roofing tiles
- Fascia boards
- Felt underlayment
- Roof insulation
Planning Your Project
Proper planning is essential for a successful roofing project. Consider the following:
- Design Your Roof: Decide on the pitch and style of your hip roof.
- Obtain Permits: Check with your local building authority for necessary permits.
- Calculate Costs: Create a budget that includes materials and labor.
Step-by-Step Guide to Building a Hip Roof
Step 1: Establish the Framework
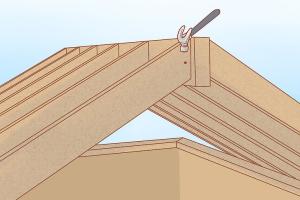
Start by creating the framework of the roof. This includes the ridge, hip, and valley rafters. Use the following guidelines:
- Measure and cut the rafters according to your design.
- Ensure all cuts are accurate to avoid gaps.
Step 2: Install the Rafters
Attach the rafters securely to the top of the walls. Use a level to ensure they are straight.
Step 3: Add the Plywood Sheathing
Cover the rafters with plywood sheathing. This will serve as the base for your roofing material.
Step 4: Install the Underlayment
Lay down a felt underlayment to provide additional protection from moisture.
Step 5: Apply Roofing Material
Finish by adding shingles or tiles, starting from the bottom and working your way up.
Common Pitfalls to Avoid
Even experienced builders can fall prey to common mistakes. Here are some pitfalls to watch out for:
- Inaccurate measurements
- Neglecting local building codes
- Forgetting to install proper ventilation
Case Studies
Understanding real-world applications can enhance your knowledge. Here are a couple of case studies:
Case Study 1: Residential Home
A family in a snowy region opted for a hip roof design. The result was a sturdy structure that survived several heavy snowstorms without any issues.
Case Study 2: Commercial Building
A local business installed a hip roof to improve energy efficiency. They reported reduced heating costs and improved aesthetic appeal.
Expert Insights
We consulted with roofing experts to gather insights:
“Proper planning and execution are crucial for a successful hip roof installation,” says John Doe, a licensed contractor with over 20 years of experience.
FAQs
1. What is a hip roof?
A hip roof has slopes on all four sides, providing stability and aesthetic versatility.
2. How much does it cost to build a hip roof?
The cost varies based on materials and labor, but average estimates range from $10,000 to $30,000.
3. Can I build a hip roof myself?
Yes, with the right tools and knowledge, you can build a hip roof, but it requires careful planning and execution.
4. What materials are best for hip roofs?
Common materials include asphalt shingles, metal roofing, and tiles.
5. How do I ensure my hip roof is watertight?
Proper installation of underlayment and flashing is essential to prevent leaks.
6. What pitch is ideal for a hip roof?
A pitch of 4/12 to 6/12 is commonly recommended for effective water drainage.
7. How long does it take to build a hip roof?
Depending on the size and complexity, it can take anywhere from a few days to a few weeks.
8. Do I need a permit to build a hip roof?
Yes, check local building codes and regulations to determine if a permit is required.
9. What are the benefits of a hip roof?
Benefits include enhanced stability, better wind resistance, and aesthetic appeal.
10. Can I add dormers to a hip roof?
Yes, dormers can be added for additional space and light, but they need to be designed carefully to maintain structural integrity.
Conclusion
Building a hip roof is a rewarding project that enhances both the functionality and aesthetic of your home. With careful planning, the right tools, and adherence to best practices, you can create a roof that stands the test of time. Whether you are a DIY enthusiast or a professional contractor, this guide provides you with the knowledge you need to succeed.