Ultimate Guide: How to Install a Condensate Pump for Efficient Drainage

-
Quick Links:
- What is a Condensate Pump?
- Why Install a Condensate Pump?
- Tools and Materials Needed
- Step-by-Step Installation Guide
- Maintenance and Troubleshooting
- Case Studies
- Expert Insights
- FAQs
What is a Condensate Pump?
A condensate pump is a vital component in HVAC systems, particularly for air conditioning and heating systems. It is designed to remove the excess condensation that forms during the cooling process. This condensation is often collected in a pan or reservoir and needs to be pumped away to prevent water damage, mold growth, and other issues.
Why Install a Condensate Pump?
There are several compelling reasons to install a condensate pump:
- Prevent Water Damage: Excess water can lead to significant structural damage if not properly removed.
- Improve Air Quality: Keeping the area dry reduces the risk of mold and mildew.
- Enhance HVAC Efficiency: A properly functioning condensate pump ensures your HVAC system operates effectively.
- Ease of Installation: Condensate pumps are relatively easy to install with basic plumbing knowledge.
Tools and Materials Needed
Before starting the installation, ensure you have the following tools and materials:
- Condensate pump
- PVC piping
- PVC cement
- Screwdriver
- Wrench
- Drill and drill bits
- Level
- Safety goggles
- Gloves
Step-by-Step Installation Guide
Step 1: Choose the Right Location
Select a location for your condensate pump that is easily accessible and close to a power source. Make sure the area is well-ventilated and away from any potential water leaks.
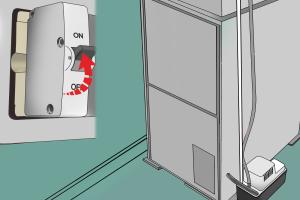
Step 2: Turn Off Power
Before starting the installation process, ensure that you turn off the power to your HVAC system to avoid any accidents.
Step 3: Prepare the Pump
Unbox your condensate pump and inspect it for any damages. Familiarize yourself with the pump's components and the installation guide provided by the manufacturer.
Step 4: Connect the PVC Piping
Using PVC piping, connect the pump to the drain line. Ensure all connections are secure and use PVC cement to seal joints where necessary. The drain line should slope downward to facilitate proper drainage.
Step 5: Install the Pump
Place the pump in the chosen location and ensure it is level. This is critical for the pump to function correctly. Use the provided screws to secure the pump in place.
Step 6: Electrical Connections
Connect the pump to a power source. Ensure you follow the manufacturer's instructions for electrical connections. If you're unsure, consult a licensed electrician.
Step 7: Test the System
Once everything is connected, turn the power back on and test the system. Check for leaks and ensure the pump activates and deactivates properly.
Step 8: Final Checks
Make any necessary adjustments and ensure that the drainage line is clear. Regular maintenance will ensure the longevity of your condensate pump.
Maintenance and Troubleshooting
Regular maintenance is essential for the efficient operation of your condensate pump. Here are some tips:
- Inspect Regularly: Check the pump for blockages and leaks monthly.
- Clean the Reservoir: Remove any debris from the pump's basin to prevent clogs.
- Test the Float Switch: Ensure the float switch moves freely and activates the pump.
- Check Electrical Connections: Ensure all electrical connections are secure and free from corrosion.
Case Studies
Real-world scenarios highlight the importance of installing a condensate pump:
Case Study 1: Residential Installation
A homeowner in Florida installed a condensate pump to manage excess moisture from their air conditioning system. After installation, they reported a 30% increase in HVAC efficiency and a significant decrease in mold growth.
Case Study 2: Commercial Application
A restaurant faced persistent water damage from their HVAC system. Installing a condensate pump resolved their drainage issues, allowing them to focus on their operations without worrying about water damage.
Expert Insights
According to HVAC experts, "Installing a condensate pump is often overlooked, yet it plays a crucial role in preventing water damage and maintaining HVAC efficiency. Regular maintenance is key to ensuring its longevity."
FAQs
- Q1: How do I know if I need a condensate pump?
- A: If your HVAC system produces excess condensation that cannot drain naturally, a condensate pump is necessary.
- Q2: Can I install a condensate pump myself?
- A: Yes, with basic plumbing and electrical skills, you can install a condensate pump. However, consult a professional if unsure.
- Q3: How often should I maintain my condensate pump?
- A: Inspect your pump monthly and perform maintenance at least twice a year.
- Q4: What are the signs of a failing condensate pump?
- A: Signs include water pooling around the pump, unusual noises, and the pump not activating.
- Q5: What type of condensate pump should I buy?
- A: Choose a pump based on your HVAC system's specifications and the volume of condensation produced.
- Q6: Can a condensate pump be used for other applications?
- A: Yes, condensate pumps can be used in various systems, including dehumidifiers and refrigeration units.
- Q7: Is a condensate pump noisy?
- A: Most condensate pumps operate quietly; however, some noise is expected during operation.
- Q8: How long do condensate pumps last?
- A: With regular maintenance, condensate pumps can last 5 to 10 years.
- Q9: What should I do if my condensate pump is not working?
- A: Check for clogs, ensure the float switch is functioning, and verify electrical connections.
- Q10: Do I need a permit to install a condensate pump?
- A: Check local regulations; some areas may require permits for plumbing installations.
Random Reads
- Installing corrugated roofing yourself
- Join discord server android
- How to sweep a floor expert tips
- How to remove wax from concrete
- How to remove wallpaper paste
- Turn off ad blocking google chrome
- Turn off s mode windows 11
- How to learn computer networking
- How to launch a website
- Silencing your iphone guide