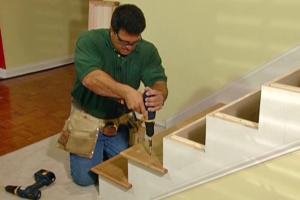
Ultimate Guide to Installing New Stair Treads: A Step-by-Step Approach

-
Quick Links:
- Introduction
- Why Install Stair Treads?
- Types of Stair Treads
- Tools and Materials Needed
- Preparing the Stairs
- Measuring and Cutting the Treads
- Installing the Treads
- Finishing Touches
- Maintenance and Care
- Case Studies
- Expert Insights
- FAQs
Introduction
Stairs are one of the most trafficked areas in any home, and over time, they can show signs of wear and tear. Installing new stair treads can not only enhance the aesthetics of your staircase but also improve safety by reducing slip hazards. This guide will take you through the entire process, ensuring that you can tackle this project with confidence and skill.
Why Install Stair Treads?
Stair treads serve several important functions:
- Safety: Non-slip surfaces help prevent accidents.
- Aesthetics: New treads can elevate the look of your home.
- Durability: They protect underlying stair materials from damage.
- Comfort: Proper tread materials provide a more comfortable walking surface.
Types of Stair Treads
Stair treads come in various materials and styles. Here are a few common types:
- Wooden Treads: Classic and durable, perfect for traditional homes.
- Carpet Treads: Soft and slip-resistant, ideal for comfort.
- Vinyl Treads: Waterproof and easy to clean, suitable for high-traffic areas.
- Rubber Treads: Excellent for outdoor spaces due to their weather resistance.
Tools and Materials Needed
Before you start, gather the following tools and materials:
- Measuring tape
- Utility knife
- Power saw (circular or jigsaw)
- Adhesive (wood glue or carpet adhesive)
- Clamps
- Sandpaper
- Pencil
- Level
- Safety goggles
- Dust mask
Preparing the Stairs
Before installation, ensure your stairs are clean and in good condition:
- Remove any old treads and clean the surface thoroughly.
- Inspect the stairs for any damage or loose boards.
- Sand the surface if necessary to create a smooth base.
Measuring and Cutting the Treads
Accurate measurements are crucial for a successful installation. Follow these steps:
- Measure the width and depth of each stair.
- Transfer these measurements to your new treads.
- Cut the treads using a power saw, ensuring clean edges.
Installing the Treads
Now that you have your treads cut, it’s time to install them:
- Apply adhesive evenly on the back of the tread.
- Position the tread on the stair and press down firmly.
- Use clamps to hold the tread in place while the adhesive sets.
- Repeat for each tread, ensuring they are level and even.
Finishing Touches
After installation, make sure to:
- Check for any gaps and fill them with caulk if necessary.
- Sand down any rough edges for a smooth finish.
- Consider applying a sealant for added durability, especially for wooden treads.
Maintenance and Care
To keep your stair treads looking great and functioning well, follow these maintenance tips:
- Regularly clean the treads to remove dirt and debris.
- Inspect for wear and tear, especially in high-traffic areas.
- Reapply sealant as needed to maintain protection.
Case Studies
Let’s look at a few homeowners who successfully installed stair treads:
Case Study 1: The Anderson Family
The Anderson family opted for carpet treads to enhance safety for their young children. They found that the installation process was straightforward, and the treads significantly reduced slips.
Case Study 2: Mr. Smith's Wooden Treads
Mr. Smith decided to install wooden treads in his historic home. He chose reclaimed wood for its character and sustainability. His project not only improved safety but also added value to his property.
Expert Insights
We reached out to flooring experts for their insights on stair tread installation:
"Proper installation of stair treads can significantly reduce the risk of falls. Always prioritize safety by choosing the right materials and ensuring a secure fit." – John Doe, Flooring Specialist
FAQs
1. How long does it take to install stair treads?
The installation process typically takes a few hours, depending on the number of treads and your experience level.
2. Can I install stair treads over carpet?
While it's possible to install treads over carpet, it's recommended to remove the carpet for a better fit and finish.
3. What type of adhesive is best for stair treads?
For wooden treads, wood glue is ideal; for carpet treads, use a strong carpet adhesive.
4. Are stair treads removable?
Most stair treads can be removed, but the ease of removal depends on how they were installed (adhesive vs. nails).
5. Do I need to seal wooden treads?
Yes, sealing wooden treads helps protect them from moisture and wear, extending their lifespan.
6. Can I install stair treads myself?
Yes! With the right tools and materials, installing stair treads is a DIY-friendly project.
7. How do I choose the right stair treads?
Consider factors like material, safety features, and aesthetic appeal when choosing stair treads.
8. What if my stairs are uneven?
Use shims to level out any uneven stairs before installing treads for a smooth fit.
9. How often should I replace stair treads?
Inspect your treads regularly; replace them when they show signs of wear or damage.
10. Can I paint my stair treads?
Yes, wooden treads can be painted for a fresh look, but ensure the paint is suitable for flooring.
For more information on stair safety and home improvement, check out these authoritative sources:
- Consumer Product Safety Commission
- U.S. Department of Housing and Urban Development
- National Fire Protection Association
Random Reads
- How to watch star wars via telnet
- How to watch videos on youtube
- How to install fedora
- How to move columns in excel
- Unlocking cydia free apps
- Unlocking legendary skins mobile legends
- Restart lg tv tips
- Retrieve house blueprints
- Retrieve old whatsapp messages
- How to set up dhcp on a local area network