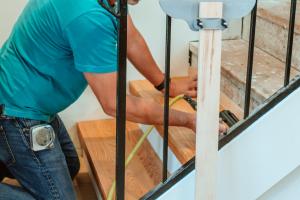
Ultimate Guide: How to Install Wood Stairs for Your Home

-
Quick Links:
- 1. Introduction
- 2. Materials Needed
- 3. Tools Required
- 4. Planning and Measuring
- 5. Installation Process
- 5.1 Preparing the Area
- 5.2 Building the Stringers
- 5.3 Installing the Treads and Risers
- 5.4 Finishing Touches
- 6. Safety Tips
- 7. Case Studies
- 8. FAQs
- 9. Conclusion
1. Introduction
Installing wood stairs can significantly enhance the aesthetic appeal and value of your home. Whether you’re replacing an old staircase or building a new one, knowing how to properly install wood stairs is crucial. This guide will walk you through the entire process, providing step-by-step instructions, tips, and expert insights to ensure a successful installation.
2. Materials Needed
Before you start, gather the necessary materials:
- Hardwood for treads and risers
- Wood glue
- Wood screws
- Wood finish or stain
- Safety gear (gloves, goggles)
3. Tools Required
Having the right tools is essential for a smooth installation:
- Measuring tape
- Level
- Circular saw
- Drill
- Chisel
- Hammer
- Screwdriver
- Square
4. Planning and Measuring
Proper planning is key to a successful installation. Measure the height and width of the area where the stairs will be installed. Calculate the number of steps needed by dividing the total rise (height) by the height of each step (typically 7 inches).
5. Installation Process
This section covers the step-by-step process of installing wood stairs.
5.1 Preparing the Area
Start by clearing the area where the stairs will be installed. Remove any old carpet, debris, or obstacles that may hinder the installation process.
5.2 Building the Stringers
Stringers are the backbone of your staircase. To build them:
- Cut the stringers from 2x12 lumber using a circular saw.
- Mark the rise and run on each stringer to ensure uniformity.
- Cut the notches where the treads and risers will sit.
5.3 Installing the Treads and Risers
Once the stringers are secure, install the risers first, followed by the treads:
- Attach the risers to the stringers using wood screws.
- Apply wood glue to the edges of the treads before securing them.
5.4 Finishing Touches
After installation, sand the surfaces and apply a wood finish or stain for a polished look. Ensure all screws are countersunk and secure.
6. Safety Tips
Safety should be your top priority when installing wood stairs. Here are some essential safety tips:
- Always wear safety goggles and gloves.
- Use a level to ensure your stairs are even.
- Be cautious with power tools and follow manufacturer instructions.
7. Case Studies
Consider these real-world examples of successful wood stair installations:
- Case Study 1: A homeowner in Seattle replaced their carpeted stairs with oak treads, resulting in a 15% increase in home value.
- Case Study 2: A DIY enthusiast transformed their basement stairs using reclaimed wood, showcasing a unique rustic charm.
8. FAQs
1. How much does it cost to install wood stairs?
The cost can vary based on materials and labor, but expect between $1,000 to $2,500 for a standard installation.
2. Can I install wood stairs myself?
Yes, with proper tools and guidance, DIY installation is possible.
3. How long does the installation take?
Typically, it takes 1-3 days depending on complexity.
4. What type of wood is best for stairs?
Hardwoods like oak, maple, or cherry are durable and attractive options for stair construction.
5. Do I need building permits for stair installation?
Check local regulations; some areas may require permits for structural changes.
6. How do I maintain wood stairs?
Regular cleaning and periodic refinishing will keep your stairs looking new.
7. What are the common mistakes in stair installation?
Miscalculating measurements and inadequate support are common pitfalls.
8. Can I change the design of my stairs?
Yes, stairs can be redesigned, but structural integrity must be considered.
9. Is it possible to install stairs on a slope?
Yes, but specialized design and construction methods may be required.
10. How can I make my stairs safer?
Add non-slip treads or coatings to enhance safety.
9. Conclusion
Installing wood stairs can be a rewarding DIY project that adds value and elegance to your home. With careful planning, the right materials, and adherence to safety guidelines, you can successfully complete your wood stair installation. Remember to take your time and consult professionals if needed, ensuring that your new stairs are built to last.
Random Reads