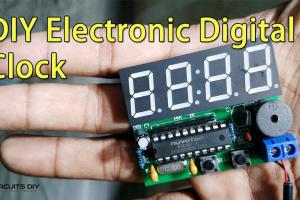
Step-by-Step Guide: How to Create Your Own Digital Clock

-
Quick Links:
- Introduction
- Essential Components
- Designing the Circuit
- Programming the Clock
- Enclosure and Finish
- Adding Advanced Features
- Case Studies
- Expert Insights
- Troubleshooting Common Issues
- FAQs
Introduction
Creating a digital clock is a rewarding project that combines electronics and programming. Whether you're a hobbyist or a beginner looking to learn about electronics, this guide will walk you through the process step-by-step. By the end of this article, you’ll not only have your own digital clock but also a deeper understanding of how electronic circuits and programming work together.
Essential Components
Before diving into the construction of the digital clock, it’s crucial to gather all necessary components. Here’s a list of what you’ll need:
- Microcontroller: Arduino, Raspberry Pi, or similar
- Display: 7-segment display or LCD
- Real-Time Clock (RTC) Module: DS3231 or similar
- Resistors: 220 ohm resistors (for 7-segment displays)
- Breadboard: For prototyping
- Jumper Wires: Female-to-male and male-to-male
- Power Supply: USB connector or battery
- Optional: Buzzer for alarms, buttons for setting time
Where to Source Components
Many components can be purchased through online retailers or local electronics shops. Websites like SparkFun and Adafruit offer a wide range of components for hobbyists.
Designing the Circuit
Once you have all components, the next step is to design the circuit. The circuit diagram outlines how each component connects. Below is a simplified version of what your circuit may look like:
Basic Circuit Diagram
Use a schematic drawing tool or software like Fritzing to visualize your design. Here’s a basic connection layout:
- Connect the RTC module to the microcontroller using I2C connections (typically SDA and SCL).
- Attach the display to the microcontroller according to its specifications.
- Insert resistors where necessary for 7-segment displays.
Programming the Clock
Programming the clock is where the magic happens. You’ll write code to manage timekeeping and display the time on your chosen display. Below is a basic framework for your clock using Arduino:
#include <Wire.h>
#include <RTClib.h>
#include <LiquidCrystal.h>

RTC_DS3231 rtc;
LiquidCrystal lcd(7, 8, 9, 10, 11, 12);

void setup() {
  lcd.begin(16, 2);
  Wire.begin();
  rtc.begin();
}

void loop() {
  DateTime now = rtc.now();
  lcd.setCursor(0, 0);
  lcd.print(now.hour());
  lcd.print(':');
  lcd.print(now.minute());
  lcd.print(':');
  lcd.print(now.second());
  delay(1000);
}
Upload the code to your microcontroller and observe your clock come to life!
Enclosure and Finish
The enclosure gives your clock a professional look. Consider using:
- 3D Printed Case: Design a custom case using CAD software.
- Wooden Box: A DIY wooden enclosure can add a rustic charm.
- Plastic Enclosure: Purchase a pre-made case for a clean finish.
Adding Advanced Features
Once you've built a basic digital clock, consider adding features like:
- Alarm Functionality: Use a buzzer to sound an alarm at a set time.
- Temperature Display: Connect a temperature sensor to show the current temperature.
- Wi-Fi Connectivity: Use a Wi-Fi module to sync time automatically.
Case Studies
Many enthusiasts have taken the basic concept of a digital clock and innovated upon it. Here are a few interesting projects:
- Weather Station Clock: Combines a digital clock and weather display. Check out this project on Instructables.
- Smart Clock: Integrates voice control using Google Assistant. Learn more on Hackaday.
Expert Insights
Experts in the electronics field often recommend starting with simple projects and gradually increasing complexity. Dr. Alice Johnson, an electronics professor, suggests:
“Understanding the basics of electronics is crucial. Always prototype on a breadboard before moving to permanent solutions.”
Troubleshooting Common Issues
If you encounter issues while building your digital clock, consider these troubleshooting tips:
- No Display: Check connections and ensure the microcontroller is powered.
- Incorrect Time: Ensure the RTC module is set properly.
- Code Errors: Review your code for syntax and logic errors.
FAQs
Here are some frequently asked questions about digital clocks:
- 1. What components do I need to make a digital clock?
- You will need a microcontroller, display, RTC module, resistors, and a breadboard.
- 2. Can I make a digital clock without programming?
- Basic functionality requires programming, but kits may offer pre-written code.
- 3. How accurate is a digital clock using an RTC module?
- RTC modules like DS3231 offer high accuracy, typically within a few seconds per month.
- 4. What is the best microcontroller for beginners?
- Arduino is widely recommended for beginners due to its community support and resources.
- 5. How can I add an alarm feature?
- Use a buzzer and additional programming logic to trigger it at a set time.
- 6. Is it possible to sync the clock with the internet?
- Yes, using Wi-Fi modules like ESP8266 allows for internet time synchronization.
- 7. What tools do I need for assembly?
- A soldering iron, wire cutters, and a multimeter are useful for assembly and testing.
- 8. How do I power my digital clock?
- You can use USB power or batteries, depending on your design.
- 9. Can I customize the display?
- Yes, you can design your own display or use different types of displays like OLED.
- 10. Where can I find more resources?
- Online platforms like Instructables and Adafruit offer tutorials and kits.
Random Reads
- Ultimate guide to changing default video player on ios devices
- How to wire an electric dryer
- How to woohoo in the sims 2
- Mastering jitter click
- Mastering key bindings counter strike
- How to make a spreadsheet in excel
- How to make a secret hideout in your closet
- View cookies web browser
- Using ssd as ram windows pc
- How to play guitar hero