Crafting Custom Doors: A Comprehensive Guide to Building Your Own Door

-
Quick Links:
- Introduction
- Materials Needed
- Tools Required
- Door Design Options
- Planning Your Door
- Step-by-Step Guide to Building a Door
- Finishing Touches
- Case Studies and Examples
- Expert Insights
- FAQs
Introduction
Building your own door can be a rewarding project that enhances your home’s aesthetic and security. This guide will take you through the entire process, from selecting materials to the final installation.
Materials Needed
Before you start building your door, you'll need to gather the following materials:
- Wood (Plywood, hardwood, or softwood)
- Wood glue
- Wood screws
- Sandpaper
- Paint or stain
- Sealer or varnish
- Door hinges
- Door handle and lock
Tools Required
Having the right tools will make your door-building experience much easier. Here’s what you’ll need:
- Measuring tape
- Circular saw or hand saw
- Drill
- Chisel
- Clamps
- Square
- Level
Door Design Options
When it comes to designing your door, there are several styles to choose from:
- Panel Doors: Traditional and elegant, suitable for various home styles.
- Flush Doors: Simple and modern, perfect for contemporary designs.
- French Doors: Great for creating an open feel with glass panels.
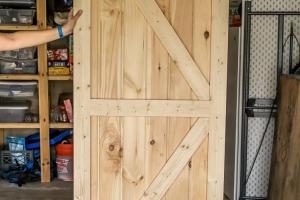
- Sliding Barn Doors: A trendy option that saves space and adds character.
Planning Your Door
Proper planning is essential for a successful door build. Consider the following:
- Measure the door frame accurately to ensure a perfect fit.
- Decide on the door thickness and style based on your home’s architecture.
- Choose a design that complements your interior and exterior aesthetics.
Step-by-Step Guide to Building a Door
Step 1: Measure and Cut the Wood
Start by measuring the dimensions of your door frame. Cut your wood pieces according to your design specifications, ensuring accuracy for a snug fit.
Step 2: Assemble the Frame
Using wood glue and screws, assemble the frame of the door. This usually involves creating a rectangular shape with vertical and horizontal pieces.
Step 3: Attach Panels (if applicable)
If you are building a panel door, insert the panels into the frame. Make sure they are secured properly, using glue and screws.
Step 4: Sand the Surface
Once the door is assembled, sand down the surfaces to ensure they are smooth and even. This step is crucial for a professional finish.
Step 5: Apply Finish
Choose a paint or stain that suits your style. Apply the finish evenly, allowing it to dry completely before proceeding.
Step 6: Install Hinges and Hardware
Attach the hinges and any hardware such as handles and locks. Make sure they are aligned correctly for smooth operation.
Step 7: Hang the Door
Finally, hang the door in the frame. Use a level to ensure it is straight, and make any necessary adjustments.
Finishing Touches
After installation, inspect the door for any rough edges or areas that need touch-up paint or stain. Ensure the door opens and closes smoothly, and make adjustments if necessary.
Case Studies and Examples
Let’s look at a couple of real-world examples:
- Case Study 1: A DIY enthusiast built a custom flush door for their apartment, incorporating reclaimed wood, resulting in a unique and environmentally-friendly choice.
- Case Study 2: A family renovated their farmhouse and opted for sliding barn doors, enhancing the rustic charm while saving space in their layout.
Expert Insights
We spoke to John Smith, a professional carpenter with over 20 years of experience. He emphasized the importance of choosing high-quality materials and taking your time during the measurement phase to avoid costly mistakes.
FAQs
Here are some commonly asked questions about making a door:
- What type of wood is best for a door? Hardwoods like oak or maple are great for durability and aesthetics.
- How do I measure for a door? Measure the height and width of the door frame, accounting for any gaps needed for hinges and handles.
- Can I use plywood for a door? Yes, plywood is a popular choice for lightweight and budget-friendly doors.
- What is the best finish for wooden doors? A polyurethane sealer provides excellent protection and enhances the wood's natural beauty.
- How do I ensure my door is level? Use a level tool during installation and adjust the hinges as needed.
- Do I need special tools to make a door? Basic woodworking tools like a saw, drill, and sander will suffice.
- How long does it take to build a door? Depending on your experience, it can take anywhere from a few hours to a few days.
- Can I customize the size of my door? Absolutely! Make sure to measure your frame carefully for a perfect fit.
- What if my door doesn’t fit? You can trim it down, but it’s best to measure accurately before building.
- Is it cheaper to make a door than to buy one? It can be, especially if you use reclaimed materials or have leftover wood.
By following this comprehensive guide, you can successfully create a custom door that meets your specific needs and enhances your living space. Happy building!