Mastering Your Honeywell Thermostat: A Comprehensive Guide to Battery Replacement

-
Quick Links:
- Introduction
- Why Change Batteries in Your Honeywell Thermostat?
- Types of Honeywell Thermostats
- Preparing to Replace Batteries
- Step-by-Step Guide to Battery Replacement
- Troubleshooting Common Issues
- Maintaining Your Thermostat
- Expert Tips and Insights
- Case Studies
- FAQs
Introduction
Honeywell thermostats are known for their reliability and precision in home temperature management. However, like any electronic device, they require regular maintenance to function optimally. One of the simplest yet essential tasks homeowners can perform is replacing the batteries in their Honeywell thermostats. This article will guide you through the entire process, ensuring your thermostat remains efficient and your home stays comfortable.
Why Change Batteries in Your Honeywell Thermostat?
Battery replacement is crucial for several reasons:
- Consistent Performance: Fresh batteries ensure that your thermostat functions correctly, preventing fluctuations in temperature.
- Energy Efficiency: An efficient thermostat can lead to lower energy bills by maintaining consistent heating and cooling.
- Preventing Damage: Old batteries can leak, potentially damaging the thermostat.
Types of Honeywell Thermostats
Honeywell offers a variety of thermostat models, each with its unique features. Understanding the type of thermostat you have can simplify the battery replacement process:
- Digital Thermostats: Common in modern homes, these thermostats often require AA or AAA batteries.
- Wi-Fi Thermostats: These smart devices may have rechargeable batteries or use a power adapter.
- Mechanical Thermostats: Older models may not use batteries but instead rely on hardwired connections.
Preparing to Replace Batteries
Before beginning the replacement process, gather the necessary tools and materials:
- New Batteries: Check your thermostat manual for the correct type.
- Screwdriver: Some models require a screwdriver to access the battery compartment.
- Soft Cloth: For cleaning the thermostat area.
Step-by-Step Guide to Battery Replacement
Follow these comprehensive steps to replace the batteries in most Honeywell thermostat models:
Step 1: Turn Off Your Thermostat
Before you start, turn off the thermostat to prevent any electrical issues.
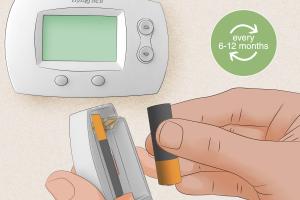
Step 2: Remove the Thermostat Cover
Gently pull or unscrew the thermostat cover to access the battery compartment. Be cautious not to damage any wiring.
Step 3: Take Out the Old Batteries
Carefully remove the old batteries. Note their orientation (positive and negative ends) for the installation of the new batteries.
Step 4: Insert New Batteries
Place the new batteries into the compartment, ensuring they are aligned correctly with the positive and negative markings.
Step 5: Replace the Thermostat Cover
Once the new batteries are in place, reattach the cover securely.
Step 6: Turn on Your Thermostat
Switch the thermostat back on and confirm that it is functioning properly.
Troubleshooting Common Issues
If your thermostat is not working after battery replacement, consider the following troubleshooting tips:
- Check Battery Orientation: Ensure the batteries are installed correctly.
- Inspect for Corrosion: Look for any signs of battery leakage or corrosion and clean it if necessary.
- Reset the Thermostat: Some models may require a reset after battery replacement.
Maintaining Your Thermostat
Regular maintenance can prolong the life of your Honeywell thermostat:
- Perform battery checks every six months.
- Keep the thermostat clean and dust-free.
- Update any firmware if applicable for smart models.
Expert Tips and Insights
To enhance your thermostat experience, consider these expert tips:
- Use high-quality batteries for better performance.
- Consider a smart thermostat for added convenience and efficiency.
Case Studies
Real-world examples illustrate the importance of regular battery replacement:
- Case Study 1: A homeowner reported a 20% decrease in energy bills after consistently replacing their thermostat batteries.
- Case Study 2: Another user experienced fewer temperature fluctuations, leading to improved comfort levels.
FAQs
1. How often should I change the batteries in my Honeywell thermostat?
It is recommended to change batteries every six months or when the low battery indicator appears.
2. What type of batteries does a Honeywell thermostat typically use?
Most Honeywell thermostats use AA or AAA batteries, but it's best to check your specific model.
3. Can I use rechargeable batteries in my Honeywell thermostat?
While some users opt for rechargeable batteries, it's essential to ensure they are compatible with your model.
4. What should I do if my thermostat is still not working after battery replacement?
Check the battery orientation, inspect for corrosion, and consider resetting the thermostat.
5. How can I tell if my thermostat needs new batteries?
Most models have a low battery indicator, but you may also notice irregular temperature readings.
6. Are there any risks associated with changing thermostat batteries?
As long as you follow the instructions carefully, the risks are minimal. Ensure to turn off the thermostat before starting.
7. Can I replace the batteries in a Wi-Fi Honeywell thermostat?
Yes, but ensure to check your model as some may have a rechargeable battery or require an adapter.
8. How long do batteries last in Honeywell thermostats?
Batteries typically last six months to a year, depending on usage and model type.
9. Is it necessary to clean the thermostat when changing batteries?
While not mandatory, cleaning can help maintain performance and prolong the device's life.
10. What if my thermostat is hardwired?
Hardwired thermostats may not use batteries but check your model for backup battery options.
Random Reads