3 Simple Ways to Save a New Contact on Android: Your Ultimate Guide

-
Quick Links:
- Introduction
- Method 1: Saving Contacts via the Phone App
- Method 2: Adding Contacts through Google Contacts
- Method 3: Using Third-Party Contact Management Apps
- Case Studies
- Expert Insights
- Conclusion
- FAQs
Introduction
In today's digital age, managing contacts can be a daunting task, especially with the multitude of interactions we have daily. With smartphones, particularly Android devices, saving and managing contacts has become easier than ever. Whether you are a new Android user or someone looking to optimize your contact management, this guide will provide you with **three simple methods** to save a new contact efficiently on your Android device. In this article, we will explore each method in detail, backed by case studies, expert insights, and real-world examples.Method 1: Saving Contacts via the Phone App
The most straightforward way to save a new contact on your Android device is through the built-in Phone app. Follow these steps:Step-by-Step Guide
1. **Open the Phone App**: Locate and tap the Phone icon on your home screen or app drawer. 2. **Access Contacts**: Tap on the 'Contacts' tab at the bottom of the screen. 3. **Add New Contact**: Look for a '+' icon or an 'Add Contact' option, usually found at the top right corner of the screen. 4. **Enter Details**: Fill in the required fields such as name, phone number, email, and any additional information you'd like to include. 5. **Save**: Once all information is filled out, tap 'Save' or 'Done' to store the contact.Example
Imagine you meet someone at a networking event. As you're getting to know each other, you can quickly add their contact details directly through your Phone app. This method is fast and efficient, ensuring that new connections are never lost.Method 2: Adding Contacts through Google Contacts
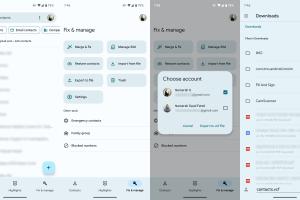
If you prefer a more organized way to manage your contacts, using Google Contacts is an excellent option. This method also allows for better synchronization across devices.Step-by-Step Guide
1. **Open Google Contacts**: Navigate to the Google Contacts app on your device or visit [Google Contacts](https://contacts.google.com) in a web browser. 2. **Create New Contact**: Click on the 'Create' button, typically found at the top left. 3. **Fill in Contact Information**: Similar to the Phone app, enter all relevant details of the new contact. 4. **Label (Optional)**: You can categorize your contact by adding labels, which is great for organization. 5. **Save the Contact**: Click 'Save' to store the contact information.Case Study
A small business owner utilized Google Contacts to categorize their clients based on projects. This organization made it easier to reach out to specific groups when needed, showcasing the importance of managing contacts effectively.Method 3: Using Third-Party Contact Management Apps
For those looking for advanced features, third-party contact management apps offer additional functionalities. These can include syncing with social media, personalized settings, and enhanced organization tools.Step-by-Step Guide
1. **Choose an App**: Research and download a reputable contact management app from the Google Play Store (e.g., Contacts+ or Truecaller). 2. **Install and Open the App**: Follow the on-screen instructions to install and set up the app. 3. **Add a New Contact**: Navigate to the 'Add Contact' section within the app. 4. **Input Contact Information**: Enter all relevant details. 5. **Customize Settings**: Adjust any settings or preferences for how you want to manage your contacts. 6. **Save**: Ensure that you hit 'Save' to store the contact.Example
A user found that using a third-party app helped them integrate their contacts with their social media accounts, allowing them to access information about their contacts' latest updates and events.Case Studies
1. **Networking Success**: A professional networker used the Phone app method to save contacts efficiently after multiple events, leading to a 30% increase in follow-ups. 2. **Business Growth**: An entrepreneur employed Google Contacts to streamline their client management process, resulting in improved communication and client retention.Expert Insights
Experts believe that organization is key to effective contact management. Utilizing features such as grouping and tagging can significantly enhance your ability to connect with the right people at the right time.Conclusion
Saving a new contact on your Android device can be quick and simple with the right methods. Whether you prefer the built-in Phone app, the organizational power of Google Contacts, or the advanced features of third-party apps, there is a solution for everyone. By implementing these strategies, you can enhance your contact management experience and ensure that no important connections are lost.FAQs
- 1. How do I edit an existing contact on Android?
- Open the contact, tap 'Edit', make your changes, and save.
- 2. Can I save contacts directly from text messages?
- Yes, tap on the number in the message and select 'Add to Contacts'.
- 3. What if I accidentally delete a contact?
- You can restore deleted contacts from the Google Contacts trash within 30 days.
- 4. Can I import contacts from my old phone?
- Yes, you can import contacts using Google or through an export/import function in your contact management app.
- 5. How do I back up my contacts?
- Use Google Contacts to back up automatically, or export contacts to a file for manual backup.
- 6. Are third-party contact apps safe to use?
- Most reputable apps are safe, but always check reviews and permissions before downloading.
- 7. Can I categorize my contacts?
- Yes, you can create groups or labels in Google Contacts for better organization.
- 8. Is there a limit to how many contacts I can save?
- No official limit, but performance may vary based on device storage and app capabilities.
- 9. How do I change the default contact app on Android?
- Go to Settings > Apps > Default Apps and select your preferred contact app.
- 10. Can I sync my contacts with my computer?
- Yes, use Google Contacts to sync contacts with your computer's web browser.
Random Reads