A Comprehensive Guide to Installing and Laying Glass Blocks for Stunning Interiors

-
Quick Links:
- Introduction
- Benefits of Glass Blocks
- Materials Needed
- Preparation Steps
- Installation Process
- Finishing Touches
- Maintenance Tips
- Case Studies
- Expert Insights
- FAQs
Introduction
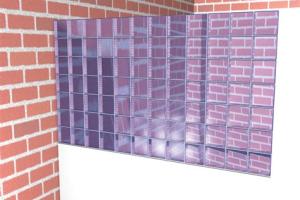
Glass blocks are a stylish and functional choice for both interior and exterior applications. They allow natural light to enter while providing privacy, making them perfect for bathrooms, kitchens, and even living spaces. In this comprehensive guide, we will walk you through the entire process of installing and laying glass blocks, ensuring you achieve a professional finish that enhances your home’s aesthetics.
Benefits of Glass Blocks
There are numerous benefits to using glass blocks in your home:
- Natural Light: Glass blocks allow light to filter through while maintaining privacy.
- Energy Efficiency: They provide insulation, helping to keep your home warm in winter and cool in summer.
- Durability: Glass blocks are resistant to moisture, mold, and mildew.
- Design Flexibility: Available in various styles, colors, and sizes, glass blocks can be used creatively to enhance your decor.
Materials Needed
Before you begin the installation process, gather the following materials:
- Glass blocks (choose your preferred size and style)
- Mortar or adhesive specifically designed for glass blocks
- Grout for sealing
- Safety goggles and gloves
- Level
- Trowel
- Measuring tape
- Spacers for uniform gaps
- Sponge and bucket for cleaning
Preparation Steps
Proper preparation is key to a successful installation:
- Measure the Area: Determine the dimensions of the space where you will install the glass blocks. Ensure you account for the thickness of the mortar.
- Prepare the Surface: Clean the area thoroughly to remove dust, grease, and any loose materials.
- Plan Your Layout: Lay out the glass blocks without adhesive to visualize the final design.
Installation Process
The installation of glass blocks is straightforward, but it requires precision:
- Mix the Mortar: Follow manufacturer instructions for mixing the mortar or adhesive.
- Start Laying Blocks: Begin at the bottom, applying mortar to the substrate and the sides of the first block. Place the block and use a level to ensure it’s even.
- Insert Spacers: Use spacers between blocks to maintain consistent gaps.
- Continue Layering: Repeat the process for each row, ensuring you stagger the joints for stability.
- Apply Grout: Once the installation is complete, fill the joints with grout, smoothing it out for a clean finish.
Finishing Touches
After the installation is complete, consider these finishing touches:
- Clean the surface of the glass blocks with a non-abrasive cleaner to remove any mortar residue.
- Apply sealant if recommended by the manufacturer to enhance durability.
Maintenance Tips
To keep your glass block installation looking its best, follow these maintenance tips:
- Regularly clean with mild soap and water.
- Avoid abrasive materials that could scratch the surface.
- Check for cracks or damage and repair them promptly.
Case Studies
Here are some real-world examples of successful glass block installations:
- Residential Bathroom: A homeowner transformed their small bathroom by replacing a solid wall with a glass block wall, allowing natural light while maintaining privacy. The project increased the perceived space and added value to the home.
- Commercial Office: An office used glass blocks as part of their interior design to create a modern look. The installation provided natural light without sacrificing privacy in meeting rooms.
Expert Insights
According to home improvement experts, the key to a successful glass block installation lies in:
- Choosing the right adhesive and materials for your specific project.
- Taking the time to properly measure and plan your layout before beginning.
- Being patient during installation to ensure each block is perfectly aligned.
FAQs
1. Can I install glass blocks myself?
Yes, with the right materials and patience, DIY enthusiasts can successfully install glass blocks.
2. What type of adhesive should I use for glass blocks?
Use a mortar or adhesive that is specifically designed for glass blocks to ensure a strong bond.
3. How do I clean glass blocks after installation?
Use a mild soap solution and a non-abrasive sponge to clean glass blocks without scratching them.
4. Are glass blocks energy efficient?
Yes, glass blocks provide insulation, which helps with energy efficiency in your home.
5. Can glass blocks be used outdoors?
Yes, as long as they are properly sealed and installed, glass blocks can be a beautiful outdoor feature.
6. How long does the installation process take?
The process can vary based on the size of the project, but typically, it can take several hours to a couple of days.
7. Can I paint glass blocks?
Painting glass blocks is not recommended as it can damage the surface and appearance.
8. What are the design options for glass blocks?
Glass blocks come in various styles, including frosted, clear, and colored options, allowing for creative design.
9. Is it necessary to use spacers?
Yes, spacers help maintain uniform gaps between blocks, ensuring a professional finish.
10. How do I repair damaged glass blocks?
Replace any damaged blocks carefully, ensuring to reapply mortar and grout as needed for a seamless look.
Random Reads
- Simple ways to get dragon talon in blox fruits
- How to take down wall mirror
- How to take down big daddies in bioshock
- How to save a file
- How to safely meet a person you met online
- How to replace a submersible well pump
- How to replace a shower head like a pro
- Opening dicom file free viewers photoshop
- Open windows explorer
- Mastering screenshot techniques dell