Mastering Email Etiquette: How to Add a Signature in Microsoft Outlook

-
Quick Links:
- Introduction
- Importance of Signatures
- Creating Your Signature
- Adding Signature in Outlook
- Advanced Signature Options
- Case Studies
- Expert Insights
- Troubleshooting Common Issues
- Conclusion
- FAQs
Introduction
Email signatures play a crucial role in professional communication. They provide the recipient with essential information about the sender and can enhance your brand image. In this guide, we'll explore the step-by-step process of adding a signature in Microsoft Outlook, along with tips on creating an effective signature that reflects your professional persona.
Importance of Signatures
Signatures are not just a formality; they serve multiple purposes:
- Professionalism: A well-designed signature adds a layer of professionalism to your emails.
- Branding: Including your logo or company colors can reinforce your brand identity.
- Contact Information: Signatures provide recipients with quick access to your contact details.
- Legal Compliance: Some industries require specific information in email signatures for compliance.
Creating Your Signature
Before adding a signature in Outlook, you need to create one. Here are some tips:
1. Design Principles
- Keep it simple: Avoid clutter.
- Use clear typography: Ensure readability.
- Incorporate your brand colors: Use colors that align with your brand.
2. Essential Elements
A typical email signature should include:
- Your name
- Your job title
- Your company name
- Contact information (email, phone number)
- Company logo (optional)
- Social media links (optional)
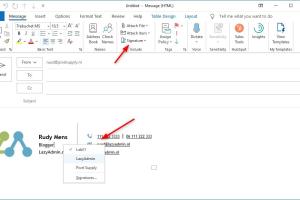
Adding Signature in Outlook
Step-by-Step Guide for Outlook Desktop
- Open Microsoft Outlook.
- Click on "File" in the top menu.
- Select "Options" from the sidebar.
- In the Outlook Options window, click on "Mail."
- Click "Signatures."
- In the Signatures and Stationery window, click "New."
- Name your signature and click "OK."
- In the editing box, create your signature using the formatting options provided.
- Set your default signature for new messages and replies/forwards, if desired.
- Click "OK" to save your changes.
Step-by-Step Guide for Outlook Web App
- Log into your Outlook account.
- Click on the gear icon in the upper right corner.
- Select "View all Outlook settings."
- Go to "Mail" and then "Compose and reply."
- In the "Email signature" section, create your signature.
- Select options for automatically including your signature in new messages and replies/forwards.
- Click "Save."
Advanced Signature Options
Once you have added your signature, you can further customize it:
1. Adding Images and Links
To make your signature more engaging, consider adding images (like a logo) and hyperlinks. Ensure that images are appropriately sized and links are functional.
2. Using HTML for Customization
If you're familiar with HTML, you can create a more customized HTML signature. This option allows for advanced styling and elements.
Case Studies
Let’s explore a few case studies where a well-crafted email signature made a significant difference in communication:
Case Study 1: Boosting Engagement
A marketing firm revamped their email signatures to include social media links, resulting in a 25% increase in engagement on those platforms.
Case Study 2: Improving Professional Image
A small business owner added a professional logo to their signature, which led to improved client perceptions and increased trust in the brand.
Expert Insights
According to email marketing experts, a signature is often the last impression you make on a recipient. It’s crucial to ensure that it reflects not only your information but also your personality and brand ethos.
Troubleshooting Common Issues
If you encounter issues with your email signature, consider the following:
- Ensure that images are uploaded and linked correctly.
- Check formatting and adjust in the signature settings.
- Test sending emails to different email clients to see how your signature appears.
Conclusion
Adding a signature in Microsoft Outlook is a simple yet effective way to enhance your email communication. By following the steps outlined in this guide, you can create a signature that not only conveys your information but also reflects your professionalism and brand identity.
FAQs
1. Can I have multiple signatures in Outlook?
Yes, Outlook allows you to create multiple signatures and choose which one to use for different emails.
2. How do I delete a signature in Outlook?
Go to the Signatures settings, select the signature you wish to delete, and click the "Delete" button.
3. Can I use HTML for my email signature?
Yes, Outlook supports HTML signatures. You can paste HTML code directly into the signature editor.
4. Will my signature appear on replies and forwards?
You can set your signature to appear on replies and forwards in the signature settings.
5. How can I ensure my signature looks good on mobile?
Keep your signature simple and responsive. Test it on different devices to ensure it displays correctly.
6. Can I use a photo in my signature?
Yes, you can include a photo or logo in your signature, but ensure it is appropriately sized.
7. Is there a maximum character limit for email signatures?
While there is no strict limit, keeping your signature concise is advisable for readability.
8. How do I change my signature in Outlook?
Go to the Signatures settings, select the signature you wish to edit, make your changes, and save.
9. Can I use different signatures for different email accounts in Outlook?
Yes, you can create and select different signatures for each email account you have set up in Outlook.
10. How often should I update my email signature?
It’s a good practice to review and update your email signature regularly, especially when your contact information or job title changes.