Mastering Circuit Board Design: A Comprehensive Guide for Beginners

-
Quick Links:
- Introduction
- Understanding Circuit Boards
- Components Required to Build a Circuit Board
- Designing Your Circuit Board
- Etching the Circuit Board
- Soldering Components onto the Circuit Board
- Testing Your Circuit Board
- Case Studies: Successful Circuit Board Projects
- Expert Insights and Tips
- Conclusion
- FAQs
Introduction
Circuit boards are the backbone of modern electronics, playing a crucial role in the functionality of devices ranging from smartphones to home appliances. For beginners, the idea of building your own circuit board might seem daunting, but with the right guidance and resources, it can be an incredibly rewarding project. In this guide, we will explore the process of designing, etching, and assembling a circuit board from scratch.
Understanding Circuit Boards
A circuit board, or printed circuit board (PCB), is a flat board that connects electronic components using conductive pathways. Understanding the different types of circuit boards (single-sided, double-sided, and multilayer) and their applications is essential for any budding electronics enthusiast.
- Single-Sided PCBs: These boards have components mounted on one side only.
- Double-Sided PCBs: Components are mounted on both sides, allowing for more complex circuits.
- Multilayer PCBs: These consist of multiple layers of circuitry, used in advanced applications.
Components Required to Build a Circuit Board
Before starting your project, gather all necessary components. Here’s a list of essential items:
- PCB Material: Common materials include FR-4 and CEM-1.
- Electronic Components: Resistors, capacitors, diodes, and ICs.
- Soldering Tools: Soldering iron, solder, and flux.
- Etching Supplies: Ferric chloride or a similar etching solution.
- Design Software: Tools like Eagle or KiCad for PCB design.
Designing Your Circuit Board
The design phase is critical. Here’s a step-by-step guide:
- Choose a circuit design software and familiarize yourself with its features.
- Create a schematic: Lay out all components and connections.
- Convert the schematic to a PCB layout: Arrange components on the board.
- Check design rules: Ensure all components fit and connections are correct.
- Export the design files for etching.
Etching the Circuit Board
Once your design is ready, it’s time to etch your PCB. Follow these steps:
- Print the PCB design onto a transfer paper.
- Use a heat press or iron to transfer the design onto the copper board.
- Immerse the board in an etching solution until unwanted copper is removed.
- Clean the board and remove the transfer paper.
Soldering Components onto the Circuit Board
With the board etched and cleaned, you can now solder the components:
- Insert components into their designated spots on the PCB.
- Heat the soldering iron and apply solder to secure each component.
- Inspect each connection for quality and integrity.
Testing Your Circuit Board
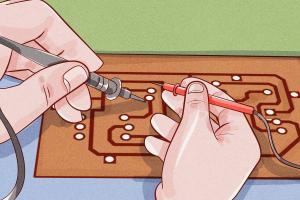
After soldering, testing is essential. Here’s how to ensure everything works:
- Use a multimeter to check for continuity in connections.
- Power the circuit and measure voltage at various points to ensure proper function.
- Debug any issues by tracing back through your design.
Case Studies: Successful Circuit Board Projects
Exploring real-world applications can provide inspiration and practical insight. Here are a few case studies:
1. DIY Arduino Shield
A beginner project that illustrates how to create a custom shield for Arduino, enhancing its functionality.
2. Custom LED Matrix Display
This project demonstrates how to build a circuit board for an LED matrix, focusing on design and programming aspects.
Expert Insights and Tips
Gleaning wisdom from experienced professionals can save you time and effort:
- Start with simple projects to build confidence.
- Always double-check your schematic before etching.
- Don’t rush the soldering process; take your time for quality connections.
Conclusion
Building a circuit board can be a fulfilling venture that enhances your understanding of electronics. With the steps outlined in this guide, you have the foundation to start creating your own circuit boards. Remember, practice and patience are key to mastering this skill.
FAQs
1. What tools do I need to build a circuit board?
You will need PCB material, electronic components, soldering tools, and etching supplies.
2. How do I choose the right PCB design software?
Look for software that fits your skill level; beginners may prefer user-friendly options like KiCad.
3. What is the difference between through-hole and surface-mount components?
Through-hole components have leads that go through the PCB, while surface-mount components are mounted directly on the surface.
4. Can I etch my PCB at home?
Yes, you can etch PCBs at home using simple materials like ferric chloride.
5. What safety precautions should I take while soldering?
Always work in a well-ventilated area, wear safety glasses, and handle the soldering iron carefully to avoid burns.
6. How can I troubleshoot a non-working circuit board?
Check for faulty solder joints, ensure all components are correctly placed, and test connections with a multimeter.
7. Is it possible to design multilayer PCBs at home?
While technically possible, designing multilayer PCBs is complex and typically requires professional manufacturing.
8. What are some common mistakes to avoid?
Common mistakes include poor soldering, incorrect component placement, and not following design rules.
9. How long does it take to build a simple circuit board?
Building a simple circuit board can take anywhere from a few hours to a couple of days, depending on your experience and the complexity of the design.
10. Where can I find inspiration for circuit board projects?
Check online forums, electronics blogs, and project websites like Instructables or Hackster.io for project ideas.
Random Reads
- How to get a pc game to work
- How to download psp games
- How to download pdfs
- How to fix iphone unavailable message
- How to fix earphones one side silent
- How to copy files to usb using command prompt
- Effective strategies remove worm viruses
- How to get to high hrothgar in skyrim
- Roblox error code 279 fix
- Rotate images in microsoft word