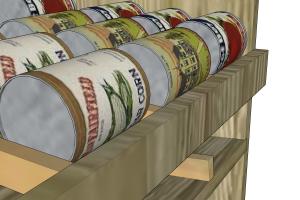
DIY Rotating Canned Food Shelf: The Ultimate Guide for Efficient Storage

-
Quick Links:
- Introduction
- Benefits of a Rotating Canned Food Shelf
- Materials Needed
- Tools Required
- Design Options
- Step-by-Step Guide
- Case Studies
- Expert Insights
- FAQs
Introduction
In an era where food preservation and efficient storage are more important than ever, creating a rotating canned food shelf can significantly enhance your pantry's functionality. A rotating canned food shelf allows you to easily access and organize canned goods, ensuring you use older products before newer ones. This guide provides a comprehensive overview of building your own rotating canned food shelf, including benefits, materials, step-by-step instructions, and expert insights.
Benefits of a Rotating Canned Food Shelf
Building a rotating canned food shelf comes with numerous advantages:
- Maximized Space: Efficiently utilizes vertical space in your pantry.
- Improved Accessibility: Easy access to all items, reducing the time spent searching.
- Food Rotation: Encourages the use of older canned goods first, minimizing waste.
- Customizable Design: Tailor the shelf to fit your specific needs and space constraints.
- Cost-Effective: DIY project saves money compared to purchasing ready-made shelves.
Materials Needed
To build your rotating canned food shelf, gather the following materials:
- Wood boards (1" x 12" for shelves, 1" x 2" for framing)
- Plywood (for the base and backing)
- Wood screws
- Wood glue
- Lazy Susan bearing (for rotation)
- Sandpaper
- Wood stain or paint (optional)
Tools Required
Ensure you have the following tools ready:
- Drill
- Screwdriver
- Miter saw or circular saw
- Measuring tape
- Level
- Clamps
Design Options
When it comes to designing your rotating canned food shelf, there are several options to consider:
1. Basic Rotating Shelf
A simple design consisting of a single lazy Susan rotating base with shelves attached.
2. Multi-Tier Rotating Shelf
This design features multiple layers, allowing for more canned goods to be stored vertically.
3. Wall-Mounted Rotating Shelf
For those with limited floor space, a wall-mounted option can save space while providing easy access.
Step-by-Step Guide
Follow these detailed steps to build your rotating canned food shelf:
Step 1: Measure Your Space
Determine the dimensions of your pantry space to ensure a perfect fit for your shelf.
Step 2: Cut the Wood
Using the miter saw, cut the wood boards according to your measurements. Ensure all cuts are straight and smooth.
Step 3: Assemble the Base
Attach the plywood base to the lazy Susan bearing using wood screws, ensuring it is secure.
Step 4: Create the Shelves
Attach wood boards to create shelves. Use wood glue and screws for stability.
Step 5: Attach the Shelves to the Base
Secure the shelves to the lazy Susan bearing, ensuring they rotate smoothly.
Step 6: Sand and Finish
Sand down any rough edges and apply wood stain or paint as desired.
Case Studies
Several families have successfully implemented rotating canned food shelves in their homes:
Case Study 1: The Smith Family
The Smiths installed a multi-tier rotating shelf in their tight kitchen space, allowing them to store twice the number of cans compared to their previous setup.
Case Study 2: Emergency Prepper Community
A group of emergency preppers built rotating shelves to facilitate better inventory management, ensuring they always have access to the oldest canned goods during crises.
Expert Insights
We consulted with home organization experts and DIY enthusiasts who shared their thoughts:
"Rotating shelves not only improve accessibility but also encourage better food management practices, especially for those who stock up on canned goods."