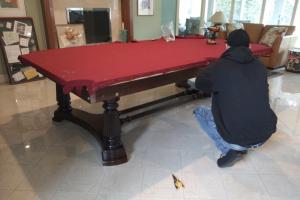
Ultimate Guide: How to Disassemble a Pool Table Like a Pro

-
Quick Links:
- Introduction
- Tools Needed
- Step-by-Step Disassembly Process
- Safety Tips
- Reassembly Tips
- Case Studies & Examples
- Expert Insights
- FAQs
Introduction
Disassembling a pool table is a task that can seem daunting, especially for those who have never attempted it before. However, with the right tools and a clear step-by-step guide, anyone can successfully take apart a pool table. Whether you're moving to a new home, redecorating, or just need to replace the felt, understanding how to disassemble a pool table is an essential skill. This guide will walk you through the entire process, ensuring that you can do so safely and effectively.
Tools Needed
Before you begin the disassembly process, you need to gather the necessary tools. Here's a list of what you'll need:
- Socket wrench or ratchet set
- Screwdriver (flat and Phillips)
- Pry bar
- Measuring tape
- Marker or chalk
- Plastic bags or containers (for screws and small parts)
- Blankets or padding (to protect the table during disassembly)
Step-by-Step Disassembly Process
Now, let’s dive into the step-by-step process of disassembling your pool table.
Step 1: Clear the Area
Before you start, make sure the area around the pool table is cleared of any furniture or obstacles. This will give you enough space to work and maneuver the parts.
Step 2: Remove the Accessories
Remove all accessories from the table, including the balls, cues, and any other items. Store them in a safe place to avoid any damage.
Step 3: Remove the Felt
Carefully peel back the felt from the surface of the table. Use a flat screwdriver or pry bar to gently lift it without tearing. If it’s attached with staples, you’ll need to pull those out as well. Be sure to keep the felt intact if you plan to reuse it.
Step 4: Take Off the Rails
Next, locate the bolts or screws that secure the rails to the table. Use your socket wrench or screwdriver to remove them. Once they are unscrewed, lift the rails off gently. This may require some assistance, as they can be heavy.
Step 5: Remove the Slate
Most pool tables have slate bed sections. Check for screws or bolts holding the slate in place. Remove these carefully, and then lift the slate off. Note that slate is quite heavy, so it’s advisable to have a few people help with this step.
Step 6: Disassemble the Frame
With the slate removed, you can now access the frame of the table. Unscrew any remaining screws or bolts to take the frame apart. Make sure to keep track of all the screws and parts as you go.
Step 7: Clean and Pack
Once everything is disassembled, clean the parts and pack them securely for transportation. Use blankets or padding to prevent any damage during the move.
Safety Tips
Disassembling a pool table can be physically demanding. Here are some safety tips to keep in mind:
- Always wear gloves to protect your hands from sharp edges.
- Use proper lifting techniques to avoid back injuries.
- Have a friend assist with heavy components like slate.
- Ensure the area is well-lit to see all parts clearly.
Reassembly Tips
Once you’ve successfully disassembled your pool table, you may need to reassemble it later. Here are some tips for that process:
- Keep all screws and small parts in labeled bags.
- Follow the disassembly steps in reverse order.
- Ensure that the felt is properly stretched and secured to avoid wrinkles.
- Double-check that all screws are tightened to prevent any instability.
Case Studies & Examples
Many homeowners have tackled the project of disassembling their pool tables. For instance, John from California shared his experience of relocating his 8-foot table. He found that documenting each step with photographs helped him remember how to reassemble it later. This real-world insight highlights the importance of being organized during disassembly.
Expert Insights
According to expert movers at Moving.com, careful disassembly is crucial for maintaining the integrity of the table. They recommend always consulting the manufacturer’s guidelines before starting the process.
FAQs
1. How long does it take to disassemble a pool table?
It typically takes around 2 to 4 hours, depending on your experience and the table's complexity.
2. Do I need special tools to disassemble a pool table?
No, basic hand tools like wrenches and screwdrivers are usually sufficient.
3. Can I disassemble a pool table by myself?
While it's possible, having a friend assist you is recommended, especially for heavy parts.
4. What if I lose some screws during disassembly?
Replacement screws can often be found at hardware stores or directly from the manufacturer.
5. Is it safe to move the slate by myself?
No, slate is heavy and can break easily. Always have someone assist when moving it.
6. How can I preserve the felt during disassembly?
Gently peel it away and store it flat in a clean, dry area to prevent wrinkles or damage.
7. Can I reuse the felt after disassembly?
Yes, as long as it is not damaged during the removal process.
8. What should I do if the pool table is damaged during disassembly?
Contact a professional repair service if you notice any significant damage.
9. Are there any specific brands that are easier to disassemble?
Some brands have user-friendly designs, making disassembly easier. Look for customer reviews on specific models.
10. Is it worth hiring professionals for disassembly?
If you're unsure or uncomfortable, hiring professionals can save time and prevent damage.
Conclusion
Disassembling a pool table may seem intimidating at first, but with this comprehensive guide, you should be well-equipped to tackle the project. Remember to take your time, follow safety precautions, and document your process to make reassembly easy. Happy disassembling!