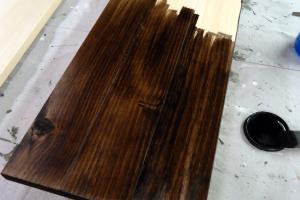
Mastering the Art of Wood Dyeing: A Comprehensive Guide for Beginners and Experts

-
Quick Links:
- Introduction
- Tools and Materials Needed
- Types of Wood Dyes
- Preparation of Wood for Dyeing
- The Dyeing Process
- Finishing Techniques After Dyeing
- Case Studies and Examples
- Expert Insights
- Common Issues and Troubleshooting
- FAQs
Introduction
Dyeing wood is an art that transforms plain timber into stunning, colorful pieces that can enhance the beauty of any project, from furniture to decorative items. Whether you are a seasoned woodworker or a DIY enthusiast, knowing how to dye wood is a valuable skill that opens up a world of creative possibilities. In this comprehensive guide, we will explore the different types of wood dyes, the tools and materials you need, and the step-by-step process to achieve professional-quality results.
Tools and Materials Needed
Before diving into the dyeing process, it’s essential to gather all necessary tools and materials. Here’s a comprehensive list:
- Wood: Choose the type of wood you want to dye.
- Wood dye: Natural or synthetic, depending on your preference.
- Applicators: Brushes, rags, or spray bottles.
- Sandpaper: For surface preparation.
- Protective gear: Gloves, masks, goggles.
- Sealer or finish: To protect the dyed surface.
- Container: For mixing dye solutions.
Types of Wood Dyes
Understanding the different types of wood dyes will help you make informed choices for your projects:
1. Natural Dyes
Natural dyes are derived from plants, minerals, and insects. Common sources include:
- Walnut hulls: Produces a rich brown color.
- Onion skins: Yields yellow to orange shades.
- Indigo: Offers vibrant blue hues.
2. Synthetic Dyes
Synthetic dyes are man-made and often have a broader range of colors and better lightfastness. They include:
- Water-based dyes: Easy to use and clean up.
- Alcohol-based dyes: Quick-drying and vibrant.
Preparation of Wood for Dyeing
Proper preparation is vital for successful dyeing. Follow these steps:
- Sand the wood: Use fine-grit sandpaper to create a smooth surface.
- Clean the surface: Remove dust and debris using a damp cloth.
- Test the dye: Always test on a scrap piece of wood first to see the final color.
The Dyeing Process
Now that your wood is prepared, here’s how to dye it effectively:
- Mix the dye: Follow the manufacturer’s instructions for the right concentration.
- Apply the dye: Use your chosen applicator and apply in long, even strokes.
- Let it dry: Allow the dye to penetrate for the recommended time before wiping off excess.
- Repeat if necessary: Multiple coats can enhance the depth of color.
Finishing Techniques After Dyeing
Once the dye has dried, it’s essential to apply a finish to protect your work:
- Sealants: Use a clear coat to lock in the color.
- Wax: For a soft sheen and additional protection.
- Oil finishes: Enhance the depth and warmth of the dye.
Case Studies and Examples
Let’s explore some inspiring examples of wood dyeing projects:
- Case Study 1: A DIY coffee table dyed with walnut stain, showcasing a rich, warm finish.
- Case Study 2: A set of kitchen cabinets transformed with blue alcohol dye, creating a modern look.
Expert Insights
We spoke with several woodworking experts to gather their insights on dyeing wood:
"Always test your dye on scrap wood first. The type of wood can drastically affect how the dye looks once applied." - Jane Doe, Master Woodworker
Common Issues and Troubleshooting
If you encounter issues during the dyeing process, here are common problems and solutions:
- Uneven color: Ensure even application and consider sanding between coats.
- Fading: Use a UV-resistant finish to protect from sunlight.
FAQs
- 1. Can I use food coloring to dye wood?
- Yes, food coloring can be used but may not provide long-lasting results.
- 2. How long does wood dye take to dry?
- Drying times vary; typically, it takes 1-2 hours for water-based dyes.
- 3. Is wood dye waterproof?
- Wood dye is not waterproof; a finish should be applied for protection.
- 4. Can I mix different dyes?
- Yes, experimenting with dye mixtures can yield unique colors.
- 5. Do I need to sand after dyeing?
- It is not necessary; however, light sanding before the final finish can help.
- 6. What is the best wood for dyeing?
- Softwoods and hardwoods like maple and oak absorb dye well.
- 7. How can I remove stains from wood dye?
- Use a wood stripper or sand the area to remove unwanted dye.
- 8. What is the difference between stain and dye?
- Stain sits on the surface while dye penetrates deep into the wood fibers.
- 9. Can I use a spray can for dye application?
- Yes, spray application can provide a smooth, even coat.
- 10. How can I achieve a darker color with dye?
- Apply additional coats or choose a dye with a darker base color.
Random Reads
- How to tell if a usb cable supports hi speed fast charging
- How to make a gravel driveway
- How to make a hidden camera
- How to make a gradient in photoshop
- Hide apps samsung galaxy
- Hide wireless network
- Heart hands emoji meaning
- How to clean your microwave naturally with lemon
- How to make a computer diary
- How to show hidden files and folders on a mac