Ultimate Guide on How to Erase Ubuntu: Step-by-Step Instructions

-
Quick Links:
- Introduction
- Why Erase Ubuntu?
- Preparation Before Erasing Ubuntu
- Methods to Erase Ubuntu
- Step-by-Step Guide to Erase Ubuntu
- Backing Up Your Data
- Post-Erasure Steps
- Common Mistakes to Avoid
- Case Studies
- Expert Insights
- FAQs
Introduction
Ubuntu, a popular Linux distribution, offers a user-friendly experience for both beginners and seasoned users. However, there are times when you may need to erase Ubuntu from your system. Whether you're transitioning to another operating system or simply reclaiming disk space, this comprehensive guide will walk you through the process of erasing Ubuntu entirely.
Why Erase Ubuntu?
There are several reasons why you might want to erase Ubuntu:
- Switching to a different operating system, such as Windows or macOS.
- Reclaiming disk space for other applications or files.
- Resolving persistent issues or bugs in your current Ubuntu installation.
- Preparing your computer for resale or donation.
Preparation Before Erasing Ubuntu
Before you begin the process of erasing Ubuntu, it’s vital to prepare adequately:
- Backup Your Data: Ensure that all important data is backed up to an external drive or cloud storage.
- Gather Necessary Tools: You may need a bootable USB drive or installation media for the operating system you plan to install next.
- Check Disk Space: Verify that you have enough disk space for the new operating system or any other files you wish to retain.
Methods to Erase Ubuntu
There are several methods to erase Ubuntu, and the choice of method depends on your preferences and technical skills:
- Using the Ubuntu Installation Media
- Using a Live USB or CD
- Using Disk Management Tools
- Manually Removing Ubuntu Partitions
Step-by-Step Guide to Erase Ubuntu
Here’s a detailed guide to erasing Ubuntu using the installation media:
Step 1: Create Installation Media
Download the ISO image of the operating system you want to install and create a bootable USB drive using tools like Rufus or UNetbootin.
Step 2: Boot from the Installation Media
Insert the USB drive and restart your computer. Access the BIOS/UEFI settings to boot from the USB drive.
Step 3: Start the Installation Process
Once the installation media loads, choose the option to install the new operating system.
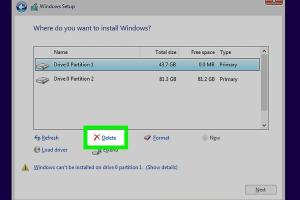
Step 4: Erase Ubuntu Partitions
During the installation process, you will be prompted to choose the type of installation. Select the option to erase existing Ubuntu partitions.
Step 5: Follow On-Screen Instructions
Complete the installation by following the on-screen instructions until the process is finished.
Backing Up Your Data
Before erasing Ubuntu, backing up your data is crucial. Here are some methods to do so:
- External Hard Drives: Use an external hard drive to store files.
- Cloud Storage: Services like Google Drive or Dropbox can be used to back up important documents.
- Backup Software: Tools like Timeshift can help create system backups.
Post-Erasure Steps
After erasing Ubuntu, follow these steps:
- Install New Operating System: If you plan to install another OS, do so immediately.
- Verify Disk Space: Check that the disk has been cleared and is ready for new installations.
- Update Drivers: Ensure that all necessary drivers for your new OS are installed and updated.
Common Mistakes to Avoid
Here are some common pitfalls to avoid when erasing Ubuntu:
- Not backing up data before erasure.
- Choosing the wrong installation media to boot from.
- Failing to wipe partitions correctly, leading to data recovery issues.
Case Studies
Real-world examples can provide valuable insights:
Case Study 1: User Transitioning to Windows
A user faced performance issues with Ubuntu and decided to switch to Windows. By following the outlined steps, they successfully erased Ubuntu without data loss.
Case Study 2: Preparing a Computer for Resale
Another user needed to erase Ubuntu to prepare a laptop for sale. They backed up their data and followed the erasure process, ensuring all personal data was removed.
Expert Insights
Experts recommend always verifying your installation media before starting the erasure process. This ensures that the new OS installs smoothly without errors.
FAQs
1. What happens to my data when I erase Ubuntu?
Your data will be deleted unless you back it up before erasure.
2. Can I recover data after erasing Ubuntu?
Data recovery is possible but becomes more complicated the longer you wait after deletion.
3. Is it safe to erase Ubuntu?
Yes, as long as you follow the correct procedures and back up your data.
4. Do I need special tools to erase Ubuntu?
No special tools are needed, but having a bootable USB is essential.
5. Can I erase Ubuntu without losing my other OS?
Yes, if you choose the correct partition to erase during the installation process.
6. How long does it take to erase Ubuntu?
The process can take anywhere from a few minutes to an hour, depending on your system and the method used.
7. Can I erase Ubuntu from a Live CD?
Yes, a Live CD can be used to access your disk management tools and erase Ubuntu.
8. Will erasing Ubuntu affect my Windows installation?
Not if you ensure you only erase the Ubuntu partitions.
9. What if I encounter errors while erasing Ubuntu?
Consult online forums or professional services if you face issues.
10. Is there a way to erase Ubuntu remotely?
Remote erasure is not typically possible. You must have physical access to the machine.
Conclusion
Erasing Ubuntu can be a straightforward process if you follow the right steps. With proper preparation and an understanding of the methods available, you can reclaim your system and transition to a new operating system with ease.
For more in-depth information on operating systems, visit Linux.org and Ubuntu's official website.
Random Reads