Ultimate Guide: How to Felt a Pool Table for a Fresh Look and Improved Game

-
Quick Links:
- 1. Introduction
- 2. Why Felt a Pool Table?
- 3. Tools and Materials Needed
- 4. Preparation Steps
- 5. Step-by-Step Instructions
- 6. Common Mistakes to Avoid
- 7. Case Studies
- 8. Maintenance Tips for Your Pool Table
- 9. Conclusion
- 10. FAQs
1. Introduction
Felt is an essential component of a pool table, affecting both its appearance and gameplay. Over time, the felt can wear out, tear, or become discolored, necessitating replacement. This detailed guide will walk you through the process of felting a pool table, ensuring you have all the knowledge and tools needed to achieve a professional finish.
2. Why Felt a Pool Table?
Felt replacement is crucial for several reasons:
- Improved Playability: Fresh felt provides a smooth surface for the balls to roll, enhancing gameplay.
- Aesthetic Appeal: New felt revitalizes the look of your table, making it more inviting.
- Preservation of the Table: Regular maintenance, including felt replacement, can prolong the life of your pool table.
3. Tools and Materials Needed
Before starting the felting process, gather the following tools and materials:
- New pool table felt (choose the appropriate color and type)
- Staple gun and staples
- Utility knife
- Measuring tape
- Scissors
- Brush or vacuum for cleaning
- Level (to ensure the table is even)
- Adhesive spray (optional for extra grip)
4. Preparation Steps
Preparation is key to a successful felting job. Follow these steps:
- Disassemble the Table: Remove the pockets and rails carefully to avoid damage.
- Clean the Surface: Use a brush or vacuum to remove dust and debris.
- Check for Damage: Inspect the slate for cracks or issues that may need repairs before applying new felt.
5. Step-by-Step Instructions
Now that you have prepared your table, follow these detailed steps to felt it:
Step 1: Measure and Cut the Felt
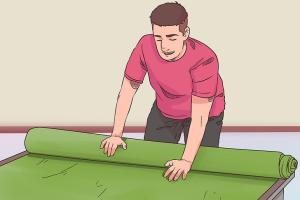
Measure the dimensions of your pool table and cut the felt accordingly, ensuring you leave extra material for wrapping around the edges.
Step 2: Lay Down the Felt
Position the felt over the slate and ensure it is centered. Smooth out any wrinkles.
Step 3: Staple the Felt Down
Starting from the center, staple the felt to the underside of the table. Work your way outwards, pulling the felt taut as you go.
Step 4: Trim Excess Felt
Once secured, trim away any excess felt, ensuring a clean edge around the table.
Step 5: Reattach Pockets and Rails
Reinstall the pockets and rails, ensuring everything fits snugly against the new felt.
6. Common Mistakes to Avoid
Here are some pitfalls to watch out for during the felting process:
- Not Cleaning Properly: Failing to clean the surface can lead to bumps and an uneven finish.
- Overstretching the Felt: Pulling too hard can cause the felt to tear or warp.
- Using Incorrect Tools: Using the wrong tools can result in damage to the table or poor installation.
7. Case Studies
To illustrate the importance of proper felting, consider these examples:
Case Study 1: The Family Game Room
In a suburban home, a family decided to felt their aging pool table. After following the steps outlined in this guide, they reported a significant improvement in gameplay and overall enjoyment.
Case Study 2: A Local Pool Hall
A local pool hall updated the felt on all their tables. They noticed an increase in customers and satisfaction, attributing it to the fresh, vibrant felt.
8. Maintenance Tips for Your Pool Table
To extend the life of your new felt, consider these maintenance tips:
- Regularly brush the felt to remove chalk and debris.
- Avoid eating or drinking over the table.
- Use a cover when the table is not in use to protect it from dust and sunlight.
9. Conclusion
Felting a pool table is a rewarding DIY project that can enhance both the appearance and playability of your table. By following the steps outlined in this guide, you can achieve a professional finish that will impress your friends and family. Remember to maintain your felt regularly to keep your table looking and performing its best.
10. FAQs
1. How often should I felt my pool table?
It is recommended to felt your pool table every 3-5 years, depending on usage.
2. Can I felt my pool table alone?
Yes, but having a helper can make the process easier, especially when handling large pieces of felt.
3. What type of felt should I use for my pool table?
Choose a high-quality wool or wool blend felt designed specifically for pool tables.
4. Is it necessary to replace the felt if it has minor tears?
Minor tears can be patched, but significant damage usually requires full replacement.
5. Can I use regular fabric instead of pool table felt?
No, regular fabric won’t provide the same level of performance and durability as pool table felt.
6. What tools do I need to install pool table felt?
You will need a staple gun, utility knife, measuring tape, and possibly adhesive spray.
7. How do I know if my felt needs to be replaced?
Signs include visible wear, discoloration, or loss of smoothness in gameplay.
8. Is it difficult to remove old felt?
Removing old felt can be tricky but is manageable with a utility knife and some patience.
9. What is the cost of new pool table felt?
The cost can vary widely based on quality and size, typically ranging from $50 to $150.
10. Will new felt improve my game?
Yes, new felt can significantly enhance the playing experience by providing a smoother surface.