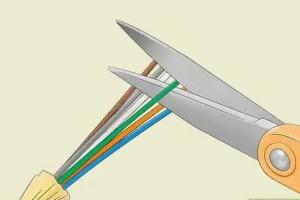
Ultimate Guide to Fixing a Cut Fiber Optic Cable: A Step-by-Step Approach

-
Quick Links:
- Introduction
- Understanding Fiber Optic Cables
- Why Fiber Optic Cables Get Cut
- Tools Required for Repair
- Step-by-Step Guide to Fixing a Cut Fiber Optic Cable
- Common Mistakes to Avoid
- Case Studies
- Expert Insights
- Conclusion
- FAQs
Introduction
Fiber optic cables are essential for high-speed internet and telecommunications. However, accidents can happen, leading to cuts or breaks in the cable. Understanding how to effectively repair a cut fiber optic cable can save you time and money, ensuring that your internet connection remains uninterrupted.
Understanding Fiber Optic Cables
Fiber optic cables transmit data as light signals through glass or plastic fibers. They are known for their high speed and capacity over long distances. Knowing how these cables work is crucial for effective repairs.
Components of Fiber Optic Cables
- Core: The thin glass center where light travels.
- Cladding: A layer that reflects light back into the core.
- Buffer Coating: Protects the fiber from damage.
- Outer Jacket: The protective outer layer of the cable.
Why Fiber Optic Cables Get Cut
There are several reasons why fiber optic cables may become damaged:
- Accidental cuts during landscaping or construction.
- Animal interference.
- Environmental wear and tear.
- Improper installation.
Tools Required for Repair
Before starting the repair, you will need several tools:
- Fiber optic cleaver
- Fusion splicer
- Stripping tool
- Protective eyewear
- Cleaning supplies (isopropyl alcohol, lint-free wipes)
Step-by-Step Guide to Fixing a Cut Fiber Optic Cable
Step 1: Assess the Damage
Examine the cut area to determine the extent of the damage. Make sure to check both ends of the cable for any further damage.
Step 2: Gather Your Tools
Ensure you have all necessary tools within reach before starting the repair process.
Step 3: Clean the Fiber Ends
Using a lint-free wipe and isopropyl alcohol, clean the ends of the fiber optic cable to remove any dust or debris.
Step 4: Strip the Fiber
Using the stripping tool, carefully strip the outer jacket and buffer coating to expose the core and cladding of the fiber.
Step 5: Cut the Fiber
Use the fiber optic cleaver to make a clean, straight cut on both ends of the fiber to ensure proper alignment during splicing.
Step 6: Splice the Fiber
Utilize the fusion splicer to join the two fiber ends. Follow the manufacturer's instructions for your specific splicing device.
Step 7: Test the Connection
After splicing, test the fiber connection using an optical power meter to ensure the repair was successful.
Common Mistakes to Avoid
- Neglecting to clean the fiber ends properly, which can lead to signal loss.
- Using improper tools or techniques can compromise the repair.
- Failing to test the connection after repairs.
Case Studies
Case Study 1: Residential Fiber Repair
A homeowner accidentally cut their fiber optic cable while digging in the garden. They followed the steps outlined above and managed to restore their internet service quickly.
Case Study 2: Commercial Installation
A telecommunications company faced multiple cut cables due to construction work. By training their technicians in fiber repair, they reduced downtime significantly.
Expert Insights
Experts recommend regular maintenance checks on installed fiber optic cables to prevent unexpected cuts. Investing in protective measures, such as conduit installation, can also help mitigate risk.
Conclusion
Repairing a cut fiber optic cable is a manageable task if you have the right tools and follow a systematic approach. By understanding the components of fiber optics and applying the step-by-step guide, you can effectively restore your connection.
FAQs
1. Can I repair a fiber optic cable on my own?
Yes, with the right tools and knowledge, you can repair a fiber optic cable yourself.
2. What tools do I need to fix a fiber optic cable?
You will need a fiber optic cleaver, fusion splicer, stripping tool, and cleaning supplies.
3. How long does it take to repair a cut fiber optic cable?
The repair process can take anywhere from 30 minutes to a couple of hours, depending on your experience.
4. What happens if I don't repair a cut fiber optic cable?
A cut fiber optic cable will result in loss of internet connectivity and may affect services relying on fiber optics.
5. Is it expensive to fix a cut fiber optic cable?
If you hire a professional, costs can vary. DIY repairs can save money if you have the right tools.
6. Can I use regular tape to fix a cut fiber optic cable?
No, using tape will not restore the functionality of a cut fiber optic cable. Proper splicing is required.
7. How can I prevent fiber optic cables from getting cut?
Installing protective conduits and marking the location of cables can help prevent accidental cuts.
8. What is fiber optic splicing?
Fiber optic splicing is the process of connecting two fiber optic cables together to restore connectivity.
9. Why is cleaning the fiber ends important?
Cleaning the fiber ends is crucial for minimizing signal loss and ensuring a successful splice.
10. Where can I find professional help for fiber optic repair?
Look for licensed telecommunications companies or certified technicians in your area.
Random Reads