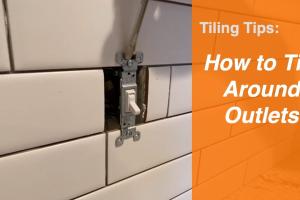
Mastering the Art of Tiling Around Outlets: A Comprehensive Guide

-
Quick Links:
- Introduction
- Essential Tools and Materials
- Preparation Steps
- Measuring and Marking
- Cutting Tiles
- Installing the Tiles
- Finishing Touches
- Common Mistakes to Avoid
- Case Studies and Examples
- Expert Insights
- FAQs
Introduction
Tiling around electrical outlets can seem daunting for DIY enthusiasts and even seasoned professionals. However, with the right techniques and a little patience, you can achieve a professional-looking finish that enhances the aesthetic appeal of your space. This guide will walk you through every step, ensuring that you tile around outlets safely and effectively.Essential Tools and Materials
Before you begin tiling, gather the necessary tools and materials. Here’s a comprehensive list:- Tools:
- Tile cutter or wet saw
- Notched trowel
- Level
- Measuring tape
- Pencil
- Utility knife
- Sponge
- Bucket for grout
- Tile spacers
- Safety goggles
- Materials:
- Tiles (ceramic, porcelain, or any preferred type)
- Thin-set mortar
- Grout (sanded or unsanded depending on tile spacing)
- Sealer (if necessary)
Preparation Steps
Preparation is key to a successful tiling project. Follow these steps to get ready: 1. **Turn Off Power:** Safety first! Ensure that the power to the outlet is turned off at the circuit breaker. 2. **Remove Outlet Covers:** Use a screwdriver to carefully remove the outlet cover plates. Set them aside for reinstallation later. 3. **Protect the Outlets:** Place painter’s tape around the outlets to prevent mortar or grout from getting into the electrical box.Measuring and Marking
Accurate measurements and markings make all the difference in achieving a professional look. 1. **Measure the Area:** Use your measuring tape to determine the area where tiles will be installed around the outlets. 2. **Mark the Layout:** Use a pencil to outline where the tiles will go. Ensure that the outlets are clearly marked, and plan for any necessary cuts around them.Cutting Tiles
Cutting tiles accurately is essential, especially around outlets. Here’s how to do it: 1. **Measure Twice, Cut Once:** Double-check your measurements before cutting. 2. **Use a Tile Cutter or Wet Saw:** Depending on your tile type, use the appropriate tool for cutting. For intricate cuts, a wet saw is often more effective.Installing the Tiles
Once your tiles are cut, it’s time to install them. 1. **Apply Thin-Set Mortar:** Use the notched trowel to spread thin-set mortar onto the wall, covering an area slightly larger than the tile. 2. **Position the Tile:** Press the tile firmly into the mortar, ensuring it aligns with your markings. 3. **Insert Tile Spacers:** Place tile spacers between tiles to maintain uniform spacing for grout. 4. **Continue Until Completed:** Repeat the process for each tile around the outlet.Finishing Touches
After all tiles are installed, it’s time for the finishing touches. 1. **Grouting:** Allow the mortar to cure as per manufacturer instructions. Once dry, remove the tile spacers and apply grout to the spaces between tiles. 2. **Clean Excess Grout:** Use a damp sponge to wipe away excess grout from the surface of the tiles. 3. **Reinstall Outlet Covers:** Once the grout has dried, replace the outlet covers carefully.Common Mistakes to Avoid
Recognizing common pitfalls can save you time and frustration. - **Not Planning Cuts Ahead:** Always measure and plan cuts ahead of time. - **Ignoring Drying Times:** Allow sufficient drying time between each step to avoid issues later on. - **Skipping Sealer:** If your grout requires sealing, make sure to do it after it has cured properly.Case Studies and Examples
To further illustrate the process, let’s explore a couple of case studies from individuals who have successfully tiled around outlets. **Case Study 1: Kitchen Backsplash** A homeowner renovated their kitchen by tiling around electrical outlets for a backsplash. They followed our outlined steps and opted for ceramic tiles, resulting in a sleek, modern appearance. **Case Study 2: Bathroom Update** In a bathroom update, another DIY enthusiast faced challenges with irregular outlet positioning. They used a wet saw for precise cuts, ultimately achieving a beautiful tiled effect around the outlets.Expert Insights
We reached out to tiling experts for their insights on this process. Here’s what they had to say: - **“Always prioritize safety. Turn off the power and protect outlets during installation.”** - **“Using a wet saw can significantly improve the quality of your cuts around outlets.”** - **“Don’t rush the grouting process; it can make or break the overall appearance.”**FAQs
1. Can I tile directly over existing outlet covers?
No, it's important to remove outlet covers to ensure a proper fit and finish.
2. What type of tile is best for kitchens and bathrooms?
Ceramic and porcelain tiles are ideal due to their durability and moisture resistance.
3. How long does it take for grout to dry?
Typically, grout takes about 24 hours to dry, but always check manufacturer guidelines.
4. Should I seal my grout?
Yes, sealing grout can help prevent stains and moisture damage.
5. Can I use any type of thin-set mortar?
Choose a thin-set mortar suitable for your tile type and the surface you're tiling.
6. How do I clean my tiles after installation?
Use a damp sponge to remove any mortar or grout residue, and then follow up with a gentle tile cleaner.
7. Is it necessary to use tile spacers?
Yes, tile spacers help maintain even spacing for grout lines.
8. What if my tiles don’t fit perfectly around the outlet?
It’s common to have some irregular cuts; use caulk to fill any gaps if necessary.
9. Can I tile around a GFCI outlet?
Yes, but ensure the outlet is properly protected and that tiles are cut accurately around it.
10. What tools do I need to cut tiles around outlets?
A tile cutter or wet saw is recommended for making precise cuts around electrical outlets.
Random Reads