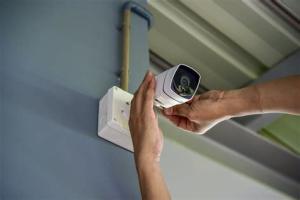
Complete Guide on How to Install a Security Camera System for Your House

-
Quick Links:
- Introduction
- Benefits of Installing a Security Camera System
- Types of Security Cameras
- Planning Your Installation
- Tools and Equipment Needed
- Step-by-Step Installation Guide
- Common Mistakes to Avoid
- Maintaining Your Security Camera System
- Case Study: Real-World Installation
- Expert Insights
- FAQs
Introduction
With the rise in crime rates and the increasing need for home security, installing a security camera system has become a necessity for homeowners. Not only does it provide peace of mind, but it also acts as a deterrent to potential intruders. This comprehensive guide will walk you through the entire process of installing a security camera system, ensuring you understand every detail from planning to execution.
Benefits of Installing a Security Camera System
- Enhanced Security: Cameras can deter crime and provide valuable evidence in case of incidents.
- Remote Monitoring: Many systems allow you to view live feeds from anywhere using your smartphone.
- Insurance Benefits: Having a security system may lower your home insurance premiums.
- Increased Property Value: Homes with security systems often sell for more.
Types of Security Cameras
When selecting a security camera system, consider the different types available:
- Indoor Cameras: Ideal for monitoring the interior of your home.
- Outdoor Cameras: Designed to withstand weather conditions and provide a wider field of view.
- Wireless Cameras: Easier to install with no need for extensive wiring.
- Smart Cameras: Integrate with your home automation system and allow remote access.
Planning Your Installation
Before diving into installation, it’s crucial to plan:
- Assess Your Needs: Determine which areas of your home need surveillance.
- Choose Camera Locations: Select strategic locations for optimal coverage.
- Check Wi-Fi Range: Ensure your cameras will have a strong signal if they are wireless.
- Consider Power Sources: Identify where your power outlets are located.
Tools and Equipment Needed
Gather the necessary tools and equipment for installation:
- Drill and drill bits
- Screwdriver set
- Cable management clips
- Measuring tape
- Level
- Security camera system package
Step-by-Step Installation Guide
Step 1: Mount the Cameras
Using the drill, mount your cameras in the chosen locations. Ensure they are secure and positioned for maximum visibility.
Step 2: Run the Cables
If you’re using wired cameras, run the cables to the designated power sources while ensuring they are hidden from view for aesthetic purposes.
Step 3: Connect to Power
Plug in the cameras and ensure they power on. If using wireless cameras, ensure they are connected to the Wi-Fi network.
Step 4: Configure Your System
Follow the manufacturer’s instructions to set up your camera system, including adjusting settings for notifications and recording preferences.
Step 5: Test the System
Once everything is set up, conduct a test to make sure all cameras are functioning correctly and capturing the desired areas.
Common Mistakes to Avoid
- Not considering the field of view when placing cameras.
- Ignoring Wi-Fi strength and range.
- Failing to secure cables properly.
- Neglecting to regularly maintain and update the system.
Maintaining Your Security Camera System
Regular maintenance is key to ensuring your security system operates effectively:
- Check camera lenses for dirt and clean them if necessary.
- Update the system firmware regularly.
- Review footage periodically to ensure cameras are functioning as expected.
Case Study: Real-World Installation
In a suburban neighborhood, a family installed a 4-camera system around their home. After a series of break-ins in the area, they documented the process and shared their experience, emphasizing the importance of planning camera placement and regularly reviewing footage. The cameras helped them identify suspicious activity, leading to a neighborhood watch initiative.
Expert Insights
Industry experts recommend considering both indoor and outdoor cameras for full coverage. Additionally, integrating motion detection features can significantly enhance your security system's effectiveness.
FAQs
1. How much does it cost to install a security camera system?
The cost can vary widely based on the number of cameras and the complexity of the installation. On average, expect to spend between $200 to $1,500.
2. Can I install a security camera system myself?
Yes, many homeowners choose to install their systems themselves using the step-by-step guides provided by the manufacturer.
3. Do I need a permit to install security cameras?
In some areas, a permit may be required. It's best to check local regulations before installation.
4. How long do security cameras last?
With proper maintenance, most security cameras can last 5-10 years.
5. What should I do if my camera stops working?
Check the power source, ensure the camera is connected to the network, and refer to the troubleshooting section of the manual.
6. Can I view my security cameras remotely?
Yes, most modern security camera systems offer remote viewing capabilities via smartphone apps or web interfaces.
7. What is the best placement for security cameras?
Install cameras at entry points (doors and windows) and high-traffic areas like driveways and backyards.
8. Are wireless cameras better than wired?
Wireless cameras are easier to install but may be less reliable than wired cameras if the Wi-Fi signal is weak.
9. Can security cameras be hacked?
While security cameras can be vulnerable, using strong passwords and updating firmware can help protect against hacking.
10. How do I store footage from my security cameras?
Most systems allow you to store footage locally on a DVR or cloud-based storage options.