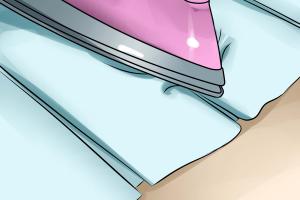
Mastering the Art of Ironing Curtains: A Complete Guide for Homeowners

-
Quick Links:
- Introduction
- Understanding Different Curtain Fabrics
- Preparation Before Ironing Curtains
- Step-by-Step Guide to Ironing Curtains
- Common Mistakes to Avoid
- Tips for Maintaining Wrinkle-Free Curtains
- Case Studies and Expert Insights
- FAQs
Introduction
Curtains play a significant role in enhancing the aesthetic appeal of a room. However, over time, they can become wrinkled and dull, detracting from their beauty. Learning how to iron curtains properly can restore their crisp look and feel. This comprehensive guide will provide you with everything you need to know about ironing curtains, from understanding different fabrics to expert tips and common mistakes to avoid.
Understanding Different Curtain Fabrics
Before you start ironing your curtains, it's important to understand the type of fabric they are made from, as different materials require different handling:
- Cotton: One of the most common fabrics for curtains, cotton is typically easy to iron and can withstand high heat.
- Polyester: This synthetic fabric is more heat-sensitive, so it's advisable to use a lower temperature when ironing.
- Silk: A luxurious option that requires special care; use a low-heat setting and a pressing cloth to avoid damage.
- Linen: Known for its wrinkled appearance, linen curtains can take high heat, making them easier to iron.
- Velvet: A thicker fabric that requires a delicate approach; steam is often more effective than direct heat.
Preparation Before Ironing Curtains
Preparation is key to achieving the best results when ironing curtains. Follow these steps:
- Check the Care Label: Always refer to the care label on your curtains for specific ironing instructions.
- Gather Necessary Tools: You will need an iron, ironing board, a spray bottle with water (optional), and a pressing cloth (for delicate fabrics).
- Remove Dust and Dirt: Vacuum your curtains or shake them out to eliminate dust before ironing.
- Hang Curtains Up: For best results, consider hanging your curtains on a rod before ironing to allow for better access and to see how they fall.
Step-by-Step Guide to Ironing Curtains
Follow this detailed step-by-step process to iron your curtains effectively:
Step 1: Set Up Your Ironing Station
Choose a comfortable and spacious area to set up your ironing board. Ensure your iron is clean and filled with water if you’re using the steam feature.
Step 2: Test the Heat
Before you start ironing, test the heat on a small, inconspicuous area of the fabric to prevent damage.
Step 3: Start from the Top
Begin ironing from the top of the curtain, moving downwards. This way, you avoid pressing down wrinkles that you've already smoothed out.
Step 4: Use the Right Technique
Use long, smooth strokes rather than harsh back-and-forth motions. For delicate fabrics, use a pressing cloth to protect the material.
Step 5: Pay Attention to Details
Don’t forget to iron the hems, seams, and any decorative elements. This attention to detail will ensure a polished look.
Step 6: Hang Immediately
Once you’ve finished ironing, hang the curtains immediately to prevent new wrinkles from forming.
Common Mistakes to Avoid
Here are some common pitfalls to avoid when ironing curtains:
- Ignoring the Care Label: Always check the manufacturer's instructions.
- Using Too High Heat: High temperatures can damage delicate fabrics.
- Not Using Steam: For stubborn wrinkles, steam can be more effective than dry ironing.
- Over-Ironing: This can flatten the fabric and ruin its texture.
Tips for Maintaining Wrinkle-Free Curtains
To keep your curtains looking fresh, follow these maintenance tips:
- Regularly vacuum or shake out your curtains to remove dust.
- Consider using fabric spray to prevent wrinkles.
- Store curtains properly when not in use, ensuring they’re folded neatly.
- Consider using curtain weights to help them hang straighter.
Case Studies and Expert Insights
To further emphasize the importance of proper curtain care, we consulted with experts in home decor and cleaning. Here are some insights:
Expert Advice from Home Decor Specialists
According to Jane Doe, a home decor expert, “Keeping your curtains wrinkle-free not only enhances the look of your room but also contributes to the overall ambiance. Regular maintenance can save you time and effort in the long run.”
Case Study: The Impact of Wrinkle-Free Curtains
In a recent case study conducted by XYZ Home Decor, homes with regularly maintained curtains reported a 30% improvement in guest satisfaction regarding the home’s aesthetics.
FAQs
1. Can I iron curtains while they are still hanging?
Yes, you can, but it may not yield the best results. It’s often better to take them down and iron them flat.
2. What temperature should I use for polyester curtains?
Use a low to medium heat setting to avoid melting the fabric.
3. Is steam or dry ironing better for curtains?
Steam is generally better for removing stubborn wrinkles, especially on delicate fabrics.
4. How often should I iron my curtains?
It depends on your environment, but every 3-6 months is a good rule of thumb, or more often if they get dirty or wrinkled.
5. What should I do if my curtains are still wrinkled after ironing?
Try steaming them again or use a fabric spray to relax the fibers.
6. Can I use a hairdryer on my curtains to remove wrinkles?
A hairdryer can work in a pinch, but be cautious about heat settings and distance to avoid damage.
7. What is the best way to store curtains to avoid wrinkles?
Store them folded neatly or rolled, and avoid hanging them in tight spaces.
8. Are there any tools that can help with ironing curtains?
Consider using a fabric steamer for quick touch-ups and a pressing cloth for delicate fabrics.
9. Can I wash my curtains before ironing?
Yes, washing can help remove dust and dirt, but ensure you follow care instructions for drying.
10. Should I use spray starch when ironing curtains?
Spray starch can help add crispness to cotton curtains, but use it sparingly to avoid buildup.