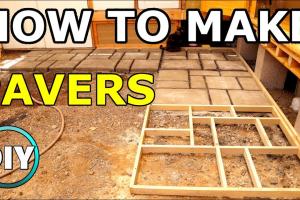
Ultimate Guide: How to Make Pavers for Your Outdoor Space

-
Quick Links:
- 1. Introduction
- 2. Materials Needed
- 3. Tools Required
- 4. Planning Your Paver Design
- 5. Step-by-Step Process of Making Pavers
- 6. Curing and Finishing Your Pavers
- 7. Case Studies and Examples
- 8. Expert Insights on Paver Making
- 9. Cost Analysis of Making Pavers
- 10. Maintaining Your Pavers
- 11. FAQs
1. Introduction
Making your own pavers can be a rewarding DIY project that enhances the beauty and functionality of your outdoor space. With the right materials, tools, and techniques, you can create stunning walkways, patios, or garden paths that reflect your unique style. This guide will walk you through the entire process of making pavers, including detailed steps, expert insights, and tips for success.2. Materials Needed
To make pavers, you will need the following materials: - **Concrete mix**: The primary material for making pavers. - **Color pigments**: Optional, for coloring the concrete. - **Reinforcement materials**: Such as wire mesh for added strength. - **Release agent**: To prevent sticking to molds. - **Water**: For mixing with the concrete.3. Tools Required
Essential tools for making pavers include: - **Mixing container**: A wheelbarrow or large bucket. - **Shovel or hoe**: For mixing the concrete. - **Paver molds**: Available in various shapes and sizes. - **Trowel**: For smoothing the surface. - **Measuring tools**: Ruler and measuring tape. - **Protective gear**: Gloves and safety goggles.4. Planning Your Paver Design
Before diving into the making process, plan your paver design: - **Choose the shape and size**: Consider rectangular, square, or custom shapes. - **Design the layout**: Sketch a layout that integrates well with your existing landscape. - **Determine the number of pavers needed**: Calculate based on the area to be covered.5. Step-by-Step Process of Making Pavers
Follow these detailed steps to create your own pavers:Step 1: Prepare the Concrete Mixture
- In a mixing container, combine the concrete mix with water according to the package instructions. If you are adding color pigments, mix them in at this stage.Step 2: Fill the Molds
- Lightly coat the molds with a release agent to ease the removal later. Pour the concrete mixture into the molds, filling them about three-quarters full.Step 3: Smooth the Surface
- Use a trowel to smooth the surface of the concrete, ensuring a flat finish.Step 4: Reinforce (if necessary)
- If using reinforcement materials, place them in the mold before the concrete sets, ensuring they are covered completely.Step 5: Allow to Set
- Let the concrete set in the molds for at least 24-48 hours, depending on the weather conditions.6. Curing and Finishing Your Pavers
Once your pavers are set, it's essential to cure them properly: - After demolding, keep the pavers moist and shaded for a week to enhance strength. - Clean any rough edges with a trowel or sandpaper for a polished finish.7. Case Studies and Examples
**Example 1: DIY Garden Path** A homeowner created a beautiful garden path using homemade circular pavers. The project took three weekends and significantly enhanced the garden's aesthetics. **Example 2: Patio Expansion** A DIY enthusiast expanded their patio using square pavers made from colored concrete. The project was budget-friendly and allowed for customization.8. Expert Insights on Paver Making
Experts recommend using high-quality concrete mix for durability. Additionally, experimenting with different molds and colors can lead to unique designs that stand out.9. Cost Analysis of Making Pavers
Creating your own pavers can be cost-effective: - **Material Costs**: Approximate costs for concrete mix, molds, and pigments can range from $100 to $500, depending on the quantity and quality. - **DIY vs. Professional Installation**: Hiring professionals can cost significantly more, making DIY an appealing option for budget-conscious homeowners.10. Maintaining Your Pavers
To keep your pavers looking new: - Regularly clean the surface to prevent weed growth. - Seal the pavers every few years to protect against weather damage.11. FAQs
- 1. How long does it take to make pavers?
- It typically takes 1-2 days to make pavers, including setting time.
- 2. Can I use any type of concrete for making pavers?
- It’s best to use a high-strength concrete mix designed for paving.
- 3. Are homemade pavers durable?
- Yes, if made and cured properly, they can be very durable.
- 4. How can I color my concrete pavers?
- You can add color pigments to the concrete mix before pouring it into the molds.
- 5. What is the best sealant for pavers?
- Acrylic or polyurethane sealants work well for protecting pavers.
- 6. Can I make pavers in winter?
- It's possible, but ensure the temperature remains above freezing for proper curing.
- 7. How do I prevent weeds from growing between pavers?
- Use polymeric sand or sealant to fill gaps and inhibit weed growth.
- 8. What's the best way to clean pavers?
- Use a pressure washer or a mixture of soap and water for regular cleaning.
- 9. Can I make pavers without molds?
- While molds are recommended, you can shape pavers by hand if desired.
- 10. How thick should my pavers be?
- A thickness of 2-3 inches is standard for most applications.
Random Reads
- How to see your account name in steam
- How to turn on your tv
- Unlock extinction mode cod ghosts
- Unlock mario kart cups characters
- The ultimate guide to easily accessing your motorola modem
- How to reset microsoft word to default factory settings
- How to remove a virus
- How to remove a shower head
- How to unclog ac drain
- How to open and use file manager android