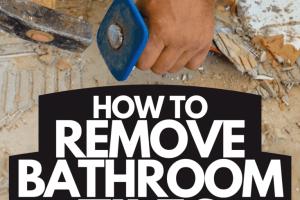
Ultimate Guide to Removing Bathroom Tile: Step-by-Step Instructions and Tips

-
Quick Links:
- Introduction
- Essential Tools and Materials
- Preparation Steps
- Step-by-Step Tile Removal Process
- Common Challenges and Solutions
- Finishing Up
- Case Studies and Examples
- Expert Insights
- FAQs
Introduction
Removing bathroom tiles can seem like a daunting task, but with the right tools and a clear plan, it can be a manageable DIY project. Whether you're looking to update your space or repair damage, this guide will walk you through everything you need to know about removing bathroom tiles effectively.
Essential Tools and Materials
Before you start the tile removal process, gather the following tools and materials:
- Safety Gear: Safety goggles, gloves, and a dust mask.
- Tools:
- Chisel
- Hammer
- Tile scraper or pry bar
- Utility knife
- Drill (optional)
- Heat gun or hairdryer (for adhesive removal)
- Materials:
- Plastic sheeting (to protect surrounding areas)
- Trash bags (for debris)
- Sponges and towels (for cleaning up dust)
Preparation Steps
Preparation is key to a successful tile removal project. Follow these steps:
- Clear the Area: Remove any furniture, rugs, or items from the bathroom to create a clear workspace.
- Protect Surfaces: Use plastic sheeting to cover sinks, tubs, and other fixtures to prevent damage.
- Turn Off Water Supply: If you're removing tiles around plumbing fixtures, ensure the water supply is turned off.
Step-by-Step Tile Removal Process
Now that you're prepared, it's time to start removing the tiles. Follow these steps:
Step 1: Start at the Grout Line
Using a utility knife, carefully cut through the grout line around the tile you want to remove. This will help prevent damage to adjacent tiles.
Step 2: Use a Chisel and Hammer
Position your chisel at an angle against the edge of the tile. Gently tap the chisel with a hammer to loosen the tile. Start with a corner and work your way around.
Step 3: Remove the Tile
Once the tile is loose, use your hands or a pry bar to lift it off the wall or floor. If the tile is stubborn, repeat the chiseling process.
Step 4: Remove Adhesive Residue
After removing the tiles, there may be adhesive left behind. Use a tile scraper or heat gun to soften and remove the adhesive. Be cautious to avoid damaging the underlying surface.
Step 5: Clean Up
Collect all debris and clean the area thoroughly. Ensure that the surface is ready for new tile installation if that’s your next step.
Common Challenges and Solutions
During the tile removal process, you may encounter some challenges. Here are a few common ones and their solutions:
- Stubborn Tiles: If tiles won't budge, apply heat to soften the adhesive before chiseling.
- Cracked Tiles: Use caution when removing cracked tiles to avoid injury. Wear safety gear and ensure you remove all pieces.
- Dust and Debris: Keep a vacuum handy to clean up dust as you work to maintain visibility and safety.
Finishing Up
After removing the tiles and cleaning the area, assess the underlying surface. If it’s damaged, you may need to repair or replace it before installing new tiles.
Case Studies and Examples
Here are a few real-world examples of successful bathroom tile removal:
Case Study 1: DIY Homeowner
A homeowner decided to remove old bathroom tiles to modernize their space. They followed a step-by-step guide, used a heat gun to soften adhesive, and completed the project in a weekend.
Case Study 2: Professional Renovation
A contracting team faced challenges with stubborn tiles in an older home. They utilized a combination of chiseling and heat application, successfully removing the tiles with minimal damage to the wall.
Expert Insights
Experts recommend taking your time during tile removal to avoid damaging the underlying structure. Always wear safety gear, and don’t hesitate to consult a professional if you encounter significant issues.
FAQs
1. How long does it take to remove bathroom tiles?
On average, it can take a few hours to a full day, depending on the size of the area and the type of adhesive used.
2. Can I remove tiles without damaging the wall?
Yes, by carefully chiseling and avoiding excessive force, you can minimize damage to the wall.
3. What should I do with the debris?
Collect all debris in trash bags and dispose of it according to local regulations.
4. Is it safe to remove tiles myself?
Yes, as long as you take proper safety precautions and use the right tools.
5. Should I hire a professional?
If you're unsure about the process or if the tiles are particularly difficult to remove, hiring a professional may be best.
6. What tools are necessary for tile removal?
Essential tools include a chisel, hammer, tile scraper, and safety gear.
7. Can I reuse the tiles I remove?
It's possible to reuse tiles if they are not damaged during removal and can be cleaned of adhesive.
8. How do I know if the adhesive is safe?
If you're unsure, consult a professional or do a test patch to see how easily the adhesive can be removed.
9. How do I prepare the surface after tile removal?
Clean the surface thoroughly, check for damage, and repair as necessary before installing new tiles.
10. What are the best practices for tile removal?
Take your time, protect surrounding areas, use the right tools, and wear safety gear.
Random Reads
- How to use gcc to compile c program
- How to organize your wardrobe
- How to organize your room 13 tips tricks
- How to set up usb game controllers windows 8
- How to move files from android to pc without usb cables
- How to respond to heart eye emoji
- How to polish corian countertops
- How to polish concrete
- Open idx files
- Open emz file guide