Ultimate Guide to Resizing Digital Images: Techniques, Tools, and Tips

-
Quick Links:
- 1. Understanding Image Resizing
- 2. Why Resize Images?
- 3. Image Resizing Techniques
- 4. Tools for Resizing Images
- 5. Step-by-Step Guide to Resizing Images
- 6. Best Practices for Resizing Digital Images
- 7. FAQs
1. Understanding Image Resizing
Image resizing is a process that alters the dimensions of a digital image. It can be done to fit specific requirements for different platforms, improve loading times, or enhance user experience. Understanding how this process works is essential for anyone involved in digital content creation.
Types of Image Resizing
- Scaling: Adjusting the dimensions while maintaining the aspect ratio.
- Cropping: Removing parts of the image to focus on a specific area.
- Compression: Reducing file size without significantly affecting quality.
2. Why Resize Images?
Resizing images serves several purposes, including:
- Improving Load Times: Smaller images load faster, enhancing user experience.
- Fitting Specific Dimensions: Certain platforms require images to be a specific size.
- Optimizing for SEO: Properly sized images can help with search engine rankings.
3. Image Resizing Techniques
There are various techniques to resize images effectively. Here are some common methods:
Proportional Resizing
When resizing, keeping the image's aspect ratio intact is crucial to avoid distortion. This is often done using software that allows you to lock the aspect ratio.
Batch Resizing
For users needing to resize multiple images at once, batch resizing tools can save time and effort. These tools allow you to apply the same resizing parameters across many images simultaneously.
4. Tools for Resizing Images
Numerous tools are available to help with image resizing, ranging from online applications to professional software. Here are some popular options:
Online Tools
- Canva: A versatile design tool that offers resizing features.
- ResizeImage.net: A simple online tool for quick resizing.
Software Tools
- Adobe Photoshop: A powerful image editing tool that includes advanced resizing options.
- GIMP: A free and open-source alternative to Photoshop with robust resizing capabilities.
5. Step-by-Step Guide to Resizing Images
Here’s a detailed guide to resizing images using different tools:
Resizing with Canva
- Open Canva and create a new design or upload your image.
- Click on the image, then use the corner handles to resize.
- Download your resized image by clicking the download button.
Resizing with Adobe Photoshop
- Open your image in Photoshop.
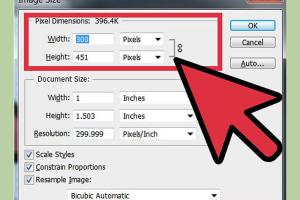
- Select 'Image' from the top menu, then 'Image Size'.
- Enter the new dimensions and ensure 'Constrain Proportions' is checked.
- Click 'OK' and save your resized image.
6. Best Practices for Resizing Digital Images
To ensure your resized images maintain quality and serve their purpose effectively, consider the following best practices:
- Maintain Aspect Ratio: Always keep the aspect ratio consistent to prevent distortion.
- Use High-Quality Sources: Start with high-resolution images for better results when resizing.
- Optimize for Web: Use tools to compress images without losing quality, which helps with loading speeds.
FAQs
1. What is the best image size for web use?
The best size varies by platform, but generally, images should be under 100KB for faster loading while maintaining quality.
2. Can resizing images affect quality?
Yes, resizing can affect quality, especially if enlarging an image significantly. Always start with a high-resolution image.
3. What tools can I use to resize images for free?
Tools like Canva, GIMP, and online services like ResizeImage.net are great free options.
4. What is the difference between resizing and cropping?
Resizing changes the dimensions of the entire image, while cropping removes parts of the image to focus on a specific area.
5. How can I batch resize images?
Using tools like IrfanView or Adobe Lightroom allows you to resize multiple images at once.
6. Is there a risk of losing quality when resizing images?
Yes, especially when enlarging. It’s best to reduce size rather than increase it whenever possible.
7. How do I resize an image in Microsoft Paint?
Open the image in Paint, go to the 'Home' tab, select 'Resize', and input your desired dimensions.
8. What is the best format for resized images?
JPEG is commonly used for photographs, while PNG is better for images with transparency and graphics.
9. Can I resize images on my smartphone?
Yes, there are many apps available for both iOS and Android that allow you to resize images easily.
10. How does image size affect SEO?
Large images can slow down your website, negatively impacting user experience and search engine rankings. Properly sized images help with SEO.
Conclusion
Resizing digital images is a crucial skill for anyone involved in digital media. By understanding the techniques, tools, and best practices outlined in this guide, you’ll be better equipped to manage your images effectively, enhancing both user experience and search engine visibility.
References
- HubSpot - The Ultimate Guide to Image Sizes
- Moz - Image Optimization for SEO
- W3Schools - HTML Images
Random Reads
- Vizio tv wifi without remote
- How to make video call on wechat
- How to make whitewash
- Kino der toten easter egg guide
- Keyboard mouse control
- How to stop unwanted phone calls
- Mastering picture tiling microsoft word
- Mastering plumbing venting
- Testing ground rod
- The 10 best solutions to get any ink out of your carpet