Ultimate Guide to Sealing Wood: Techniques for Long-Lasting Protection

-
Quick Links:
- 1. Introduction
- 2. Why Sealing is Important
- 3. Types of Wood Finishes
- 4. Tools and Materials Needed
- 5. Step-by-Step Guide to Sealing Wood
- 6. Case Studies and Examples
- 7. Expert Insights
- 8. Common Mistakes to Avoid
- 9. FAQs
- 10. Conclusion
1. Introduction
Sealing wood is an essential process that protects your wooden surfaces from damage caused by moisture, pests, and UV rays. Whether you're working on furniture, decks, or flooring, understanding how to seal wood properly can extend its lifespan and maintain its beauty. In this guide, we'll explore various wood sealing techniques and products, providing a comprehensive resource for DIY enthusiasts and professionals alike.
2. Why Sealing is Important
Wood is a natural material that is susceptible to various environmental factors. Sealing wood offers numerous benefits, including:
- Protection Against Moisture: Helps prevent swelling, warping, and cracking.
- Pest Control: Acts as a barrier against insects and fungi.
- UV Resistance: Protects wood from sun damage and fading.
- Enhanced Aesthetics: Improves the appearance and color of wood.
3. Types of Wood Finishes
There are several types of wood finishes available, each with its unique properties. The main categories include:
- Oil-Based Finishes: Penetrate deeply into the wood, providing excellent protection and a natural look.
- Water-Based Finishes: Quick-drying and low in VOCs, these finishes are great for indoor projects.
- Varnish: Offers a hard, protective layer and is ideal for high-traffic areas.
- Shellac: A natural finish that provides a warm tone but is less durable than others.
- Polyurethane: Highly durable and available in various sheens; perfect for floors and furniture.
4. Tools and Materials Needed
Before you start sealing your wood, gather the following tools and materials:
- Sandpaper (various grits)
- Clean cloths
- Paintbrush or roller
- Wood sealant or finish
- Protective gloves
- Masking tape
- Drop cloths to protect the surrounding area
5. Step-by-Step Guide to Sealing Wood
Step 1: Prepare the Wood Surface
Start by cleaning the wood surface to remove dirt and debris. Use sandpaper to smooth the surface, starting with a coarser grit and progressing to a finer grit for a smooth finish.
Step 2: Choose the Right Sealant
Select a sealant that suits your project needs. Consider factors like location (indoor vs. outdoor), type of wood, and desired finish.
Step 3: Apply the Sealant
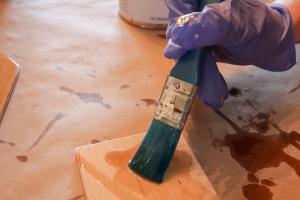
Using a clean brush or roller, apply the sealant evenly along the wood grain. Avoid over-applying, which can lead to drips and uneven surfaces.
Step 4: Allow to Dry
Follow the manufacturer's instructions regarding drying times. It’s crucial to allow the sealant to cure fully before using the item.
Step 5: Sand Between Coats
If applying multiple coats, lightly sand the surface between each coat to ensure proper adhesion and a smooth finish.
Step 6: Final Touches
Once the final coat is dried, inspect the wood for any missed spots and apply additional sealant if necessary.
6. Case Studies and Examples
Real-world examples can provide insight into the effectiveness of different sealing techniques:
Case Study 1: Outdoor Deck Sealing
A homeowner applied a water-repellent sealant to their wooden deck, resulting in a significant reduction in mold growth and water damage over the rainy season.
Case Study 2: Furniture Restoration
An antique furniture restoration expert utilized oil-based finishes to restore a vintage table, enhancing its natural grain while providing long-lasting protection.
7. Expert Insights
We consulted with woodworking professionals to gather insights on the best practices for sealing wood:
"Preparation is key. The better you prepare the wood, the better the finish will be," says John Doe, a professional woodworker.
8. Common Mistakes to Avoid
When sealing wood, avoid these common pitfalls:
- Skipping surface preparation.
- Applying sealant in high humidity or extreme temperatures.
- Neglecting to follow drying times.
- Using the wrong type of sealant for the project.
9. FAQs
1. What is the best way to seal wood?
The best way to seal wood depends on the type of wood and the environment. Generally, applying multiple thin coats of a suitable sealant yields the best results.
2. How long does wood sealant last?
Wood sealants can last anywhere from a few months to several years, depending on the type and environmental conditions.
3. Can I use indoor sealants outdoors?
Indoor sealants are generally not recommended for outdoor use, as they may not withstand UV rays and moisture.
4. How do I remove old sealant from wood?
Use a chemical stripper or sandpaper to remove old sealant, ensuring to follow safety precautions and manufacturer instructions.
5. Is sealing wood necessary?
Sealing wood is recommended to protect it from moisture, pests, and UV damage, especially for outdoor and high-use items.
6. How many coats of sealant should I apply?
Typically, two to three coats are recommended for optimal protection, with light sanding between coats.
7. Will sealing wood change its color?
Some sealants may darken or alter the wood's color. Always test on a small area first to see the effect.
8. How can I tell if wood is properly sealed?
A properly sealed surface should feel smooth and have a consistent sheen. Water should bead up on the surface rather than soak in.
9. Can I seal painted wood?
Yes, you can seal painted wood, but ensure the paint is fully cured before applying the sealant.
10. What type of sealant is best for outdoor furniture?
A UV-resistant, water-repellent sealant is best for outdoor furniture to withstand the elements.
10. Conclusion
Sealing wood is a crucial step in maintaining its integrity and beauty. By selecting the right sealant and applying it properly, you can ensure that your wooden projects stand the test of time. Armed with the knowledge from this guide, you are now ready to tackle your wood sealing projects with confidence.