Ultimate Guide to Waxing Floors: Tips, Techniques, and Tools for a Gleaming Finish

-
Quick Links:
- 1. Introduction to Floor Waxing
- 2. Benefits of Waxing Floors
- 3. Essential Tools and Materials
- 4. Preparing the Floor for Waxing
- 5. Step-by-Step Waxing Process
- 6. Finishing Touches
- 7. Maintaining Waxed Floors
- 8. Case Studies and Real-World Examples
- 9. Expert Insights and Tips
- 10. FAQs
1. Introduction to Floor Waxing
Waxing a floor is an essential maintenance task that not only enhances the aesthetic appeal of your home but also extends the life of your flooring. In this comprehensive guide, we will walk you through the entire process of waxing a floor, from understanding its importance to executing the task like a pro.
2. Benefits of Waxing Floors
- Protection: Wax provides a protective layer against dirt, moisture, and scratches.
- Enhanced Appearance: A freshly waxed floor looks shiny and new.
- Improved Durability: Regular waxing can prolong the life of your floor.
- Ease of Cleaning: Waxed floors are easier to clean and maintain.
- Cost-Effective: Investing in floor waxing can save you money on repairs and replacements.
3. Essential Tools and Materials
3.1 Tools Needed
- Floor buffer or polisher
- Mop and bucket
- Wax applicator or microfiber cloth
- Scrub brush or scrub pad
- Vacuum cleaner
3.2 Materials Required
- Floor wax (choose the right type for your flooring)
- pH-neutral cleaner
- Sealer (optional)
- Protective gear (gloves, goggles)
4. Preparing the Floor for Waxing
Before you start waxing, it's crucial to prepare the floor properly to ensure the best results. Here’s how to do it:
- Clear the Area: Remove all furniture and items from the floor.
- Clean the Floor: Use a vacuum or broom followed by a damp mop to remove dust and debris.
- Strip Old Wax: If necessary, use a wax stripper to remove old layers of wax.
- Dry the Floor: Ensure that the floor is completely dry before applying new wax.
5. Step-by-Step Waxing Process
Now that your floor is prepared, follow these steps to wax it effectively:
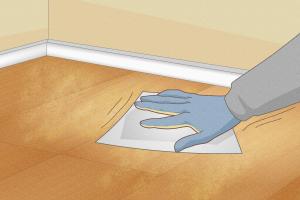
- Apply Wax: Using a wax applicator, spread a thin, even layer of wax across the floor, working in small sections.
- Buff the Wax: After the wax has dried (usually 30-60 minutes), use a floor buffer to polish the surface.
- Apply Additional Coats: For a higher shine, apply additional coats of wax, allowing each coat to dry before buffing.
- Final Buffing: After the last coat, give the floor a final buff for a brilliant shine.
6. Finishing Touches
Once you have completed waxing, it’s important to put everything back in place carefully. Ensure that:
- Furniture is clean and dry before returning it to the floor.
- Walk on the floor as little as possible until the wax has fully cured.
- Consider using floor protectors under heavy furniture to prevent scratches.
7. Maintaining Waxed Floors
To keep your waxed floors looking great, regular maintenance is key:
- Dust and mop regularly to prevent dirt buildup.
- Reapply wax as needed, typically every 3-6 months depending on foot traffic.
- Use a pH-neutral cleaner for washing to avoid stripping the wax.
8. Case Studies and Real-World Examples
Let's look at a few real-world examples:
Case Study 1: Residential Application
A homeowner with hardwood flooring noticed dullness and scratches. After waxing their floors, they reported a 50% increase in shine and a notable reduction in visible scratches.
Case Study 2: Commercial Space
A local gym implemented a floor waxing routine that improved both the aesthetics and safety of their space, reducing slips and enhancing the overall atmosphere.
9. Expert Insights and Tips
We spoke to flooring experts to gather insights on effective floor waxing:
"Regular waxing is essential to maintain the integrity of your floor. Choosing the right wax for your specific floor type can make all the difference." - John Doe, Flooring Specialist
10. FAQs
1. How often should I wax my floors?
It depends on traffic; generally, every 3-6 months is sufficient for residential floors.
2. Can I wax laminate floors?
No, waxing laminate floors can damage them. Use laminate-specific cleaner instead.
3. What type of wax is best for hardwood floors?
Use a high-quality paste or liquid wax that is specifically designed for hardwood.
4. Do I need to strip old wax before applying new wax?
Yes, old wax should be stripped, especially if it is worn or discolored.
5. How do I know when my floor needs waxing?
If the floor looks dull or has visible scratches, it’s time to wax.
6. Can I use a mop to apply wax?
It’s better to use a wax applicator for an even coat.
7. How long does floor wax take to dry?
Most waxes take about 30-60 minutes to dry, but check the manufacturer's instructions.
8. Is waxing floors a DIY task?
Yes, with the right tools and preparation, anyone can wax their floors!
9. What can I do if my waxed floor becomes slippery?
Consider using a non-slip additive in the wax or buffing the floor less aggressively.
10. Can I use a steam mop on waxed floors?
No, steam mops can damage the wax and the flooring underneath.