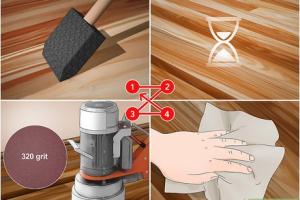
Mastering the Technique: Applying Oil-Based Polyurethane Over Water-Based Polyurethane

-
Quick Links:
- Introduction
- Understanding Polyurethanes
- Preparation for Application
- Application Process
- Tips for Success
- Case Studies
- Common Mistakes to Avoid
- FAQs
- Conclusion
Introduction
When it comes to finishing wood surfaces, polyurethane is a popular choice for both professionals and DIY enthusiasts alike. Among the different types of polyurethane, oil-based and water-based formulas stand out due to their unique properties. But what happens when you want to apply an oil-based polyurethane over an existing water-based finish? This article will guide you through the steps necessary to achieve a successful finish while ensuring the durability and aesthetic appeal.
Understanding Polyurethanes
Polyurethanes come in two main types: oil-based and water-based. Understanding the differences between these two is crucial for achieving the best results for your project.
Oil-Based Polyurethane
Oil-based polyurethane is known for its durability and rich finish. It penetrates the wood more effectively and provides a warm, amber tone. However, it takes longer to dry and has a stronger odor during application.
Water-Based Polyurethane
Water-based polyurethane is favored for its quick drying time and low odor. It dries clear, making it a popular choice for lighter woods. However, it may not provide the same level of durability as oil-based options.
Preparation for Application
Before applying oil-based polyurethane over a water-based finish, proper preparation is key to achieving a successful bond and finish. Follow these steps:
- Assess the Existing Finish: Ensure the current water-based poly is fully cured, typically taking 7-14 days.
- Clean the Surface: Wipe the surface with a damp cloth to remove dust and debris.
- Sand the Surface: Lightly sand the area with fine-grit sandpaper (220 grit) to create a key for the new finish.
- Remove Dust: Vacuum or wipe down the surface to remove any sanding residue.
- Test Compatibility: Always perform a test patch to ensure compatibility.
Application Process
Once your surface is prepped, it’s time to apply the oil-based polyurethane. Here’s a step-by-step guide:
Materials Needed
- Oil-based polyurethane
- High-quality paintbrush or foam applicator
- Mineral spirits (for cleanup)
- Fine-grit sandpaper
- Lint-free cloths
Step-by-Step Application
- Stir the Polyurethane: Gently stir the polyurethane to mix it thoroughly without introducing bubbles.
- Start Applying: Using a high-quality brush, apply a thin coat of polyurethane in the direction of the wood grain.
- Let it Dry: Allow the first coat to dry as per the manufacturer's instructions (typically 24 hours).
- Sand Between Coats: Once dry, lightly sand the surface with fine-grit sandpaper to ensure a smooth finish.
- Apply Additional Coats: Repeat the application and sanding process for at least two to three coats, depending on your desired finish.
Tips for Success
- Work in a Well-Ventilated Area: Ensure good airflow to help with drying and to minimize fumes.
- Use the Right Brush: Consider using a natural-bristle brush for oil-based finishes to avoid leaving brush marks.
- Check the Temperature: Ideal application temperatures are typically between 50°F and 90°F.
- Be Patient: Allow adequate drying time between coats for the best results.
Case Studies
Here are a couple of case studies showcasing successful applications of oil-based polyurethane over water-based finishes:
Case Study 1: Kitchen Cabinets
A homeowner wanted to enhance the durability of their kitchen cabinets, which were previously finished with water-based polyurethane. After following the preparation and application process, they achieved a rich amber tone that matched their kitchen decor beautifully.
Case Study 2: Hardwood Floors
A contractor was tasked with refinishing hardwood floors that had a water-based finish. By applying oil-based polyurethane, they improved the floor’s resilience and aesthetic, resulting in a stunning, long-lasting finish that delighted the homeowners.
Common Mistakes to Avoid
To ensure a successful finish, avoid these common pitfalls:
- Skipping the Test Patch: Always test on a small area first.
- Neglecting Surface Preparation: Proper sanding and cleaning are crucial.
- Applying Too Thickly: Thin coats are key to avoiding runs and sags.
- Not Following Drying Times: Rushing the process can lead to poor adhesion and finish quality.
FAQs
1. Can I apply oil-based polyurethane directly over water-based polyurethane?
No, you should always prepare the surface with sanding and a test patch to ensure adhesion.
2. How long should I wait between coats of oil-based polyurethane?
Typically, you should wait 24 hours between coats, but always follow the manufacturer's instructions.
3. What tools do I need for application?
A high-quality brush or foam applicator, fine-grit sandpaper, and mineral spirits for cleanup are essential.
4. Is it necessary to sand between coats?
Yes, sanding creates a better bond between coats and ensures a smoother finish.
5. What if I see bubbles in my finish?
Bubbles can occur from over-brushing or applying too thick of a coat. Allowing it to dry and sanding lightly can help mitigate this.
6. Can I use a spray application?
Yes, oil-based polyurethane can be sprayed, but ensure you have the right equipment and follow safety precautions.
7. How do I clean my brushes after use?
Clean brushes with mineral spirits or paint thinner immediately after use to prevent drying and damage.
8. Will oil-based polyurethane yellow over time?
Yes, oil-based finishes tend to yellow, which can affect the appearance of lighter woods.
9. Can I mix oil-based and water-based polyurethanes?
It’s not recommended to mix them, as they are incompatible and can result in poor adhesion.
10. What should I do if the finish feels rough?
If the finish is rough, lightly sand the surface and apply another coat of polyurethane.
Conclusion
Applying oil-based polyurethane over water-based polyurethane may seem daunting, but with the right preparation and technique, it can lead to beautiful, durable finishes. By understanding the differences between the two types of polyurethane, properly preparing your surface, and following the application steps, you can achieve excellent results in your woodworking projects. Happy finishing!