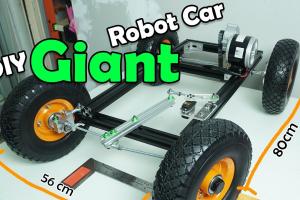
Build Your Own Robot Car: The Ultimate Guide to Chassis, Circuits, and Programming

-
Quick Links:
- Introduction
- Chassis: The Foundation of Your Robot Car
- Circuits: Powering the Robot Car
- Programming: Making Your Robot Car Smart
- Case Studies: Successful Robot Car Projects
- Expert Insights: Advice from Robotics Professionals
- FAQs
Introduction
Building a robot car is a thrilling project that can ignite a passion for engineering and technology. Whether you're a novice or an experienced maker, this guide will provide you with all the information you need to construct a robot car from scratch. This includes the chassis design, circuit connections, and programming steps, ensuring that you gain a comprehensive understanding of robotics.
Chassis: The Foundation of Your Robot Car
The chassis is the skeleton of your robot car, providing structure and support for all other components. Below, we’ll explore the different materials and designs you can use to create a sturdy and effective chassis.
1. Materials for Building Chassis
- Plastic: Lightweight and easy to cut, making it ideal for beginners.
- Metal: Offers more durability and strength but requires advanced tools for shaping.
- Wood: Readily available and easy to work with, but can be heavier.
- 3D Printed Components: Customizable and precise, perfect for unique designs.
2. Designing Your Chassis
When designing your chassis, consider the following:
- Size: Must accommodate all components including wheels, motors, and batteries.
- Shape: A rectangular design is common, but creative shapes can enhance aesthetics.
- Weight Distribution: Ensure the weight is evenly distributed for stability while driving.
3. Example Chassis Design
Here’s a simple chassis design you can follow:
1. Cut a rectangular base (30cm x 15cm) from acrylic.
2. Attach four corner support brackets.
3. Mount the wheels at each corner.
4. Ensure space for the motor and battery in the center.
Circuits: Powering the Robot Car
Once you've built the chassis, the next step is to integrate the circuits that will power and control your robot car.
1. Essential Components
- Microcontroller: Arduino or Raspberry Pi are popular choices.
- Motors: DC motors or servo motors will drive the wheels.
- Power Supply: A rechargeable battery pack is essential for mobility.
- Wiring: Use quality wires to ensure reliable connections.
2. Circuit Diagram
Creating a circuit diagram will help visualize the connections. You can use software like Fritzing to design your circuit.
3. Assembling the Circuit
- Connect the motors to the motor driver.
- Wire the microcontroller to the motor driver.
- Connect the battery to the power input of the motor driver.
- Ensure all ground wires are connected together.
Programming: Making Your Robot Car Smart
The final step in building your robot car is programming it to perform tasks. This could range from simple remote control to advanced autonomous navigation.
1. Choosing a Programming Language
Arduino uses C/C++ while Raspberry Pi supports Python, making both accessible for beginners.
2. Basic Control Code
Here’s a simple code snippet to get your car moving:
#includeAF_DCMotor motor1(1); // create motor #1 on port 1 AF_DCMotor motor2(2); // create motor #2 on port 2 void setup() { motor1.setSpeed(200); // set speed to 200 motor2.setSpeed(200); } void loop() { motor1.forward(); // turn on motor 1 motor2.forward(); // turn on motor 2 delay(1000); // run for 1 second motor1.stop(); // stop motor 1 motor2.stop(); // stop motor 2 delay(1000); // stop for 1 second }
3. Advanced Features
Once you have basic movement working, consider implementing:
- Obstacle avoidance using ultrasonic sensors.
- Remote control via Bluetooth or Wi-Fi.
- Line following using infrared sensors.
Case Studies: Successful Robot Car Projects
Understanding real-world applications can inspire your project. Here are a few notable examples:
1. Stanford Racing Team
The Stanford Racing Team developed a self-driving car that won the DARPA Grand Challenge, demonstrating the potential of autonomous vehicles.
2. DIY Projects on YouTube
Many creators have shared their robot car projects, offering insights and variations that can enhance your design. Check out channels like GreatScott! for tutorials.
Expert Insights: Advice from Robotics Professionals
We reached out to several robotics experts for their tips on building a successful robot car:
- Start Simple: Don't overcomplicate your first project; master the basics first.
- Document Everything: Keep notes on what works and what doesn’t to improve your future projects.
- Join Communities: Engage in forums and groups to seek help and share your progress.
FAQs
- What is the best microcontroller for a robot car?
Arduino is user-friendly for beginners, while Raspberry Pi offers more power for advanced projects. - How do I power my robot car?
You can use rechargeable battery packs like LiPo or NiMH batteries. - Can I make a robot car without programming?
Basic remote-controlled cars can be made without programming, but autonomous features require coding. - What sensors do I need for obstacle avoidance?
Ultrasonic sensors are popular for detecting obstacles in the path. - Is it safe to work with electronics?
Always take precautions, such as wearing safety goggles and working in a well-ventilated area. - How fast can my robot car go?
Speed is dependent on motor specifications and the weight of the car; typically, speeds from 1-10 mph are achievable. - Can I use 3D printing for my robot car?
Yes, 3D printing can help create custom chassis and components. - What programming languages are best for robotics?
C/C++ for Arduino and Python for Raspberry Pi are both effective choices. - How long does it take to build a robot car?
Time varies widely depending on complexity, but a simple robot can be built in a weekend. - Where can I find parts for my robot car?
Local electronics stores, online retailers like SparkFun or Adafruit, and platforms like Amazon are great sources.
Random Reads