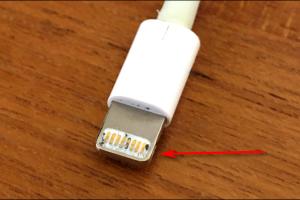
6 Quick Steps to Effectively Clean Your iPhone's Lightning Port

Keeping your iPhone in top shape requires regular maintenance, and one often overlooked area is the Lightning port. Dust, lint, and debris can accumulate over time, leading to charging issues or connection problems. Fortunately, cleaning your iPhone's Lightning port is a simple process. In this guide, we will explore six quick steps to ensure your Lightning port remains clean and functional.
-
Quick Links:
- Why Clean Your iPhone's Lightning Port?
- What You Will Need
- Step 1: Power Down Your iPhone
- Step 2: Inspect the Lightning Port
- Step 3: Use the Right Tools
- Step 4: Gently Remove Debris
- Step 5: Check for Damage
- Step 6: Test the Connection
- FAQs
Why Clean Your iPhone's Lightning Port?
The Lightning port on your iPhone is crucial for charging and connecting to accessories. Over time, debris can interfere with these functions. A dirty port may lead to:
- Charging issues
- Slow data transfer
- Accessory connection failures
By cleaning the Lightning port, you can help maintain optimal functionality and prolong the lifespan of your device.
What You Will Need
Before you begin, gather the following tools:
- A can of compressed air
- A soft-bristled toothbrush or a small, soft brush
- A toothpick or a SIM card ejector tool
- Microfiber cloth
Step 1: Power Down Your iPhone
Before cleaning, it is crucial to power down your iPhone to avoid any accidental damage or short-circuiting.
- Press and hold the power button until the "slide to power off" slider appears.
- Slide to power off your device.
Step 2: Inspect the Lightning Port
After powering down, take a moment to inspect the Lightning port visually. Use a flashlight if necessary to see inside the port. Look for lint, dust, or any other foreign objects that may be lodged in there.
Step 3: Use the Right Tools
Using the right tools is essential for effective cleaning:
- **Compressed Air**: This will help dislodge any loose debris.
- **Soft Brush**: The bristles can reach areas a can of air might not.
- **Toothpick or SIM Tool**: For gently scraping off any stubborn debris.
Step 4: Gently Remove Debris
Now, let's get started on the cleaning process:
- **Use Compressed Air**: Hold the can upright and give a few short bursts into the Lightning port.
- **Brush the Port**: Use the soft brush to gently sweep away any debris. Be careful not to apply too much pressure.
- **Scrape with a Toothpick**: If you see stubborn debris, gently scrape it away with the toothpick or SIM tool. Avoid inserting it too deep.
Step 5: Check for Damage
After cleaning, inspect the Lightning port again for any signs of physical damage. Look for bent pins or discoloration. If you notice any damage, it may be time to consult a professional repair service.
Step 6: Test the Connection
Power your iPhone back on and test the functionality of the Lightning port. Connect your charger or accessories to see if they work correctly. If issues persist, it may be time for further diagnostics.
FAQs
1. How often should I clean my iPhone's Lightning port?
It's advisable to clean it every few months or if you notice charging issues.
2. Can I use a wet cloth to clean the Lightning port?
No, avoid using any liquids, as this can damage the internal components.
3. What if my iPhone still doesn't charge after cleaning?
Check the charging cable and try a different one. If the issue persists, consider visiting a repair shop.
4. Is it safe to use compressed air?
Yes, as long as you use it correctly and keep the can upright to avoid moisture release.
5. Can I use a vacuum to clean the port?
It’s not recommended, as vacuums can create static electricity which may damage the device.
6. What tools can I use if I don’t have a toothpick?
A SIM card ejector tool or even a thin plastic tool can work as alternatives.
7. Does cleaning my Lightning port void the warranty?
No, cleaning does not void the warranty, but be cautious not to damage the port while doing so.
8. Can I clean my iPhone while it’s on?
It’s safer to power it down to prevent any accidental damage.
9. What kind of brush is best for cleaning?
A soft-bristled toothbrush or a paintbrush designed for electronics works best.
10. How can I prevent dust from entering my Lightning port?
Use a case that covers the port when not in use, and avoid placing your phone in dusty environments.
Random Reads
- How to kill the wither in minecraft
- How to clean your ipad
- How to clean your room teens
- How to add led lights to gaming pc case
- How to add led light strips to back of mirror
- Simple ways to dispose of old laptops
- Simple ways to download files with utorrent
- Move icons android
- Move full screen game
- Unlock android phone without factory reset