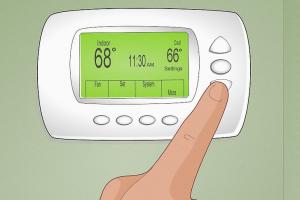
Easy DIY Guide to Installing a Digital Thermostat: Step-by-Step Instructions

-
Quick Links:
- Introduction
- Benefits of Installing a Digital Thermostat
- Pre-Installation Steps
- Tools and Materials Needed
- Removing the Old Thermostat
- Installing the New Digital Thermostat
- Programming Your New Thermostat
- Troubleshooting Common Issues
- Case Studies and Insights
- Expert Tips for Optimal Use
- FAQs
Introduction
Installing a digital thermostat can seem daunting, but with the right guidance, it’s an easy project that can enhance the comfort and efficiency of your home. In this guide, we will walk you through the entire process of installing a digital thermostat, providing you with all the necessary steps, tools, and insights to complete the project successfully.
Benefits of Installing a Digital Thermostat
Switching to a digital thermostat offers numerous advantages:
- Energy Efficiency: Digital thermostats allow for more precise temperature control, helping to save energy and reduce utility bills.
- Programmability: Many digital models allow you to set schedules, ensuring your home is only heated or cooled when needed.
- Remote Access: Smart models can be controlled via smartphone apps, providing convenience and flexibility.
- Improved Comfort: Consistent temperature control enhances overall comfort in your living space.
Pre-Installation Steps
Before you dive into installation, there are a few important preparations to make:
- Check Compatibility: Ensure the new thermostat is compatible with your HVAC system.
- Read the Manual: Familiarize yourself with the new thermostat’s features and installation instructions.
- Gather Information: Take note of your current thermostat’s wiring setup for reference.
Tools and Materials Needed
Gather the following tools and materials:
- Digital thermostat
- Phillips and flathead screwdrivers
- Wire stripper/cutter
- Drill (if needed)
- Level
- Electrical tape
- Smartphone (for smart thermostats)
Removing the Old Thermostat
Follow these steps to remove your old thermostat safely:
- Turn Off Power: Switch off power to your HVAC system at the breaker box.
- Remove Faceplate: Gently pull off the faceplate of your old thermostat.
- Label Wires: Use masking tape to label each wire connected to the old thermostat.
- Unscrew the Base: Remove screws securing the thermostat base to the wall and detach it.
Installing the New Digital Thermostat
Now, it's time to install your new thermostat:
- Secure the Base: Attach the new thermostat's base to the wall, ensuring it's level.
- Connect Wires: Match wires to the labeled connections on the new thermostat.
- Attach Faceplate: Snap on the new thermostat's faceplate.
- Restore Power: Turn the power back on at the breaker box.
Programming Your New Thermostat
Once installed, follow the specific instructions to program your thermostat for optimal performance. Most digital thermostats allow you to set daily schedules, adjust temperature settings, and even connect to Wi-Fi for remote access.
Troubleshooting Common Issues
If you encounter issues post-installation, here are some common troubleshooting tips:
- If the thermostat does not turn on, double-check that the power is restored and connections are secure.
- For incorrect temperature readings, ensure the thermostat is not placed near heat sources or drafts.
- If programming features aren’t working, consult the manual for troubleshooting specific to your model.
Case Studies and Insights
According to a recent study by the U.S. Department of Energy, households that switched to digital thermostats reported a 10-15% reduction in energy costs. This is a significant saving considering that heating and cooling typically account for around 50% of energy consumption in homes.
In a case study conducted by Energy Star, families using programmable thermostats successfully adjusted their heating and cooling schedules, resulting in energy savings of up to $180 annually.
Expert Tips for Optimal Use
To maximize the benefits of your new digital thermostat, consider these expert tips:
- Utilize the scheduling feature to avoid unnecessary heating or cooling during the day when no one is home.
- Regularly check and replace air filters to ensure your HVAC system runs efficiently.
- Consider integrating your thermostat with a smart home system for enhanced automation and energy savings.
FAQs
1. How long does it take to install a digital thermostat?
The installation process typically takes about 1-2 hours, depending on your experience level and the complexity of your HVAC system.
2. Do I need to hire a professional to install a digital thermostat?
No, if you follow the steps outlined in this guide and feel comfortable working with electrical components, you can install it yourself.
3. What if the new thermostat doesn’t work?
Check all wire connections, ensure power is restored, and consult the thermostat's manual for troubleshooting steps.
4. Can I replace an old analog thermostat with a digital one?
Yes, you can replace an old analog thermostat with a digital model as long as it is compatible with your HVAC system.
5. What features should I look for in a digital thermostat?
Look for features such as programmability, Wi-Fi connectivity, energy usage reports, and compatibility with smart home systems.
6. Are digital thermostats worth the investment?
Yes, they provide energy savings, enhanced comfort, and convenience, making them a worthwhile investment for many homeowners.
7. How do I reset my digital thermostat?
Refer to the thermostat's manual for specific instructions on how to reset your model, as the process can vary.
8. Can I install a digital thermostat without a C-wire?
Some digital thermostats can work without a C-wire using battery power, but others may require additional adapters.
9. How often should I check my thermostat settings?
It's advisable to check your settings seasonally, especially when switching between heating and cooling modes.
10. What should I do if my thermostat is unresponsive?
Check the power supply, ensure all wiring is secure, and consider replacing batteries if applicable.
Random Reads