Mastering Rufus: Your Ultimate Guide to Creating Bootable USB Drives

-
Quick Links:
- What is Rufus?
- Why Use Rufus for Bootable USB Drives?
- System Requirements
- How to Download and Install Rufus
- Creating a Bootable USB Drive with Rufus
- Common Issues and Troubleshooting
- Case Studies and Real-World Examples
- Expert Insights on Bootable USB Drives
- FAQs
What is Rufus?
Rufus is a free, open-source tool that helps you format and create bootable USB flash drives, such as USB keys or pen drives. It is particularly popular for installing operating systems like Windows and various Linux distributions. One of the reasons Rufus stands out is its speed; it is significantly faster than many other utilities available in the market.
Why Use Rufus for Bootable USB Drives?
Using Rufus has several advantages:
- Speed: Rufus is known for its efficiency, allowing users to create bootable drives quickly.
- Compatibility: It supports a wide range of operating systems, including Windows, Linux, and UEFI.
- User-Friendly Interface: The intuitive interface makes it accessible for both novices and experts.
- Advanced Options: Users can customize options for partition schemes and file systems.
System Requirements
Before installing Rufus, ensure your system meets the following requirements:
- Windows XP or later (including Windows 10 and 11)
- A USB flash drive (4GB minimum recommended)
- Administrator privileges for installation
How to Download and Install Rufus
Follow these simple steps to download and install Rufus:
- Visit the Rufus official website.
- Download the latest version of Rufus. It will be a portable application, so no installation is necessary.
- Double-click the downloaded file to run Rufus.
Creating a Bootable USB Drive with Rufus
Here’s a detailed step-by-step guide to create a bootable USB drive:
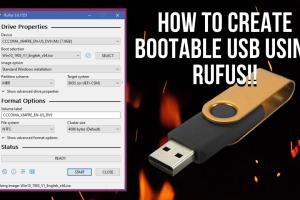
- Open Rufus: Launch the program by double-clicking its icon.
- Select USB Device: Plug in your USB drive. In Rufus, select the drive under the "Device" dropdown.
- Choose Boot Selection: Click the "SELECT" button and locate the ISO file you wish to use.
- Partition Scheme: Choose between MBR and GPT depending on your system.
- File System: Choose FAT32 for compatibility with most systems or NTFS for larger files.
- Start the Process: Click "START" to begin the process.
- Confirm: A warning will appear indicating that all data on the USB drive will be destroyed. Confirm to proceed.
- Wait for Completion: Once the process is complete, you will receive a notification. Your bootable USB drive is now ready!
Common Issues and Troubleshooting
Here are some common issues you might encounter while using Rufus, along with troubleshooting tips:
- USB Drive Not Detected: Ensure the USB drive is properly connected and try a different USB port.
- ISO File Errors: Make sure the ISO file is not corrupted. Try downloading it again.
- Write Protection: Ensure the USB drive is not write-protected. Check for a physical switch on the drive.
Case Studies and Real-World Examples
Many users have documented their experiences with Rufus. For instance, a tech enthusiast shared how they successfully created a bootable USB drive for a Linux installation, emphasizing the ease of use and speed of Rufus compared to other tools.
Expert Insights on Bootable USB Drives
Experts in technology often recommend using bootable USB drives for quick installations and troubleshooting. According to a recent survey by TechRadar, over 75% of IT professionals prefer USB drives for system recovery and installation tasks due to their portability and reliability.
FAQs
1. What types of ISO files can Rufus handle?
Rufus can handle various ISO files for Windows, Linux distributions, and other operating systems.
2. Is Rufus free?
Yes, Rufus is completely free and open-source software.
3. Can I use Rufus on a Mac?
Rufus is designed for Windows; however, you can use alternative tools on Mac, such as BalenaEtcher.
4. Does Rufus support UEFI?
Yes, Rufus supports both UEFI and BIOS boot modes.
5. Can I create a bootable USB drive without losing data?
No, creating a bootable USB drive will erase all existing data on the drive.
6. What should I do if the USB drive doesn't boot?
Check the BIOS settings to ensure USB boot is enabled. Also, verify that the ISO file was created correctly.
7. How long does it take to create a bootable USB drive with Rufus?
The time depends on the size of the ISO file and the speed of the USB drive, but typically it takes a few minutes.
8. Can Rufus create bootable USB drives for Windows 11?
Yes, Rufus can create bootable USB drives for Windows 11 as long as you have the correct ISO file.
9. Is it safe to use Rufus?
Yes, Rufus is safe to use as long as you download it from the official website.
10. How do I update Rufus?
To update Rufus, simply download the latest version from the official website and replace the existing file.