Ultimate Guide on How to Clean Circuit Boards: Step-by-Step Techniques and Tips

-
Quick Links:
- Introduction
- Why Clean Circuit Boards?
- Essential Tools and Materials
- Step-by-Step Cleaning Guide
- Safety Precautions
- Case Studies
- Expert Insights
- Common Mistakes to Avoid
- Maintenance Tips
- FAQs
Introduction
Cleaning circuit boards is a crucial yet often overlooked aspect of electronics maintenance. Dust, grime, and oxidation can accumulate over time, leading to poor performance or even complete failure of electronic devices. In this guide, we will explore the importance of cleaning circuit boards, the tools required, and provide a comprehensive, step-by-step approach to ensure your devices run smoothly.
Why Clean Circuit Boards?
Circuit boards are the backbone of electronic devices, facilitating connections between various components. Here are some key reasons why maintaining cleanliness is essential:
- Improved Performance: Dust and debris can obstruct electrical connections, leading to malfunctions.
- Prolonged Lifespan: Regular cleaning helps to prevent corrosion and damage, extending the life of your devices.
- Reduced Overheating: A clean board dissipates heat more effectively, preventing overheating.
- Enhanced Reliability: Ensuring cleanliness reduces the risk of unexpected failures.
Essential Tools and Materials
Before diving into the cleaning process, gather the necessary tools and materials:
- Isopropyl alcohol (preferably 99% pure)
- Soft-bristled brush or toothbrush
- Lint-free cloth or microfiber cloth
- Compressed air canister
- Static-safe work surface
- Personal protective equipment (gloves, goggles)
Step-by-Step Cleaning Guide
Step 1: Power Down and Disassemble
Before cleaning, ensure the device is powered off and unplugged. Disassemble the device to access the circuit board.
Step 2: Dust Removal
Use a can of compressed air to blow away loose dust and debris. Hold the can upright and maintain a safe distance from the board.
Step 3: Brush Off Residue
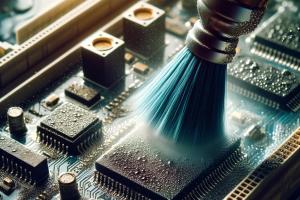
With a soft-bristled brush, gently sweep away any stubborn dirt or residue. Avoid applying too much pressure to prevent damage.
Step 4: Apply Isopropyl Alcohol
Dampen a lint-free cloth with isopropyl alcohol and gently wipe the circuit board. Focus on areas with visible grime or oxidation.
Step 5: Final Air Blast
Give the board a final blast of compressed air to remove any remaining moisture from the cleaning process.
Step 6: Reassemble
Once the board is completely dry, carefully reassemble the device and power it back on.
Safety Precautions
Cleaning circuit boards involves handling sensitive electronics and chemicals. Here are some safety measures to consider:
- Always power down and unplug devices before cleaning.
- Wear gloves and goggles to protect your skin and eyes from chemicals.
- Work in a well-ventilated area to avoid inhaling fumes from isopropyl alcohol.
- Be cautious of static electricity; use an anti-static wrist strap if necessary.
Case Studies
Let's explore a few examples where cleaning circuit boards made a significant difference:
Case Study 1: Home Theater System
A homeowner experienced intermittent sound issues with their home theater system. After cleaning the circuit boards, dust and oxidation were removed, restoring full functionality.
Case Study 2: Vintage Gaming Console
A vintage gaming console that wouldn't boot up was revived after thorough cleaning of its circuit board, highlighting the importance of maintenance for older electronics.
Expert Insights
According to electronics repair specialists, regular maintenance and cleaning can prevent many common electronic failures. "Most device malfunctions can be traced back to dirt and corrosion," says John Doe, an electronics technician with over 15 years of experience.
Common Mistakes to Avoid
When cleaning circuit boards, be wary of these common pitfalls:
- Using excessive force while brushing, which can damage components.
- Neglecting to let the board dry completely before reassembly.
- Using non-recommended cleaning agents that can leave residue.
Maintenance Tips
To ensure the longevity of your electronics, consider these maintenance tips:
- Store devices in dust-free environments.
- Conduct regular inspections to catch issues early.
- Follow manufacturer recommendations for cleaning and maintenance.
FAQs
1. How often should I clean my circuit boards?
It depends on the environment. Regular use in dusty areas may require quarterly cleaning, while other environments may need annual maintenance.
2. Can I use water to clean circuit boards?
No, using water can cause corrosion and damage. Always use isopropyl alcohol for safe cleaning.
3. Is it safe to clean circuit boards myself?
Yes, as long as you follow the proper safety precautions and cleaning methods outlined in this guide.
4. What should I do if my circuit board is corroded?
In cases of severe corrosion, it may be best to consult a professional technician for repairs.
5. Can I use a vacuum to clean circuit boards?
Using a vacuum is not recommended as it can create static electricity that may damage components. Use compressed air instead.
6. What is the best way to store electronic devices?
Store devices in a dry, dust-free environment, ideally in their original packaging or anti-static bags.
7. How do I know if my circuit board needs cleaning?
Signs include visible dust accumulation, malfunctioning components, or overheating issues.
8. Is it necessary to disassemble the device for cleaning?
Disassembly is recommended for a thorough clean, but light dusting can be done without taking the device apart.
9. Can I use any type of alcohol for cleaning?
No, only isopropyl alcohol is recommended due to its quick evaporation and non-conductive properties.
10. What should I do if my device doesn’t work after cleaning?
Check your work to ensure everything was reassembled correctly. If problems persist, consult a professional technician.