Mastering Ethernet: A Complete Guide to Creating Your Own Ethernet Cable

-
Quick Links:
- Introduction
- Understanding Ethernet Cables
- Tools You Need
- Cable Types
- Wiring Standards
- Step-by-Step Guide to Creating an Ethernet Cable
- Testing Your Cable
- Case Studies
- Expert Insights
- FAQs
Introduction
Creating your own Ethernet cable can seem daunting, but with the right tools and guidance, it becomes an empowering task. Whether you're looking to save money or customize your network setup, crafting an Ethernet cable is a practical skill that can benefit anyone from the tech-savvy to the average homeowner.
Understanding Ethernet Cables
Ethernet cables are essential for wired networking, allowing devices to communicate with one another over a local area network (LAN). These cables come in various types and categories, each with different specifications on speed and data transfer capabilities. Understanding the basics of Ethernet cables will help you choose the right one for your needs.
Types of Ethernet Cables
- Cat5e: Supports speeds up to 1 Gbps.
- Cat6: Can handle speeds up to 10 Gbps over short distances.
- Cat6a: Improved version of Cat6, reducing crosstalk.
- Cat7: Supports higher speeds and shielding for better performance.
Tools You Need
Before diving into the cable-making process, gather the necessary tools:
- RJ45 connectors
- Ethernet cable (Cat5e, Cat6, etc.)
- Cable stripper
- Crimping tool
- Network cable tester
Cable Types
Choosing the right cable type is crucial for achieving optimal performance. Here’s a breakdown of commonly used Ethernet cables:
| Type | Max Speed | Distance |
|---|---|---|
| Cat5e | 1 Gbps | 100 meters |
| Cat6 | 10 Gbps | 55 meters |
| Cat6a | 10 Gbps | 100 meters |
| Cat7 | 10 Gbps+ | 100 meters |
Wiring Standards
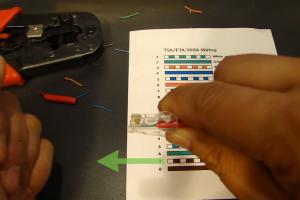
When creating an Ethernet cable, adhering to specific wiring standards is vital. The two most commonly used standards are T568A and T568B.
- T568A: Typically used in residential installations.
- T568B: Commonly used in commercial environments.
Step-by-Step Guide to Creating an Ethernet Cable
Now that you have your tools and understand the types of cables and wiring standards, follow this step-by-step guide:
Step 1: Measure and Cut the Cable
Determine the length of the cable you need and cut the Ethernet cable to size, leaving a little extra for adjustments.
Step 2: Strip the Cable Ends
Using a cable stripper, carefully strip about 1 inch of the outer sheath from each end of the cable.
Step 3: Untwist the Pairs
Inside the cable, you will find four twisted pairs of wires. Untwist them carefully and arrange them according to the wiring standard you choose (T568A or T568B).
Step 4: Trim the Wires
Trim the wires to ensure they are all the same length, about 1 inch from the outer sheath.
Step 5: Insert Wires into RJ45 Connector
Insert the wires into the RJ45 connector, ensuring they go in the correct order for the chosen wiring standard.
Step 6: Crimp the Connector
Using the crimping tool, firmly crimp the connector to secure the wires in place.
Step 7: Repeat for the Other End
Repeat the process for the other end of the cable.
Step 8: Test the Cable
Use a network cable tester to check for continuity and correct wiring.
Testing Your Cable
After creating your Ethernet cable, it’s crucial to test it to ensure it functions correctly. A network cable tester will help you detect any wiring issues or faults.
Case Studies
To illustrate the effectiveness of DIY Ethernet cables, consider the following case studies:
Case Study 1: Home Office Setup
A remote worker saved over $100 by crafting multiple Ethernet cables instead of purchasing pre-made ones, optimizing their home office with high-speed connections.
Case Study 2: Small Business Network
A small business reduced networking costs significantly by creating custom-length Ethernet cables, ensuring no excess cable was left to clutter their workspace.
Expert Insights
Experts recommend that understanding the environment where the cables will be used is crucial. For instance, outdoor cables should be rated for UV exposure, while indoor cables can be less robust.
FAQs
- Can I use any type of Ethernet cable for my home network? Yes, but ensure it meets your speed requirements.
- What's the difference between Cat5e and Cat6? Cat6 offers higher speeds and better performance over short distances.
- How long can an Ethernet cable be? The maximum length is typically 100 meters for optimal performance.
- Do I need a special tool to create an Ethernet cable? Yes, a crimping tool and cable stripper are essential.
- What is the best wiring standard to use? It depends on your setup; T568B is more common in commercial applications.
- How can I test my Ethernet cable? Use a network cable tester to check for continuity and wiring integrity.
- Can I make a crossover Ethernet cable? Yes, by using different wiring standards on each end.
- What is the maximum speed of Cat7 cables? Cat7 can support speeds of 10 Gbps and higher.
- Is it hard to create an Ethernet cable? With the right tools and guidance, it is manageable for most people.
- What should I do if my cable doesn’t work? Check the wiring and test it with a network cable tester.
Random Reads
- How and when to send email to hr
- Wake unlock ipad
- Uploading to icloud paused resolve issue
- Easy ways to turn off work offline in outlook
- How to make faux rocks with concrete diy landscape rocks
- Prevent easy install vmware workstation
- Reseal toilet replacing wax seals
- Mastering horse riding in minecraft
- Mastering fill command minecraft
- Unlocking apple itunes account