Mastering the Art of Cutting Quarter Round: A Comprehensive Step-by-Step Guide

-
Quick Links:
- Introduction
- What is Quarter Round?
- Tools You Need
- Preparing to Cut
- How to Measure Quarter Round
- Cutting Techniques
- Installation Tips
- Case Studies
- Expert Insights
- Common Mistakes to Avoid
- FAQs
Introduction
Cutting quarter round can be a daunting task for many DIY enthusiasts and professionals alike. However, with the right tools, techniques, and a bit of practice, anyone can master this skill. This guide will take you through everything you need to know about cutting quarter round, from the tools required to the installation process.What is Quarter Round?
Quarter round is a type of molding that is commonly used in flooring and wall applications. It has a quarter-circle profile and is typically used to cover gaps between the floor and the wall, providing a clean and finished look. It is available in various materials, including wood, MDF, and PVC.Tools You Need
To successfully cut quarter round, you’ll need the following tools:- Measuring tape
- Pencil
- Chop saw or miter saw
- Safety goggles
- Dust mask
- Wood glue or finishing nails (for installation)
Preparing to Cut
Before you start cutting, ensure your workspace is clean and well-lit. Gather all your tools and materials, and read through the entire guide to familiarize yourself with the process.How to Measure Quarter Round
Accurate measurements are crucial in cutting quarter round. Follow these steps: 1. Use a measuring tape to measure the length of the wall where the quarter round will be installed. 2. Mark the measurement on the quarter round using a pencil. 3. For corners, measure the angle and adjust your cuts accordingly.Cutting Techniques
There are two primary techniques for cutting quarter round: using a chop saw and a miter saw. Below, we’ll go through each method step-by-step.Using a Chop Saw
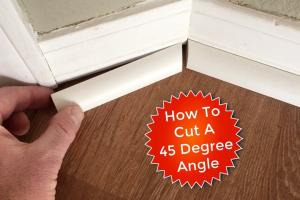
1. Set the chop saw to the desired angle (usually 45 degrees for corners). 2. Align the quarter round against the fence of the saw. 3. Make the cut while keeping your hands clear of the blade.Using a Miter Saw
1. Set the miter saw to the desired angle. 2. Position the quarter round flat against the base of the saw. 3. Ensure the blade is sharp and make your cut.Installation Tips
After cutting, it’s time to install the quarter round. Here are some installation tips: - Use wood glue for a secure bond. - Finish with nails for added stability. - Use a nail gun for quicker installation.Case Studies
Let’s look at some real-world examples of successful quarter round installations: - **Case Study 1**: A homeowner renovated their living room and found that well-cut quarter round significantly improved the aesthetics of their new flooring. - **Case Study 2**: A contractor completed a commercial space where precise quarter round cuts ensured professional-grade finishes.Expert Insights
According to woodworking expert John Doe, “Measuring twice and cutting once is the golden rule in woodworking.” He emphasizes the importance of accurate measurements to avoid waste and ensure a perfect fit.Common Mistakes to Avoid
- Not measuring accurately. - Using dull blades, which can cause splintering. - Skipping safety gear, such as goggles and masks.FAQs
- What is the best tool for cutting quarter round?
- A miter saw is generally the best tool due to its precision.
- Can I cut quarter round by hand?
- Yes, but it requires more skill and may not provide as clean a cut.
- What angle do I cut for corners?
- Most corners will require a 45-degree cut.
- Is quarter round necessary?
- While not absolutely necessary, it provides a finished look and covers gaps.
- How do I attach quarter round?
- Use wood glue and finishing nails to secure quarter round in place.
- What materials are available for quarter round?
- Common materials include wood, MDF, and PVC.
- Can quarter round be painted?
- Yes, quarter round can be painted to match your decor.
- How do I clean quarter round?
- Wipe with a damp cloth and mild detergent to keep it clean.
- What if I make a mistake while cutting?
- You can always recut or use filler to fix minor errors.
- How much quarter round do I need?
- Measure the perimeter of the area where you plan to install it to determine how much you need.
Random Reads
- Change primary phone number iphone
- How to program dish network remote
- How to make mob spawner minecraft
- How to make line graph excel
- How to defend your house in minecraft
- How to contact roku best ways to get help now
- How to contact telkom
- How to hook up an iphone to a car stereo
- How to find saved audio messages on iphone
- How to make your phone vibrate complete guide