How to Darken Wood: The Ultimate Guide for DIY Enthusiasts

-
Quick Links:
- Understanding Wood and Its Properties
- Methods to Darken Wood
- Choosing the Right Technique for Your Project
- Step-by-Step Guide to Darkening Wood
- Case Studies: Successful Wood Darkening Projects
- Expert Insights on Wood Finishing
- FAQs
Understanding Wood and Its Properties
Wood is a versatile material used in various applications, and understanding its properties is crucial for effective darkening techniques. Different types of wood react differently to stains and finishes, influencing the final appearance.
Types of Wood
- Hardwoods: Oak, maple, and cherry are popular choices that tend to absorb stains well.
- Softwoods: Pine and cedar often require special techniques due to their porous nature.
Why Darken Wood?
Darkening wood can enhance its natural beauty, hide imperfections, and achieve desired aesthetics in home decor. Whether for furniture, cabinetry, or flooring, darkened wood can create warmth and depth in any space.
Methods to Darken Wood
There are several methods available for darkening wood, each with its own benefits and drawbacks. Let's explore the most popular techniques:
1. Wood Stains
Wood stains are one of the most common methods for darkening wood. They penetrate the wood grain, providing a rich color while maintaining the wood's natural texture.
2. Natural Oils
Natural oils like tung oil or linseed oil can deepen the color of wood while adding a protective finish. They are easy to apply and safe for indoor use.
3. Paints and Sealers
Using paint or sealers can give a solid color finish, effectively darkening the wood. This method is suitable for achieving a uniform look.
4. Wood Dyes
Wood dyes are concentrated colorants that provide vibrant hues. They can be more challenging to work with but yield exceptional results.
5. Chemical Treatments
Chemical treatments, such as iron acetate, can react with tannins in the wood to create a dark effect. This method is often used for achieving a distressed look.
Choosing the Right Technique for Your Project
When selecting a method to darken wood, consider the type of wood you are working with, the desired finish, and the intended use of the item. For example:
- Furniture: Stains or oils are often preferred for their natural appearance.
- Outdoor Projects: Use paints or sealers designed to withstand the elements.
- Artistic Projects: Consider dyes for artistic applications where color vibrancy is key.
Step-by-Step Guide to Darkening Wood
Here’s a comprehensive guide to darkening wood using stains:
Tools and Materials Needed
- Wood stain or dye
- Brush or cloth
- Sandpaper (varying grits)
- Clean rags
- Protective gloves
- Sealer (optional)
Step-by-Step Process
Step 1: Prepare the Wood
Start by sanding the wood surface to remove any imperfections and create a smooth finish. Use finer grits for finishing touches.
Step 2: Clean the Surface
After sanding, wipe the surface with a clean cloth to remove dust and debris.
Step 3: Apply the Stain
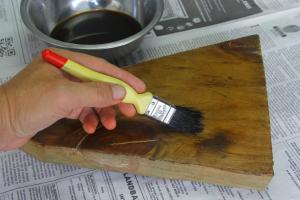
Using a brush or cloth, apply the wood stain in the direction of the grain. Ensure even coverage.
Step 4: Wipe Off Excess Stain
After a few minutes, wipe off any excess stain with a clean cloth to avoid blotchy areas.
Step 5: Let it Dry
Allow the wood to dry completely. Depending on the product used, this may take several hours or overnight.
Step 6: Apply a Sealer (Optional)
For added protection, apply a sealer to lock in the color and enhance durability.
Case Studies: Successful Wood Darkening Projects
Here are a few real-world examples showcasing the effectiveness of various darkening techniques:
Case Study 1: Darkening Oak Furniture
A homeowner transformed a light oak dining table using a walnut stain, resulting in a rich, warm finish that complemented their home decor.
Case Study 2: Cedar Decking
Using a semi-transparent stain, a homeowner successfully darkened their cedar deck while ensuring it remained protected from the elements.
Expert Insights on Wood Finishing
We reached out to woodworking experts for their insights on darkening wood:
"Choosing the right stain is crucial. Always test on a scrap piece to see how the wood reacts." – John Smith, Woodworking Expert
FAQs
1. Can I darken wood without sanding it?
While it's possible, sanding helps achieve a smoother finish and better color absorption.
2. How long does it take for wood stain to dry?
Drying time varies by product but typically ranges from 1 to 8 hours.
3. What is the best type of stain for beginners?
Water-based stains are user-friendly and easier to clean up.
4. Is it necessary to apply a sealer after staining?
Applying a sealer is recommended for added protection and longevity.
5. Can I mix different stains?
Yes, mixing stains can create unique colors, but always test beforehand.
6. How do I remove stain from wood?
Use a paint stripper or sand the surface to remove unwanted stain.
7. What is the difference between stain and dye?
Stains typically contain pigments, while dyes offer a more vibrant color by penetrating the wood more deeply.
8. Can I darken treated wood?
Yes, but ensure the wood is clean and free of any treatments that may hinder stain absorption.
9. How do I prevent blotching when staining?
Using a pre-stain conditioner can help prevent blotching on softwoods.
10. Can darkening wood affect its durability?
The right finishing products can enhance durability, while poor application may lead to issues.
Conclusion
Darkening wood is an art that can elevate the beauty of your projects. By understanding wood properties and mastering the right techniques, you can achieve stunning results that enhance your home decor. Whether you're a novice or a seasoned woodworker, this guide provides the knowledge needed to darken wood effectively.