Mastering the Art of Filling Large Holes & Gaps in Wood: Your Ultimate Guide

-
Quick Links:
- Introduction
- Understanding Wood Fillers
- Types of Wood Fillers
- Preparing the Surface
- Step-by-Step Guide to Filling Large Holes
- Finishing Touches
- Case Studies & Examples
- Expert Insights
- FAQs
Introduction
Filling large holes and gaps in wood is a common task for DIY enthusiasts and professional carpenters alike. Whether you're repairing an old piece of furniture or working on a new project, knowing how to properly fill these imperfections can not only enhance the aesthetics of your work but also prolong the life of your wooden items. In this guide, we will walk you through everything you need to know about filling large holes and gaps in wood like a pro.
Understanding Wood Fillers
Wood fillers are products designed to fill cracks, holes, and gaps in wood surfaces. They come in various forms, including paste, liquid, and powder, and can be used for different applications depending on the extent of the damage. Understanding what wood filler is and how it works is key to achieving a flawless finish.
Types of Wood Fillers
There are several types of wood fillers available on the market. Here are the most common:
- Water-Based Fillers: Easy to clean up and ideal for small repairs.
- Solvent-Based Fillers: More durable and suitable for outdoor use.
- Epoxy Fillers: Extremely strong and perfect for large repairs.
- Paste Fillers: Great for filling large gaps and holes, providing a smooth finish.
Preparing the Surface
Before applying any wood filler, it’s crucial to prepare the surface properly. Here’s how:
- Clean the Area: Remove any dust, dirt, or debris from the surface.
- Assess the Damage: Identify how large the hole or gap is and what type of filler you will need.
- Sand the Edges: Lightly sand the edges of the hole for better adhesion.
Step-by-Step Guide to Filling Large Holes
Now, let’s dive into the detailed process of filling large holes and gaps in wood:
Step 1: Choose the Right Filler
Based on the type of wood and the size of the hole, choose a suitable filler. For larger holes, epoxy fillers are generally recommended.
Step 2: Mix the Filler (if necessary)
If you’re using a two-part epoxy, follow the manufacturer’s instructions to mix the components thoroughly.
Step 3: Apply the Filler
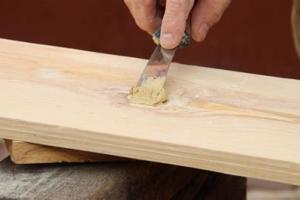
Using a putty knife, apply the filler into the hole, ensuring it overfills slightly to allow for shrinkage. Smooth it out to create an even surface.
Step 4: Allow to Dry
Let the filler dry completely. This can take anywhere from a few hours to overnight, depending on the product used.
Step 5: Sand the Surface
Once dry, sand the area smoothly until it’s flush with the surrounding wood. Start with coarse grit and finish with fine grit sandpaper.
Step 6: Finish the Wood
After sanding, apply a coat of paint, stain, or sealant to match the rest of the wood.
Finishing Touches
After filling and finishing your wood, it’s essential to let it cure properly before using the item. This ensures that the filler bonds well and provides a long-lasting repair.
Case Studies & Examples
To illustrate the effectiveness of the methods described, here are a couple of case studies:
Case Study 1: Restoring a Vintage Chair
A vintage chair had multiple large holes due to wear and tear. Using an epoxy filler, the owner restored the chair to its original beauty, reinforcing its structural integrity.
Case Study 2: Rebuilding a Wooden Deck
A wooden deck needed repair due to water damage. By filling the gaps with a water-resistant filler, the deck was saved from further deterioration.
Expert Insights
We spoke with woodworking professionals to gather their tips on filling large holes and gaps in wood:
"Always choose the filler based on the intended use of the wood piece. For outdoor projects, durability is key!" - John, Master Carpenter
"Preparation is just as important as the product. Take your time to prep the surface." - Sarah, Wood Restoration Expert
FAQs
1. What is the best wood filler for large holes?
Epoxy fillers are often recommended for large holes due to their strength and durability.
2. Can I use regular putty for filling large holes?
While regular putty can be used, it may not provide the same level of durability as specialized wood fillers.
3. How do I know if the filler is dry?
Check the manufacturer's instructions, but generally, the surface will feel hard and no longer be tacky to the touch.
4. Will the filled area match the rest of the wood?
With proper sanding and finishing, the filled area can blend seamlessly with the surrounding wood.
5. How long should I wait before sanding?
This varies by product; refer to the instructions, but typically 1-2 hours for quick-drying fillers.
6. Can I paint over wood filler?
Yes, most wood fillers can be painted or stained after they dry completely.
7. What if my filler shrinks after drying?
In cases of shrinkage, you can apply a second layer of filler to achieve a smooth finish.
8. Is wood filler waterproof?
Some fillers are designed for outdoor use and are waterproof; check the label for specifics.
9. Can I use wood filler on furniture?
Absolutely! Wood filler is commonly used on furniture repairs to restore appearance and function.
10. What tools do I need for filling wood holes?
A putty knife, sandpaper, and a clean cloth for dusting are typically sufficient for this task.