Ultimate Guide on How to Fill Nail Holes: A Step-by-Step Approach

-
Quick Links:
- Introduction
- Why Fill Nail Holes?
- Tools and Materials Needed
- Preparing the Wall
- Step-by-Step Guide to Fill Nail Holes
- Painting and Finishing
- Common Mistakes to Avoid
- Case Studies
- Expert Insights
- FAQs
Introduction
Filling nail holes is a simple yet crucial aspect of home maintenance and renovation. Whether you’re preparing for a fresh coat of paint or simply want to maintain a polished look, knowing how to fill nail holes correctly can save you time and frustration. This guide will walk you through the entire process, providing tips and insights to ensure a flawless finish.Why Fill Nail Holes?
Filling nail holes serves several purposes: - **Aesthetics**: A smooth wall surface enhances the overall look of your room. - **Protection**: Filling holes prevents moisture from seeping in, which can lead to mold and damage. - **Preparation for Painting**: A well-prepped wall ensures an even paint application, avoiding unsightly patches or discoloration.Tools and Materials Needed
Before you start, gather the following tools and materials: - Spackle or joint compound - Putty knife - Sandpaper (fine-grit) - Paint (matching your wall color) - Paintbrush or roller - Primer (if necessary) - Clean clothPreparing the Wall
Preparation is key to achieving a smooth finish. Follow these steps: 1. **Clean the Area**: Use a clean cloth to remove dust and debris from the wall around the nail hole. 2. **Inspect the Hole**: Check for any damage around the hole that might require additional repair.Step-by-Step Guide to Fill Nail Holes
Filling nail holes is a straightforward process. Here’s how to do it:Step 1: Apply Spackle
- Using a putty knife, scoop a small amount of spackle. - Press it into the hole, ensuring it is slightly overfilled to allow for sanding later. - Smooth it over the surrounding area.Step 2: Let It Dry
- Allow the spackle to dry completely. This usually takes a few hours but can vary based on the product used.Step 3: Sand the Area
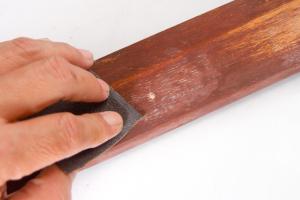
- Once dry, use fine-grit sandpaper to smooth the filled area until it is flush with the wall. - Wipe away any dust with a clean cloth.Step 4: Prime and Paint
- If you’re painting over the area, apply a primer to ensure the paint adheres well. - Once the primer is dry, paint over the filled hole with your wall color.Painting and Finishing
Choosing the right paint is essential to ensure the filled holes blend seamlessly. Here are some tips: - Use a paint that matches the sheen and color of the surrounding wall. - Apply multiple thin layers rather than one thick layer for the best finish.Common Mistakes to Avoid
- **Overfilling the Hole**: This can lead to uneven surfaces. - **Skipping Sanding**: Failing to sand can result in visible bumps. - **Using the Wrong Paint**: Ensure the color and finish match the existing wall.Case Studies
**Case Study 1: Living Room Renovation** In a recent living room renovation, filling nail holes was essential before repainting. The homeowner used spackle and achieved a professional finish that transformed the space. **Case Study 2: Office Makeover** During an office makeover, the team filled numerous nail holes left by previous decorations. By following the step-by-step guide, they saved on hiring a professional and achieved a polished look.Expert Insights
According to home improvement expert Jane Doe, “Taking the time to fill nail holes correctly can elevate the appearance of any room. It's a simple task that makes a significant difference.”FAQs
- 1. How long does it take for spackle to dry?
- Spackle typically dries within 1-2 hours, but larger holes may take longer.
- 2. Can I paint over spackle immediately?
- It’s best to wait until the spackle is completely dry before painting.
- 3. What type of spackle should I use?
- For small nail holes, lightweight spackle is usually sufficient.
- 4. Can I use caulk instead of spackle?
- Yes, caulk can be used for filling small holes or gaps, particularly around trim.
- 5. Do I need to prime before painting?
- Priming is recommended for a more uniform finish, especially if filling larger holes.
- 6. What should I do if the spackle cracks after drying?
- Simply sand the area, reapply spackle, and repaint once dry.
- 7. Is it necessary to sand the spackle?
- Sanding is crucial for a smooth finish and to blend with the wall.
- 8. How can I prevent nail holes in the future?
- Consider using adhesive hooks or damage-free hanging solutions.
- 9. Can I fill large holes using the same method?
- For larger holes, a patching compound or mesh patch may be necessary.
- 10. Is there a specific temperature for filling nail holes?
- It's best to fill holes in moderate temperatures (60-80°F) for optimal drying.
Random Reads