Ultimate Guide to Formatting Floppy Disks: A Step-by-Step Approach

-
Quick Links:
- 1. Introduction
- 2. Understanding Floppy Disks
- 3. Why Format a Floppy Disk?
- 4. Tools Needed for Formatting
- 5. Step-by-Step Guide to Formatting a Floppy Disk
- 6. Troubleshooting Common Issues
- 7. Case Studies and Examples
- 8. Expert Insights
- 9. Conclusion
- 10. FAQs
1. Introduction
In the era of cloud storage and high-capacity drives, floppy disks might feel like a relic of the past. However, understanding how to format a floppy disk is a valuable skill, especially for retro computing enthusiasts or those working with legacy systems. This guide will take you through everything you need to know about floppy disk formatting, from the basics to advanced troubleshooting techniques.
2. Understanding Floppy Disks
Floppy disks were once the primary medium for data storage and transfer. They come in various sizes, with 3.5-inch disks being the most common. Understanding how these disks work is essential for effective formatting.
2.1 Types of Floppy Disks
- 8-inch Floppy Disk
- 5.25-inch Floppy Disk
- 3.5-inch Floppy Disk
2.2 Structure of a Floppy Disk
A floppy disk is composed of a thin plastic shell that houses a magnetic disk. Data is stored magnetically, which is why formatting is critical for preparing the disk for new data.
3. Why Format a Floppy Disk?
Formatting a floppy disk is crucial for several reasons:
- To erase existing data and make space for new files.
- To correct disk errors and restore functionality.
- To prepare a disk for use in a specific operating system or device.
4. Tools Needed for Formatting
Before formatting a floppy disk, ensure you have the following tools:
- A floppy disk drive (internal or external)
- A computer with an operating system that supports floppy disks
- Formatting software (if needed)
5. Step-by-Step Guide to Formatting a Floppy Disk
Follow these steps to format your floppy disk:
5.1 Using Windows
- Insert the floppy disk into the floppy disk drive.
- Open 'My Computer' or 'This PC'.
- Right-click on the floppy disk drive icon.
- Select 'Format' from the context menu.
- Choose the formatting options (File System, Quick Format, etc.) and click 'Start'.
- Wait for the process to complete, and then click 'OK'.
5.2 Using Mac OS
- Insert the floppy disk into the floppy disk drive.
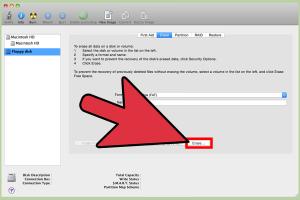
- Open 'Disk Utility' from the Applications folder.
- Select the floppy disk from the list of drives.
- Click on 'Erase' and choose the desired format.
- Click 'Erase' to begin the formatting process.
6. Troubleshooting Common Issues
Sometimes, formatting a floppy disk may not go as planned. Here are some common issues and how to resolve them:
6.1 Disk Not Recognized
If your computer does not recognize the floppy disk, try the following:
- Check if the disk is properly inserted.
- Test with another floppy disk to ensure the drive is functioning.
- Clean the disk and drive connectors.
6.2 Formatting Errors
If you encounter formatting errors, consider:
- Using different formatting software.
- Checking for physical damage on the disk.
- Ensuring the disk is not write-protected.
7. Case Studies and Examples
Let’s look at a few case studies where formatting floppy disks played a crucial role:
7.1 The Legacy of Retro Gaming
Many retro gaming consoles relied on floppy disks for saving and loading game data. Formatting these disks is essential to maintain game performance and stability.
7.2 Data Recovery Situations
In instances where data is lost due to disk corruption, formatting can sometimes restore usability, allowing data recovery specialists to retrieve lost files.
8. Expert Insights
We spoke with IT professionals who shared their thoughts on floppy disk usage and formatting.
8.1 Importance of Regular Formatting
Experts emphasize the importance of regularly formatting floppy disks to maintain data integrity and prevent corruption.
8.2 Best Practices
Always back up data before formatting, and use a reliable disk management tool to avoid mishaps.
9. Conclusion
Formatting a floppy disk may seem like a straightforward task, but understanding the underlying principles and troubleshooting common issues can greatly enhance your experience. Whether you’re a retro computing enthusiast or just looking to clear up some space, this guide has provided you with the necessary tools and knowledge to format a floppy disk efficiently.
10. FAQs
1. Can I format a floppy disk on any computer?
Formatting a floppy disk requires a floppy disk drive and compatible operating system software.
2. What is the difference between Quick Format and Full Format?
Quick Format erases the file system but does not check for bad sectors, whereas Full Format checks the disk for errors.
3. How can I recover data from a formatted floppy disk?
Data recovery software may help retrieve lost files, but results are not guaranteed.
4. Are floppy disks still used today?
Floppy disks are largely obsolete but are still used in some legacy systems and retro computing.
5. Can I format a floppy disk in a different file system?
Yes, as long as the operating system supports that file system.
6. What should I do if my floppy disk is write-protected?
Remove the write protection tab on the disk if applicable, and try formatting again.
7. How do I know if my floppy disk is damaged?
Physical damage, such as cracks or dents, or failure to format or read may indicate a damaged disk.
8. Can formatting a floppy disk improve performance?
Yes, formatting can help clear corruption and optimize performance.
9. Is it safe to use old floppy disks?
Old floppy disks can be safe to use but are prone to data loss due to age and degradation.
10. Where can I find floppy disks today?
Floppy disks can often be found through online marketplaces or specialty retro computing stores.