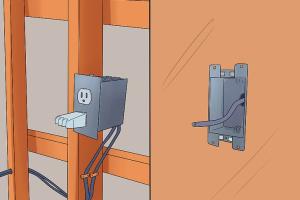
Mastering Cabling Installations in Pre-Built Homes: A Comprehensive Guide

-
Quick Links:
- Introduction
- Understanding Your Cabling Needs
- Types of Cabling
- Tools and Materials Required
- Planning Your Installation
- Step-by-Step Installation Guide
- Case Studies: Real-Life Installations
- Common Mistakes to Avoid
- Expert Insights
- FAQs
Introduction
Installing cabling in a pre-built home can seem daunting. However, with the right tools, knowledge, and planning, you can successfully set up your home for a robust network, smart devices, and more. This comprehensive guide will take you through the entire process, ensuring you feel confident in your ability to achieve a professional-level installation.
Understanding Your Cabling Needs
The first step in any cabling project is understanding what you need. Do you require a basic network for internet connectivity, or are you looking to install a more complex system for smart home devices? Assessing your needs will help you choose the right type of cabling and plan your installation effectively.
Considerations for Cabling Needs:
- Type of internet service (fiber, DSL, cable)
- Number of devices connected
- Areas requiring coverage (living room, bedrooms, home office)
- Future-proofing for additional devices
Types of Cabling
There are several types of cabling that you can use based on your needs:
1. Ethernet Cabling
For most home networking needs, Ethernet cabling (Cat 5e, Cat 6, Cat 6a) is ideal. It provides a reliable and high-speed connection for internet and local network.
2. Coaxial Cabling
Used primarily for cable television, coaxial cabling is also suitable for some internet service providers.
3. Fiber Optic Cabling
If you are looking for the fastest internet connectivity, fiber optic cabling is the best choice, though it’s often more expensive and requires specialized installation.
Tools and Materials Required
Before you begin your installation, gather all the necessary tools and materials:
- Cable (Ethernet, coaxial, or fiber)
- Cable management tools (cable ties, clips)
- Cable stripper
- Crimping tool (for Ethernet cables)
- Drill with appropriate bits
- Fish tape or wire puller
- Wall plates and connectors
Planning Your Installation
Proper planning can save you time and money. Follow these steps:
- Map Your Home: Create a detailed floor plan of your home and mark where you want to install cabling.
- Select Cable Routes: Decide on the best routes for your cabling, considering existing walls, floors, and ceilings.
- Identify Cable Drops: Choose locations for wall plates and ensure they are accessible for future maintenance.
Step-by-Step Installation Guide
Step 1: Prepare the Site
Clear the areas where you will be working and gather all tools and materials.
Step 2: Install Wall Plates
Drill holes where necessary and install wall plates for a clean finish.
Step 3: Run the Cabling
Use fish tape to pull cables through walls and ceilings. This may require navigating obstacles, so patience is key.
Step 4: Terminate the Cables
Use a cable stripper to expose the wires and crimp connectors onto the Ethernet cables.
Step 5: Test Your Setup
After installation, test your connections to ensure everything is functioning correctly.
Case Studies: Real-Life Installations
Let’s look at a few case studies to see how homeowners successfully installed cabling in their pre-built homes.
Case Study 1: The Smith Family's Smart Home Upgrade
The Smith family decided to upgrade their home to accommodate smart devices.
Challenges: Limited access to walls due to existing furniture.
Solution: They used a combination of surface-mounted raceways and wireless solutions to achieve a clean installation.
Case Study 2: The Johnsons’ Home Office
The Johnsons needed robust internet connectivity for remote work.
Challenges: A long distance from the router to the home office.
Solution: They installed Ethernet cabling through the basement to ensure reliable connectivity.
Common Mistakes to Avoid
- Overlooking local building codes and regulations.
- Using the wrong type of cabling for specific applications.
- Neglecting to test connections before sealing up walls.
- Ignoring future-proofing needs.
Expert Insights
We spoke with professional electricians and networking specialists to gather insights on common best practices for cabling installation. Here are some tips:
- Always plan your cable routes before starting.
- Use quality materials for a reliable installation.
- Label your cables for easier troubleshooting in the future.
FAQs
1. How do I know what type of cabling I need?
Assess your internet speed requirements, the number of devices, and the layout of your space to determine the best cabling type.
2. Can I install cabling myself?
Yes, with the right tools and knowledge, many homeowners can successfully install cabling themselves.
3. What tools do I need for cabling installation?
You will need cable, a cable stripper, crimping tool, drill, fish tape, and wall plates.
4. How do I avoid damaging my walls during installation?
Plan routes carefully and use fish tape to guide cables through walls rather than forcing them through.
5. Is it necessary to hire a professional?
While many installations can be DIY, hiring a professional may be advisable for complex setups or if local codes require it.
6. How can I future-proof my cabling installation?
Consider using higher-grade Ethernet cables and installing extra conduits for future needs.
7. What are some common mistakes to avoid?
Common mistakes include not testing connections, overlooking local codes, and using inappropriate cabling.
8. How do I test my cabling installation?
You can use a cable tester to ensure that your connections are working correctly.
9. Can I run cabling through my attic or basement?
Yes, running cabling through attics and basements is common, but ensure you follow safety guidelines and building codes.
10. What should I do if I encounter a problem during installation?
Stay calm and troubleshoot by checking connections, ensuring you’re using the correct cables, and consulting resources or professionals if needed.
By following this comprehensive guide, you can confidently tackle your cabling installation in a pre-built home, enhancing your living space and ensuring a reliable network for years to come.
Random Reads