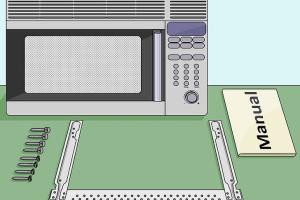
Step-by-Step Guide: How to Install an Over The Range Microwave Easily

-
Quick Links:
- Introduction
- Tools and Materials Needed
- Safety Precautions
- Preparation for Installation
- Installation Steps
- Troubleshooting Common Issues
- Case Studies and Real-Life Examples
- FAQs
Introduction
Installing an over-the-range microwave can seem daunting, but with the right tools and a step-by-step approach, it can be a rewarding DIY project. This guide will provide a comprehensive look at the installation process, safety considerations, and tips to ensure your microwave is set up correctly and securely. Let's dive into the details!
Tools and Materials Needed
- Over-the-range microwave
- Drill and drill bits
- Screwdriver (flathead and Phillips)
- Stud finder
- Level
- Measuring tape
- Wire cutters/strippers
- Safety goggles
- Masking tape
- Electrical tape
- Mounting hardware (usually included with the microwave)
Safety Precautions
Before beginning the installation, ensure you take necessary safety precautions:
- Always unplug the microwave before working on it.
- Use safety goggles when drilling or cutting.
- Ensure the area is well-ventilated, especially if working with ductwork.
- Follow the manufacturer’s installation instructions carefully.
Preparation for Installation
Before you start the installation, gather all necessary tools and materials. Ensure your workspace is clear and accessible. Here’s a quick checklist:
- Read through the microwave's installation manual.
- Check the dimensions of your new microwave to ensure it fits the space.
- Verify that the electrical outlet is functioning and located where it is required.
Installation Steps
Removing the Old Microwave
If you are replacing an old microwave, begin by carefully removing it. Here’s how:
- Unplug the old microwave from the electrical outlet.
- Remove any screws securing it to the wall or cabinet.
- Lift the microwave off its mounting bracket and set it aside.
Mounting Bracket Installation
Next, install the mounting bracket for the new microwave:
- Hold the mounting template (provided with your microwave) against the wall. Use a level to ensure it’s straight.
- Mark the drill holes indicated on the template with a pencil.
- Drill holes into the wall where you marked.
- Secure the mounting bracket using the provided screws and ensure it’s level.
Connecting Ductwork
If your microwave requires external ventilation, you’ll need to connect the ductwork:
- Follow the ducting instructions in the microwave manual.
- Attach the ductwork to the microwave’s venting system.
Mounting the New Microwave
Now it’s time to mount your new microwave:
- Lift the microwave onto the mounting bracket. You may need an assistant for this step.
- Align the microwave with the mounting bracket and secure it with screws.
Final Steps and Testing
After the microwave is mounted, complete the installation:
- Plug the microwave back into the electrical outlet.
- Test the microwave to ensure it’s functioning properly.
- Double-check all screws and connections for stability.
Troubleshooting Common Issues
If you encounter problems during installation, here are some common issues and solutions:
- Microwave not fitting: Ensure correct measurements were taken before purchasing.
- Unstable mounting: Check that all screws are tightened properly and that the bracket is secured.
- Electrical issues: Ensure the outlet is functioning and the microwave is plugged in correctly.
Case Studies and Real-Life Examples
Many homeowners have successfully installed their over-the-range microwaves. Here are a couple of real-life examples:
Case Study 1: The Johnson Family
The Johnsons replaced their old microwave after noticing it was not venting properly. They followed our guide and completed the installation in under two hours, saving hundreds on installation costs.
Case Study 2: A Kitchen Renovation
During a kitchen renovation, the Smiths installed a new microwave to match their upgraded cabinetry. Utilizing our tips for ductwork installation, they achieved a clean look and improved ventilation.
FAQs
Here are some frequently asked questions about installing an over-the-range microwave:
- Q1: Do I need a professional to install my microwave?
A1: While installation can be done as a DIY project, hiring a professional can ensure safety and proper functionality. - Q2: How long does it take to install an over-the-range microwave?
A2: The installation typically takes about 1 to 3 hours, depending on your experience level and whether you're replacing an old unit. - Q3: What if my kitchen doesn't have a vent?
A3: Many over-the-range microwaves come with recirculating options that filter air and do not require external venting. - Q4: Can I install the microwave by myself?
A4: Yes, it is possible to install it alone, but having a helper can make the process easier and safer. - Q5: What tools do I need to install an over-the-range microwave?
A5: You will need a drill, screwdriver, stud finder, level, and safety goggles, among other tools. - Q6: Is it necessary to use the mounting bracket?
A6: Yes, the mounting bracket is designed to securely hold the microwave in place. - Q7: How do I know if my microwave is properly vented?
A7: You can check for airflow and ensure there are no obstructions in the ductwork. - Q8: Can I install an over-the-range microwave above a gas stove?
A8: Yes, but you must ensure it is at a safe height to avoid heat damage. - Q9: What if my microwave makes strange noises after installation?
A9: Check for loose parts or contact customer service for troubleshooting advice. - Q10: Can I use the microwave right after installation?
A10: Yes, as long as it has been securely mounted and plugged in correctly.
Random Reads
- How to make a spreadsheet in excel
- Mastering webcam streaming guide
- Mastering vanilla ghost house
- How to upgrade your psp firmware
- How to upload a file
- How to test your ps4 controller
- How to test your lcd display on android
- How to open a door with a credit card
- How to open an old safe
- How to smooth glass edges