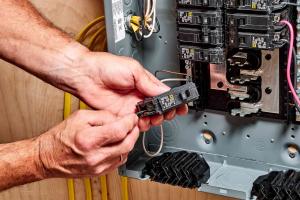
Step-by-Step Guide: How to Install a Circuit Breaker Safely and Efficiently

-
Quick Links:
- Introduction
- Tools and Materials Needed
- Safety First: Precautions to Take
- Understanding Circuit Breakers
- Steps to Install a Circuit Breaker
- Troubleshooting Common Issues
- Case Studies and Real-World Examples
- Expert Insights on Circuit Breaker Installation
- Conclusion
- FAQs
Introduction
Installing a circuit breaker might seem like a daunting task for many homeowners and DIY enthusiasts. However, with the right knowledge and tools, it can be accomplished safely and efficiently. This comprehensive guide will cover everything you need to know about circuit breaker installation, ensuring that you can tackle this project with confidence.
Tools and Materials Needed
Before diving into the installation process, it's crucial to gather all necessary tools and materials. Below is a list of what you'll need:
- New circuit breaker
- Insulated screwdrivers
- Wire cutters
- Wire strippers
- Voltage tester
- Flashlight
- Electrical tape
- Safety goggles
- Work gloves
Safety First: Precautions to Take
Safety is paramount when working with electrical systems. Here are some essential precautions to follow:
- Always turn off the main power before starting work.
- Use insulated tools to prevent electric shock.
- Wear safety goggles and gloves for protection.
- Double-check that the power is off using a voltage tester.
- If you're unsure, consult a licensed electrician.
Understanding Circuit Breakers
A circuit breaker is a crucial component of your home’s electrical system. It protects your home from electrical overloads and short circuits by automatically shutting off the electrical flow in case of a fault. Here are some key points to understand:
- Types of Circuit Breakers: Learn about standard, GFCI, and AFCI breakers.
- Breaker Ratings: Understand the amperage ratings to choose the right breaker for your needs.
- Panel Compatibility: Ensure that the new breaker is compatible with your electrical panel.
Steps to Install a Circuit Breaker
Follow these steps to install a circuit breaker safely:
Step 1: Turn Off the Power
Locate your main electrical panel and turn off the main power switch. This is a critical step to ensure your safety while working.
Step 2: Remove the Panel Cover
Using a screwdriver, carefully remove the cover of your electrical panel. Store the screws in a safe place for reassembly.
Step 3: Identify the Circuit Slot
Determine where you will install the new breaker. Ensure it is compatible with the existing slots in your panel.
Step 4: Connect the Wires
Strip the ends of your wires using wire strippers. Connect the wires to the new breaker - typically, the black wire connects to the breaker, while the white wire connects to the neutral bus bar. The green or bare wire goes to the ground bar.
Step 5: Insert the Breaker
Align the new breaker with the slot and push it firmly into place until it clicks. Ensure it is secure and properly seated.
Step 6: Replace the Panel Cover
Once the breaker is installed, reattach the panel cover and secure it with screws.
Step 7: Turn the Power Back On
Restore power to the panel by turning on the main switch. Then turn on the new circuit breaker to ensure it works correctly.
Troubleshooting Common Issues
If the new circuit breaker trips immediately after installation, here are some common issues to check:
- Overloaded Circuit: Ensure the circuit is not overloaded with too many devices.
- Faulty Wiring: Inspect the wiring connections for any errors or damage.
- Breaker Compatibility: Verify that the breaker is compatible with your electrical panel.
Case Studies and Real-World Examples
Understanding real-world scenarios can enhance your learning experience. Below are a few case studies of homeowners who successfully installed circuit breakers:
Case Study 1: Upgrading to a GFCI Breaker
One homeowner faced frequent tripping in their kitchen circuit. After installing a GFCI breaker, they effectively reduced the risk of electrical shock and improved safety.
Case Study 2: Expanding Power Supply
Another homeowner needed additional outlets in their garage. By installing a new circuit breaker, they could power multiple tools without overloading their system.
Expert Insights on Circuit Breaker Installation
According to electrical experts, proper installation of circuit breakers is crucial for home safety. Regular maintenance checks can prevent electrical fires and other hazards. Always consult with professionals if you are uncertain about any aspect of your installation.
Conclusion
Installing a circuit breaker can be a rewarding DIY project if done correctly. By following the steps outlined in this guide, you can ensure that your home’s electrical system remains safe and efficient. Remember to prioritize safety and consult professionals when necessary.
FAQs
1. How do I know which circuit breaker to buy?
Check the amperage rating and compatibility with your electrical panel.
2. Can I install a circuit breaker without a professional?
Yes, with proper safety precautions and knowledge, homeowners can install circuit breakers themselves.
3. What should I do if the breaker keeps tripping?
Check for overloaded circuits, faulty wiring, or compatibility issues.
4. How often should I replace circuit breakers?
It's recommended to inspect and potentially replace breakers every 10-15 years or if they show signs of wear.
5. Are circuit breaker installations expensive?
The cost varies based on the type of breaker and local labor rates, but DIY installations can save money.
6. What tools do I need for installation?
You’ll need insulated screwdrivers, wire cutters, wire strippers, a voltage tester, and safety gear.
7. Is it safe to install a circuit breaker during a thunderstorm?
It’s best to avoid electrical work during storms due to the risk of lightning strikes.
8. Can I install a circuit breaker in a wet location?
It’s not advisable; use GFCI breakers in wet areas instead.
9. How do I reset a tripped circuit breaker?
Simply switch the breaker to the “off” position and then back to “on”.
10. What are the signs of a failing circuit breaker?
Signs include frequent tripping, physical damage, or a burning smell.