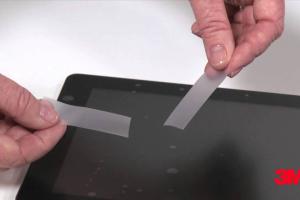
Ultimate Guide: How to Get Air Bubbles Out of a Glass Screen Protector

-
Quick Links:
- Introduction
- Understanding Air Bubbles
- Why Do Bubbles Appear?
- Types of Screen Protectors
- Step-by-Step Guide to Remove Air Bubbles
- Tips to Prevent Air Bubbles
- Case Studies and Examples
- Expert Insights
- FAQs
Introduction
Glass screen protectors are a popular choice among smartphone users for their durability and scratch resistance. However, applying them can sometimes lead to frustrating air bubbles trapped underneath. This comprehensive guide will walk you through the steps to effectively remove these bubbles and also provide insights into preventing them in the future.
Understanding Air Bubbles
Air bubbles form when the glass screen protector is not applied correctly. This can occur during the installation process or if the surface of the device is not clean. Understanding the nature of these bubbles is crucial for effective removal.
Why Do Bubbles Appear?
- Improper Installation: Misalignment or uneven pressure during installation can trap air.
- Dust and Debris: Any particles on the device screen can prevent the protector from adhering completely.
- Temperature Changes: Extreme temperatures can cause the adhesive to expand and contract, leading to bubbles.
Types of Screen Protectors
There are various types of screen protectors available, including:
- Tempered Glass: Highly durable and offers better protection.
- Plastic Film: Thinner and less protective but often less expensive.
- Liquid Screen Protectors: A coating that provides a layer of protection without a physical barrier.
Step-by-Step Guide to Remove Air Bubbles
Removing air bubbles from a glass screen protector can be straightforward if done correctly. Here’s a detailed guide:
Materials Needed
- Credit card or a similar flat object
- Microfiber cloth
- Adhesive tape (optional)
- Spray bottle with water (optional)
Step 1: Clean the Surface
Before attempting to remove the bubbles, ensure the screen protector and device surface are clean. Use a microfiber cloth to wipe away any dust or fingerprints.
Step 2: Identify the Bubbles
Locate the bubbles you wish to remove. If they are small, you might be able to push them out easily. Larger bubbles may require more effort.
Step 3: Use a Credit Card
Take a credit card and gently slide it from the center of the bubble towards the edge. Apply even pressure to push the air out through the edge of the screen protector. Be careful not to scratch the protector.
Step 4: Apply Moisture (If Necessary)
If the bubble persists, lightly spray a small amount of water onto the edge of the screen protector. This can help loosen the adhesive, allowing for easier manipulation.
Step 5: Repeat as Needed
If bubbles remain, repeat the process until all bubbles are removed. It may take several attempts to eliminate stubborn bubbles.
Tips to Prevent Air Bubbles
To avoid encountering air bubbles in the future, follow these tips:
- Ensure your device is clean before applying the protector.
- Apply the screen protector in a dust-free environment.
- Use an application tool or guide to align the protector correctly.
- Take your time during the installation process.
Case Studies and Examples
Here are a few real-world examples of users who successfully removed air bubbles from their glass screen protectors:
- User A: Used the credit card method and successfully removed all bubbles in under 10 minutes.
- User B: Applied moisture and found it easier to adjust the protector without damaging it.
Expert Insights
Experts recommend ensuring that the environment is free from dust and humidity to achieve the best results. Additionally, many suggest using a professional installation service if you’re unsure about applying it yourself.
FAQs
1. Can I use a hairdryer to remove air bubbles?
Yes, using a hairdryer on a low setting can help heat the adhesive, making it easier to push out the bubbles.
2. What if the bubbles don’t go away?
If bubbles persist, you may need to remove the screen protector and reapply it after cleaning the device thoroughly.
3. Are air bubbles dangerous for my screen?
While they are not dangerous, they can affect touch sensitivity and visibility.
4. How long does it take to remove bubbles?
Typically, it should take about 5-10 minutes, depending on the size and number of bubbles.
5. Can I remove the screen protector and reuse it?
Generally, it’s not recommended to reuse a screen protector, as the adhesive may lose its effectiveness.
6. Will applying moisture damage my phone?
As long as you apply moisture sparingly and away from the phone's ports, it should not damage your device.
7. What is the difference between tempered glass and plastic film protectors?
Tempered glass offers better protection against drops and scratches than plastic film, which is more flexible and easier to apply.
8. How can I tell if my screen protector is installed correctly?
Check for even adhesion without any visible air bubbles or misalignment.
9. Can I use tape to lift the edge of the bubble?
Yes, you can use tape to gently lift the edge of the protector and help push out the bubble.
10. What tools do I need to install a screen protector?
A microfiber cloth, credit card, and sometimes a spray bottle for moisture are all you need for a successful installation.
Random Reads