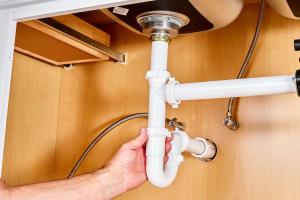
Step-by-Step Guide to Installing a Kitchen Sink Drain: Your Complete DIY Solution

-
Quick Links:
- Introduction
- Tools and Materials Needed
- Preparation Steps
- Installation Process
- Common Issues and Troubleshooting
- Maintenance Tips
- Real-World Case Studies
- Expert Insights
- FAQs
Introduction
Installing a kitchen sink drain may seem daunting, but with the right tools and guidance, it can be a manageable DIY project. A functioning drain is essential for maintaining a clean and efficient kitchen environment. In this comprehensive guide, we will walk you through the entire installation process, equipped with expert tips and troubleshooting advice to ensure your success.
Tools and Materials Needed
Before you begin, gather the necessary tools and materials:
- Adjustable wrench
- Screwdriver (flathead and Phillips)
- PVC pipe cutter
- Plumber's tape
- Silicone sealant
- New drain assembly (sink strainer, tailpiece, and trap)
- Bucket for catching water
- Rags for spills
Preparation Steps
Before you start the installation, it's important to prepare the area:
- Turn off the water supply to the sink.
- Remove any existing drain assembly carefully.
- Clean the sink area to ensure a good seal.
- Check for any plumbing issues that may need addressing before the installation.
Installation Process
Now, let’s dive into the step-by-step installation process:
Step 1: Install the Sink Strainer
Follow these instructions:
- Apply a bead of silicone sealant around the opening of the sink.
- Insert the sink strainer into the opening and press down firmly.
- Secure it from underneath with the provided locknut and washer.
Step 2: Attach the Tailpiece
Next, connect the tailpiece:
- Thread the tailpiece into the sink strainer until snug.
- Use plumber's tape to ensure a watertight seal.
Step 3: Install the Trap
Now, install the trap:
- Connect the trap to the tailpiece.
- Attach the other end of the trap to the wall drain pipe.
- Make sure all connections are tight and secure.
Step 4: Test for Leaks
Once everything is installed, turn on the water supply and check for leaks:
- Run the water and observe all connections.
- If you notice any leaks, tighten the connections as needed.
Common Issues and Troubleshooting
Even with careful installation, issues can arise. Here are some common problems and solutions:
- Leak at the Strainer: Ensure the locknut is tightened and that silicone sealant is applied properly.
- Slow Drainage: Check for clogs in the trap or drainpipe.
- Odors from the Drain: Clean the trap regularly and ensure it holds water to prevent sewer gas from escaping.
Maintenance Tips
To keep your sink drain in optimal condition, practice regular maintenance:
- Flush the drain with hot water weekly.
- Avoid pouring grease or food scraps down the drain.
- Inspect and clean the trap every few months.
Real-World Case Studies
Let’s look at some real-world examples of kitchen sink drain installations:
Case Study 1: Residential Installation
A homeowner in a suburban neighborhood decided to replace their old sink drain due to frequent clogs. By following the steps outlined in this guide, they completed the installation in just under two hours, resulting in a significant decrease in drainage issues.
Case Study 2: Kitchen Renovation
During a kitchen renovation, a contractor used this guide to install multiple sink drains. The contractor reported an increase in efficiency, completing the job ahead of schedule and ensuring all drains operated seamlessly.
Expert Insights
We reached out to plumbing experts for their insights on sink drain installation:
"Ensure that your connections are secure but not overly tight. Over-tightening can lead to cracking in PVC pipes and eventual leaks." - John Smith, Master Plumber
FAQs
Here are some frequently asked questions about installing a kitchen sink drain:
- How long does it take to install a kitchen sink drain? It typically takes 1-2 hours, depending on your plumbing experience.
- Do I need a professional for this installation? If you're comfortable with basic plumbing, this is a DIY project you can handle.
- What type of drain assembly should I buy? Look for a quality drain assembly compatible with your sink type.
- Can I use silicone sealant for all connections? Silicone sealant is great for the strainer, but plumber's tape is best for threaded connections.
- What should I do if I have a leak? Tighten the connections first; if the leak persists, check for cracks or damaged seals.
- Is it normal for a sink to drain slowly? It can be, but it often indicates a clog or improper installation.
- How do I prevent drain odors? Regular cleaning and ensuring water traps are maintained help prevent odors.
- What tools do I need for this installation? Basic plumbing tools like wrenches, screwdrivers, and a pipe cutter will suffice.
- Can I install a drain without removing the sink? It’s best to remove the sink for a thorough installation, but it can be done in some cases.
- How do I know if my drain is properly installed? Test it by running water and checking for leaks and proper drainage.
Random Reads