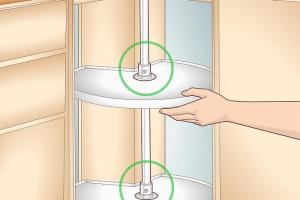
Mastering Your Kitchen: A Comprehensive Guide on How to Adjust a Lazy Susan

-
Quick Links:
- Introduction
- Understanding Lazy Susans
- Common Issues with Lazy Susans
- Tools Needed for Adjustment
- Step-by-Step Guide to Adjusting a Lazy Susan
- Case Study: A Real-Life Lazy Susan Adjustment
- Expert Insights on Lazy Susans
- Maintenance Tips for Lazy Susans
- FAQs
Introduction
Lazy Susans are a staple in kitchens and dining rooms, beloved for their convenience in storing and accessing items. However, over time, they may require adjustments to maintain their functionality. This comprehensive guide will walk you through the process of adjusting a Lazy Susan, ensuring it operates smoothly and effectively.
Understanding Lazy Susans
A Lazy Susan typically involves a rotating tray or turntable, mounted on a base that allows for easy access to items stored on it. They can be made from various materials including wood, plastic, or metal, and come in different shapes and sizes.
- Types of Lazy Susans: Broadly categorized into built-in, countertop, and portable Lazy Susans.
- Benefits: Enhanced organization, easy access, and maximized storage space.
Common Issues with Lazy Susans
Over time, Lazy Susans can develop a variety of issues that may hinder their functionality:
- Sticking or Jamming: Often caused by accumulated dirt or misalignment.
- Uneven Rotation: Can occur due to weight distribution or damage to the base.
- Noise: Grinding sounds may indicate a lack of lubrication or worn-out components.
Tools Needed for Adjustment
Before starting the adjustment process, gather the following tools:
- Screwdriver (flathead and Phillips)
- Lubricating oil or spray
- Cleaning cloths
- Leveling tool
- Measuring tape
Step-by-Step Guide to Adjusting a Lazy Susan
Follow these steps to effectively adjust your Lazy Susan:
Step 1: Remove Contents
Clear off all items stored on the Lazy Susan to access the mechanism easily.
Step 2: Inspect the Base
Check the base for any visible damage or misalignment. Ensure that all screws are tight and that the base is stable.
Step 3: Clean the Mechanism
Use a damp cloth to clean away any dirt or debris that may be causing friction. Pay special attention to the pivot points.
Step 4: Lubricate Moving Parts
Apply a small amount of lubricating oil to the rotating mechanism. This will help ensure smooth operation.
Step 5: Reassemble and Test
Reassemble any parts you may have removed during the process. Test the Lazy Susan to ensure it rotates freely.
Case Study: A Real-Life Lazy Susan Adjustment
Consider the case of a family who struggled with their kitchen Lazy Susan. They faced issues with the tray sticking and uneven rotation. By following the steps outlined above, they were able to restore their Lazy Susan to perfect working order.
Expert Insights on Lazy Susans
Experts recommend regular maintenance, such as periodic cleaning and lubrication, to prolong the life of your Lazy Susan. Additionally, they suggest avoiding overloading the tray to prevent damage.
Maintenance Tips for Lazy Susans
To keep your Lazy Susan in top shape, consider these maintenance tips:
- Regularly check for loose screws and tighten them as needed.
- Clean the surface and mechanism monthly to prevent buildup.
- Lubricate the moving parts every few months or as required.
FAQs
- 1. How often should I adjust my Lazy Susan?
- It’s advisable to check and adjust your Lazy Susan every 6-12 months, or as needed based on performance.
- 2. What can I do if my Lazy Susan is still jamming after adjustment?
- If jamming persists, inspect for damage or consider replacing worn components.
- 3. Can I use any lubricant on a Lazy Susan?
- It’s best to use a food-safe lubricant if the Lazy Susan is used in the kitchen.
- 4. How do I prevent my Lazy Susan from making noise?
- Regular lubrication and cleaning can help eliminate noise.
- 5. What materials are Lazy Susans made from?
- Common materials include wood, plastic, and metal.
- 6. Can I install a Lazy Susan myself?
- Yes, with basic tools and following installation guidelines, you can install a Lazy Susan.
- 7. What is the best way to clean a Lazy Susan?
- A damp cloth with mild soap works best. Avoid harsh chemicals.
- 8. Are there different sizes of Lazy Susans?
- Yes, Lazy Susans come in various sizes to fit different cabinets and countertops.
- 9. How can I improve the stability of my Lazy Susan?
- Ensure that it’s properly installed and that the base is level and stable.
- 10. Is it worth investing in a high-quality Lazy Susan?
- Investing in a quality Lazy Susan can provide better durability and functionality.
This guide should empower you to adjust your Lazy Susan effectively, ensuring it remains a functional and valuable part of your kitchen or dining area. With regular maintenance, you can enjoy its benefits for years to come!
Random Reads
- How to upload files to ios from pc via shareit
- Ultimate guide changing globe home wifi password
- Find your skype id
- Find your stolen phone lock or erase a lost device
- Edit change text color photoshop
- Easy ways to write in fortran
- How to display the secret menu in lg tvs
- How to bypass your screen time passcode
- How to calculate average age
- How to change windows taskbar position